This guide to growing cauliflower offers comprehensive advice for both novice and experienced gardeners on choosing the right cauliflower variety, understanding the growing process, troubleshooting common issues and harvesting for the best flavor.
Whether you’re a fan of cauliflower rice or a simple, roasted cauliflower head, you’ve probably heard about the surge in popularity of this versatile vegetable. You may have even thought about growing cauliflower in your own vegetable garden.
Growing your own cauliflower can be an exciting endeavor, a hobby that gives you access to fresh, organic produce right at your fingertips. In this post, we’ll guide you through the entire process of growing cauliflower.
Understanding Cauliflower: Facts and Nutritional Value
Cauliflower, scientifically known as Brassica oleracea botrytis group, is part of the Brassicaceae family (or cabbage family), sharing its lineage with other cole crops like broccoli and Brussels sprouts. This cool-season vegetable comes in an exciting array of varieties and colors – from the traditional snow crown (white cauliflower) to more exotic varieties like orange and purple cauliflower.
Each cauliflower variety brings its unique touch to the table, with the purple cauliflower rich in anthocyanin antioxidants and the orange ones boasting a high level of beta-carotene. Despite these minor differences, all cauliflowers are universally low in carbs and high in fiber.
They also provide an excellent source of vitamins C, K, B6, and various minerals like potassium, magnesium, and phosphorus. The nutritional powerhouse that is cauliflower makes it a fantastic addition to your vegetable garden and your diet.
Ideal Conditions for Growing Cauliflower
Cauliflower is a bit of a diva compared to other members of the cabbage family, requiring specific conditions to flourish. Unlike some other members of the Brassica oleracea species, such as Brussels sprouts, cauliflower plants are sensitive to temperature changes, preferring cool temperatures and full sun exposure.
The cauliflower growing season depends on your climate and when you want to harvest it. In general, cauliflower is a cool-weather crop that prefers temperatures around 60-65°F, making it well-suited for both spring and fall growing seasons.
Consistent temperatures are crucial for the development of cauliflower heads. Inconsistent or high temperatures can lead to bolting, causing the plant to produce flowers and seeds prematurely, leading to smaller heads.
When it comes to soil, cauliflower prefers well-drained, moist soil enriched with plenty of organic matter. The ideal soil pH for cauliflower is slightly acidic to neutral, ranging from 6.5 to 7.0. If the soil in your home garden doesn’t meet these conditions, it’s best to conduct a soil test and amend accordingly.
The cauliflower plant loves sunlight. Therefore, ensure your chosen planting spot receives at least six hours of sunlight daily. A balance of full sun, rich soil, and cool temperatures will ensure a bountiful cauliflower harvest.
Steps to Growing Cauliflower
It’s important to follow a series of steps to get the best results when growing your own cauliflower.
Preparing the Soil
Before you begin growing cauliflower from seed or transplanting seedlings, it’s important to prepare the soil. Cauliflower needs rich, well-drained soil with plenty of organic matter.
The pH of your garden soil plays a significant role in the health of your cauliflower plants. Begin by conducting a soil test to determine its pH and nutrient content. The pH should be 6.5 to 7.0 by. If it’s lower than 6.5, consider adding lime to raise it.
If the soil lacks fertility, integrate well-rotted compost or slow-release organic fertilizer to enrich it. Cauliflower thrives in soil rich in organic matter, so don’t skimp on this step.
Planting
For a summer harvest, you should start your seeds indoors about 6-8 weeks before the last expected spring frost date in your area. The seedlings can then be transplanted outdoors after the danger of hard frost has passed, which is typically 2-4 weeks before the last frost date.
For a fall harvest, you can directly sow your seeds outdoors about 6-8 weeks before the first expected fall frost date in your area. You could also start seeds indoors (usually in early July) and then transplant them outdoors in mid to late summer.
In regions with mild winters, cauliflower can also be grown as a winter crop. In this case, seeds would be sown in late summer or early fall for a winter or early spring harvest.
No matter which growing season you’re looking at, you’ll want to transplant your cauliflower seedlings when they are around 6 inches tall and have at least two sets of true leaves.
Caring for the Plants
Cauliflower requires consistent care throughout its growing stages. It is one of those ‘heavy feeders’ that requires regular watering and fertilizing. The soil should always be moist but never waterlogged.
Using mulch around your plants can help retain soil moisture, suppress weeds, and keep the soil cool during hot days. Regularly check your plants for any signs of pests like cabbage loopers, cabbage worms, and flea beetles. If they develop use, the steps in the troubleshooting section below.
Blanching
Blanching is a unique process in cauliflower cultivation. It is undertaken to ensure that the cauliflower head remains white and tender. It’s crucial to understand that blanching in this context is not about boiling the vegetable, but rather a gardening technique to protect the developing head (or curd) from sunlight.
When your cauliflower plants begin developing heads, keep an eye on their growth. Once the cauliflower head reaches about 2-3 inches in diameter, it’s time to start the blanching process. The head should be compact, firm and white at this stage. If left exposed to sunlight, the heads may turn green and become tough with a bitter flavor.
To blanch the cauliflower head, follow these steps:
- Choose a dry day: Blanching should ideally be done on a dry day to prevent trapping excess moisture, which can lead to rot.
- Gather the leaves: Carefully pull a few of the plant’s outer leaves up and over the cauliflower head. You want to create a canopy of leaves that shields the head from sunlight.
- Secure the leaves: Using a piece of soft twine or a rubber band, tie the leaves together at the top. Be gentle to avoid damaging the plant. The goal is to block sunlight but still allow some air circulation around the head to prevent moisture buildup.
- Monitor the plant: Check the plant every few days to ensure the leaves remain in place and continue to cover the cauliflower head. If the head continues to grow such that it starts peeping out, you may need to adjust the leaves to ensure it remains covered.
Note: Some cauliflower varieties are self-blanching, meaning their leaves naturally curl over the cauliflower head as it develops. For these varieties, you may not need to do anything, or you might need to help the leaves along a bit but not tie them. Also, colored varieties (like purple or orange cauliflower) do not need to be blanched as they develop their color regardless of sunlight exposure.
Troubleshooting Common Problems in Cauliflower Cultivation
Despite your best efforts, you may face some common cauliflower growing problems. Temperature fluctuations, irregular watering and nutrient imbalances can cause issues like buttoning, where the plant produces several small, malformed heads instead of a single large one.
Bolting, or premature flowering, is another common issue that can be triggered by temperature stress. To mitigate these problems, ensure consistent moisture levels in the soil and maintain a balanced soil pH and nutrient content.
Cauliflower is also susceptible to various pests and diseases, including cabbage root maggots, flea beetles, black rot and downy mildew. Some level of pest damage is to be expected and tolerated in a home garden and a few chewed leaves won’t necessarily significantly impact your harvest. However, if damage becomes severe, taking these steps can help manage pests and protect your cauliflower crop.
Protect plants from pest with these steps:
- Handpicking: For small infestations, especially of larger pests like cabbage loopers and cabbage worms, one of the simplest and most organic methods is handpicking the pests off your plants and either squashing them or dropping them into a bucket of soapy water.
- Use of Insecticides: If the infestation is severe, you might consider using an organic or synthetic insecticide. Bacillus thuringiensis (Bt) is an organic option that is particularly effective against caterpillar pests like cabbage loopers and cabbage worms. For flea beetles, a product containing spinosad or pyrethrin can be effective. Always follow the label instructions when using any pesticide. You can also consider using essential oils in the garden for a natural option.
- Beneficial Insects: Encouraging beneficial insects that prey on these pests can provide long-term pest control. Ladybugs and lacewings, for example, are natural predators of aphids.
- Row Covers: These are lightweight covers that can be placed over your plants to physically prevent pests from reaching your cauliflower. They’re particularly effective when the plants are young and most vulnerable to damage.
- Crop Rotation: This is a longer-term strategy but can be very effective in preventing recurrent infestations. By changing the type of crop planted in a particular area each year, you can interrupt the lifecycle of pests and reduce their numbers.
- Healthy Soil: Finally, ensuring that your plants are growing in healthy, fertile soil can make them more resistant to pests and diseases. Regularly amending your soil with compost or other organic matter can improve soil health and plant vigor. You can also make sure you have plenty of good worms for the garden.
Harvesting and Storing Cauliflower
Harvesting cauliflower is a joyous milestone in the journey of growing cauliflower. Cauliflower is typically ready to harvest 7 to 12 days after the head forms, but this can vary between varieties.
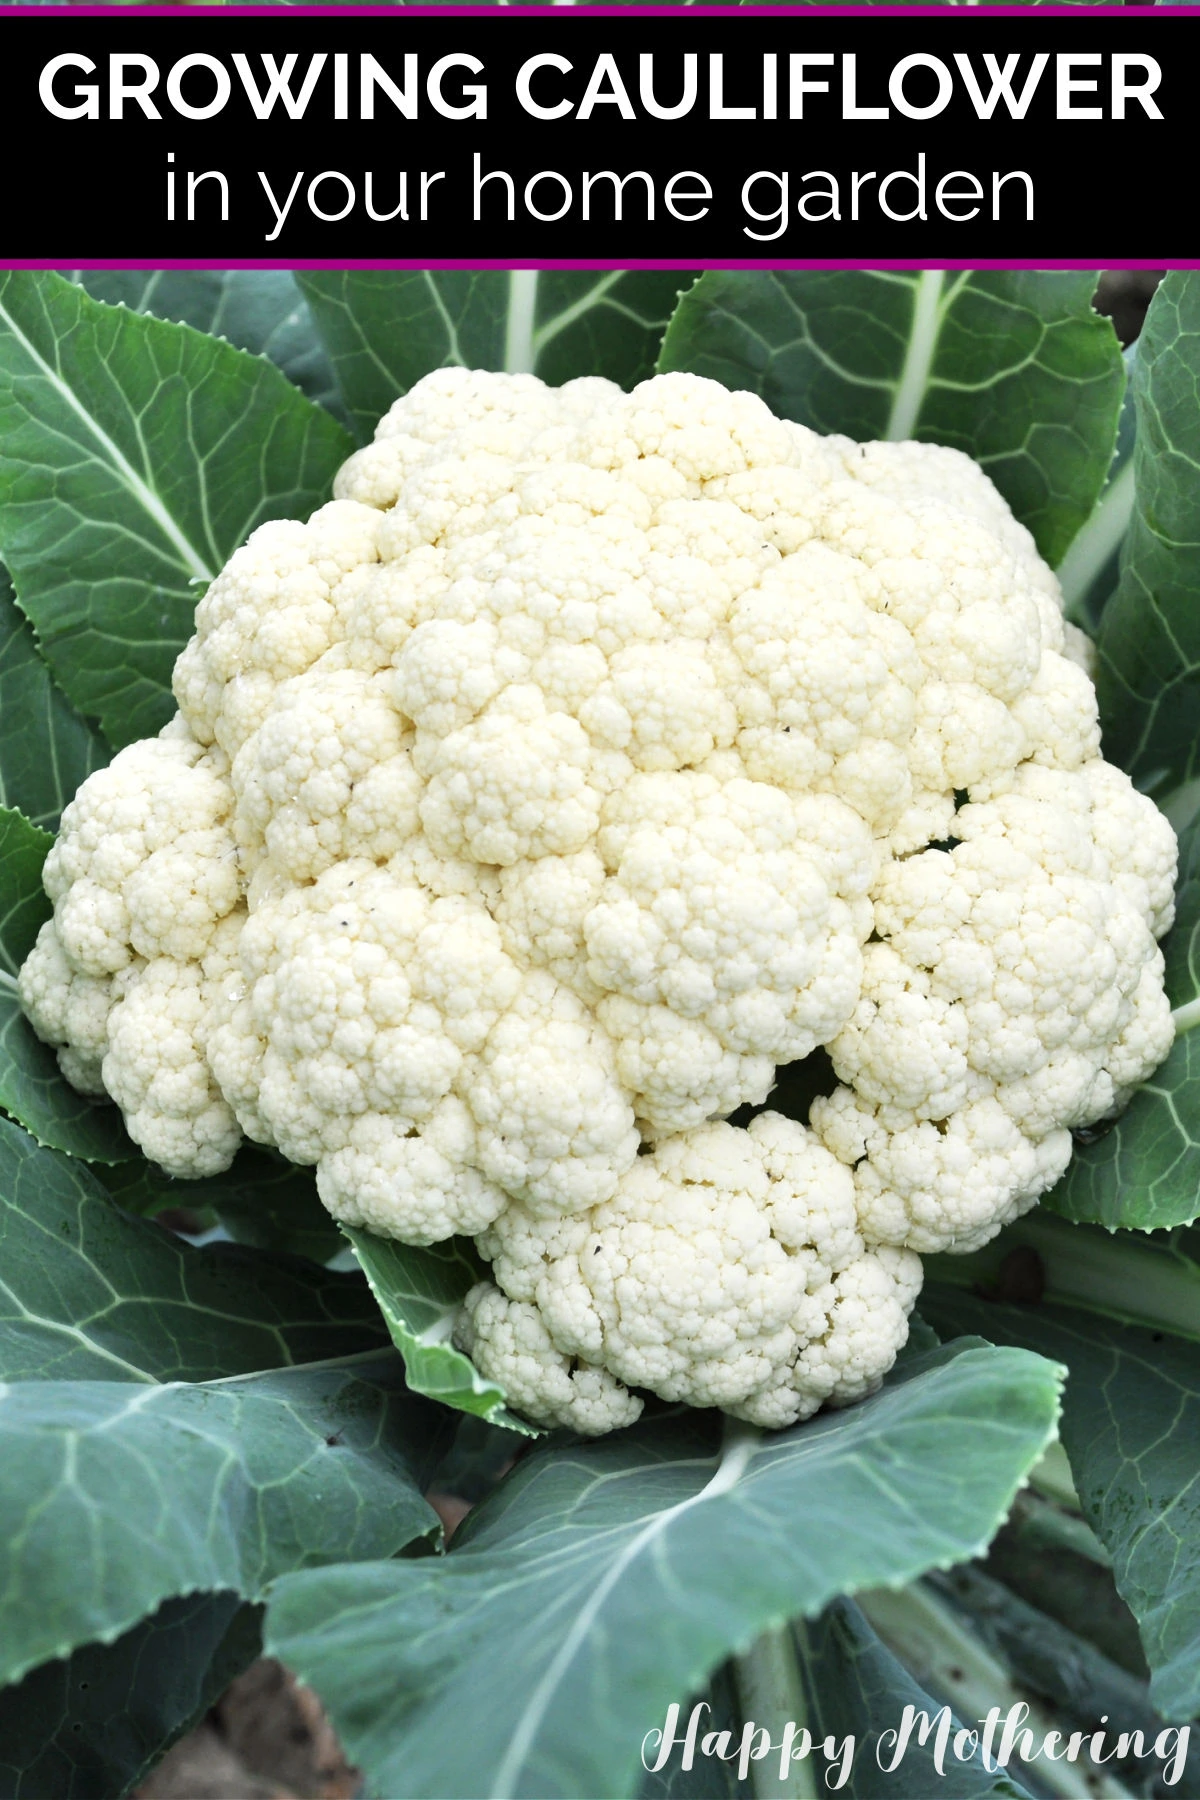
When the heads are compact, firm and about 6-8 inches in diameter, they’re ready to be harvested. Cut the head off the plant using a sharp knife, leaving a few of the outer leaves to protect the head.
Store your harvested cauliflower in a cool, dry place. They can be refrigerated for a few weeks, or for longer-term storage, consider freezing your cauliflower. Blanch the heads in boiling water for a few minutes, cool them quickly in ice water, then drain and pack into freezer-safe containers.
Cooking and Enjoying Your Home-Grown Cauliflower
Now comes the most rewarding part: tasting the fruits of your labor. The flavor of home-grown cauliflower, whether it’s white cauliflower, purple cauliflower or an unusual variety like Romanesco, is unsurpassed. From cauliflower steaks to cauliflower rice, the possibilities are endless. The sense of accomplishment from eating your home-grown produce is incomparable.
Some of my favorite ways to cook cauliflower include:
Growing cauliflower can be a thrilling journey filled with challenges and rewards. With some care and patience, anyone can cultivate this wonderful vegetable in their garden. The satisfaction that comes from nurturing a tiny seed into a flavorful, nutritious cauliflower head is truly priceless.
Whether you’re a novice gardener or a seasoned green thumb, growing cauliflower is an experience worth having. So why not give it a try? Unleash your inner gardener and embark on the journey of growing cauliflower. Happy gardening!