How to Raise Mealworms for Chickens
Jump to Directions
This simple guide will show you how to raise mealworms for chickens. It’s a fun way to always have a nice treat on hand for your backyard flock. After establishing your colony, mealworms farms are easy to maintain too.
When we decided to get chickens, I knew I wanted to make it as easy and affordable as possible. The cost of chicken feed can really add up and we don’t have enough land for our flock to get all of their calories from foraging.
We enjoy composting, and had talked about vermicomposting in the past, so the idea of raising mealworms to feed our chickens popped into my head since I’d seen some dried mealworms at the feed store.
It was so much easier than I thought it would be. Our mealworm colony grew quickly and our chickens loved their treats.
After years of experience breeding mealworms, I can say it is easy, cost effective and fun. Best of all, it only takes about 10 minutes a week to maintain them after getting my routine down.
I hope this guide will be helpful for you, and that your family will have as much fun and success as we have had over the years.
Supplies Needed
- Containers. A few plastic containers or drawers to house the mealworms. We use two 3-drawer plastic storage units. If you’re going to use plastic containers with lids, you need to drill holes in the lids for airflow.
- Edible bedding. You can use a variety of things like oats, wheat germ, chicken feed, cornmeal, etc.
- Moisture and food source. My favorite foods to use are sliced apples, potatoes or carrots.
- Mealworms. We started with 2,000 live mealworms that we ordered online from Uncle Jim’s Worm Farm.
- Shade source. You want something for the worms to hide under, like egg cartons, folded cardboard, newspaper, etc.
- Dedicated strainer. You’ll use this to strain mealworms from the bedding when you move them around. You won’t need it to set up your colony, but you’ll need it to maintain it.
Step-by-Step: How to Raise Mealworms at Home
Follow these step-by-step instructions to learn how to breed mealworms for chickens, other pets or even fishing.
Step 1: Add Bedding to Container
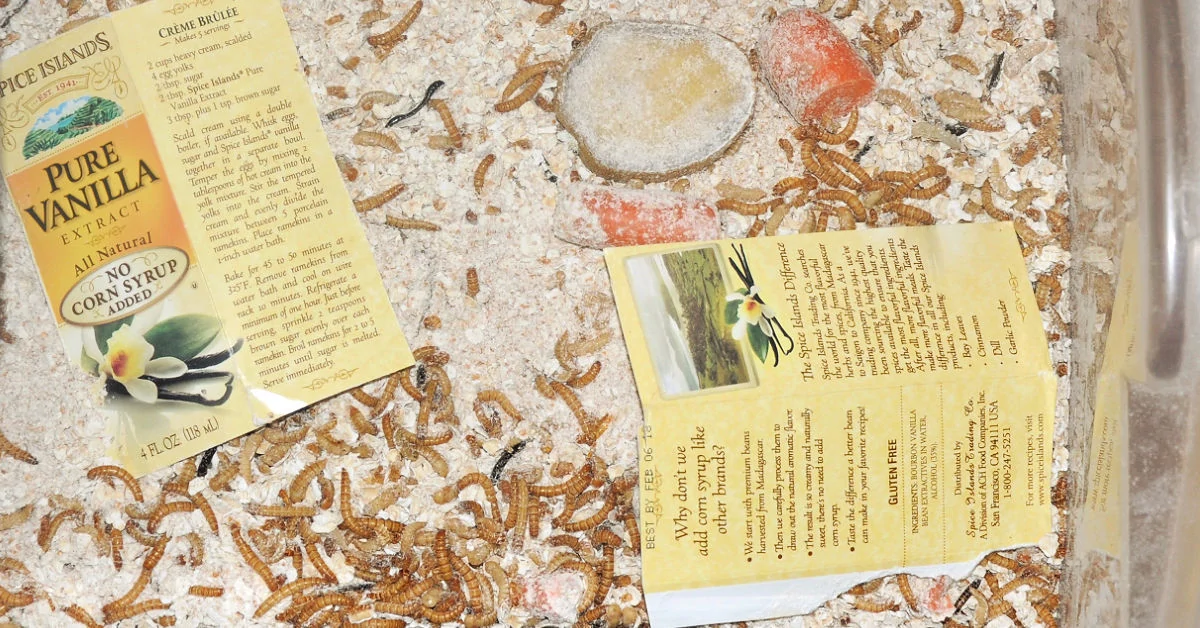
The first thing you need to do is fill your bottom drawer with the edible bedding (I started with a combination of whole wheat flour and oats because it’s what I had on hand and didn’t want to go to the store to buy wheat bran). You should have at least a 1-inch layer (more depending upon the number of worms) in the bottom of your container.
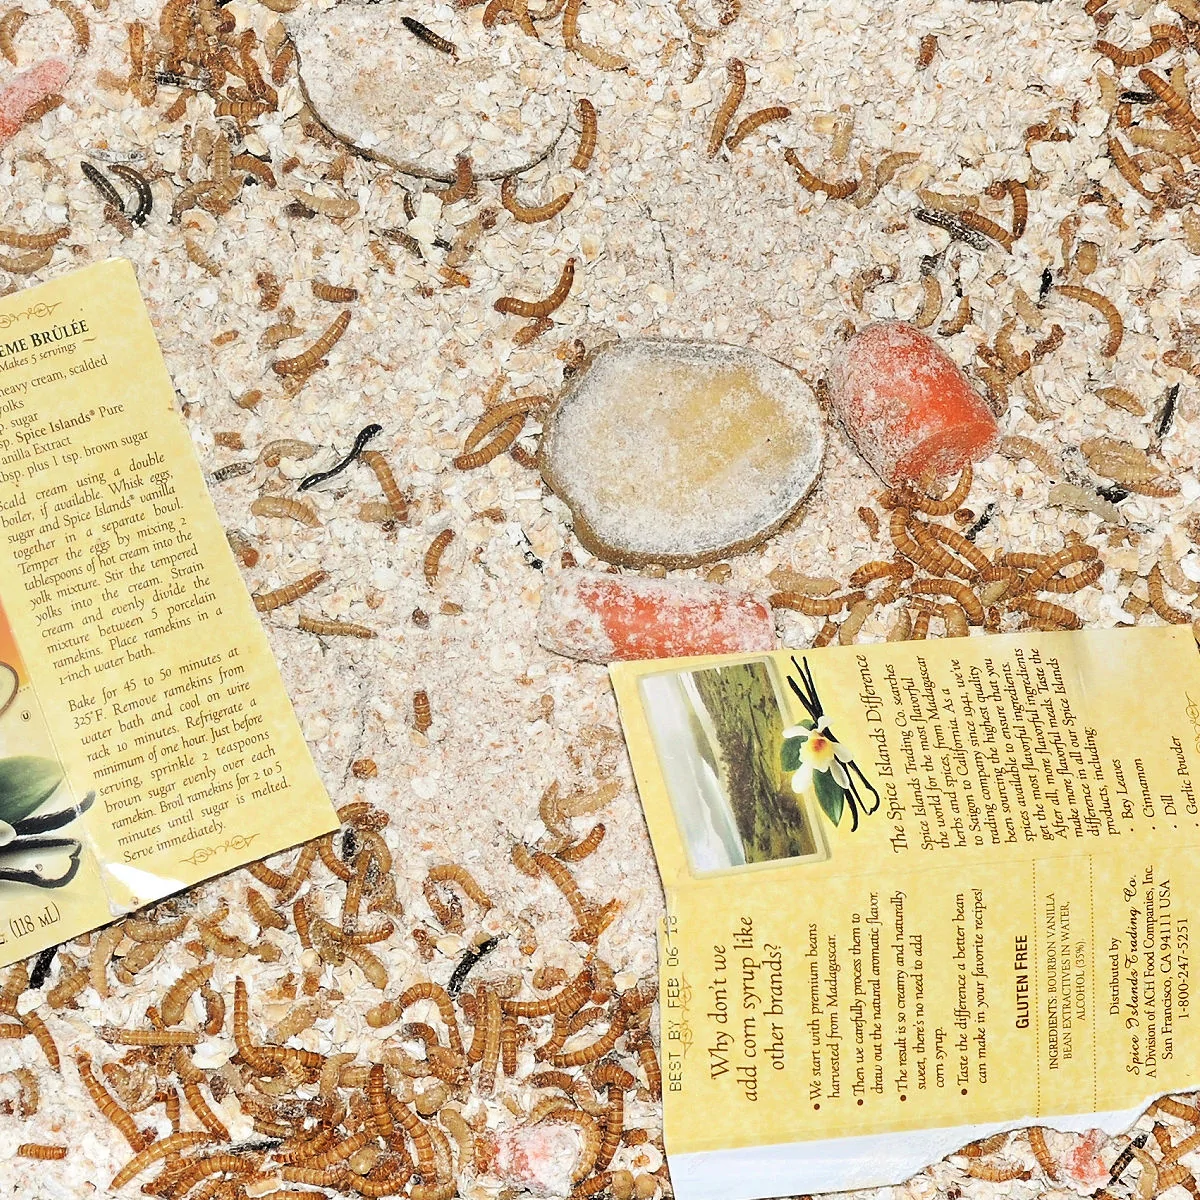
Step 2: Add Food Source
Place slices of potato, apple or carrots on top of the bedding. If you use something with more moisture, place them on a piece of cardboard so you don’t get mold in your drawers. I will often use pieces of potato, but with the peel side down.
Step 3: Add Live Mealworms
Once their home is prepared, you can add your live mealworms to the drawer.
Step 4: Add Hiding Spots
Place your egg cartons or cardboard pieces around the container to help the worms hide from the light (they don’t like light and need a dark place to escape it). It’s also best if you can plan for your farm to be in a dark room for this same reason.
Step 5: Let Mealworms Breed
You should keep them in a warm area (around 78° F is ideal) to encourage the process along. You’ll need to add more potato, carrot or apple every few days and remove any dried-out pieces.
A lot of people will pull out dead worms or larvae as they spot them, but I typically leave them in there since other mealworms will eat them. Our chickens will also eat them (I figure they’re not much different than the dried ones you get at the pet store).
Step 6: Pupa Stage Begins
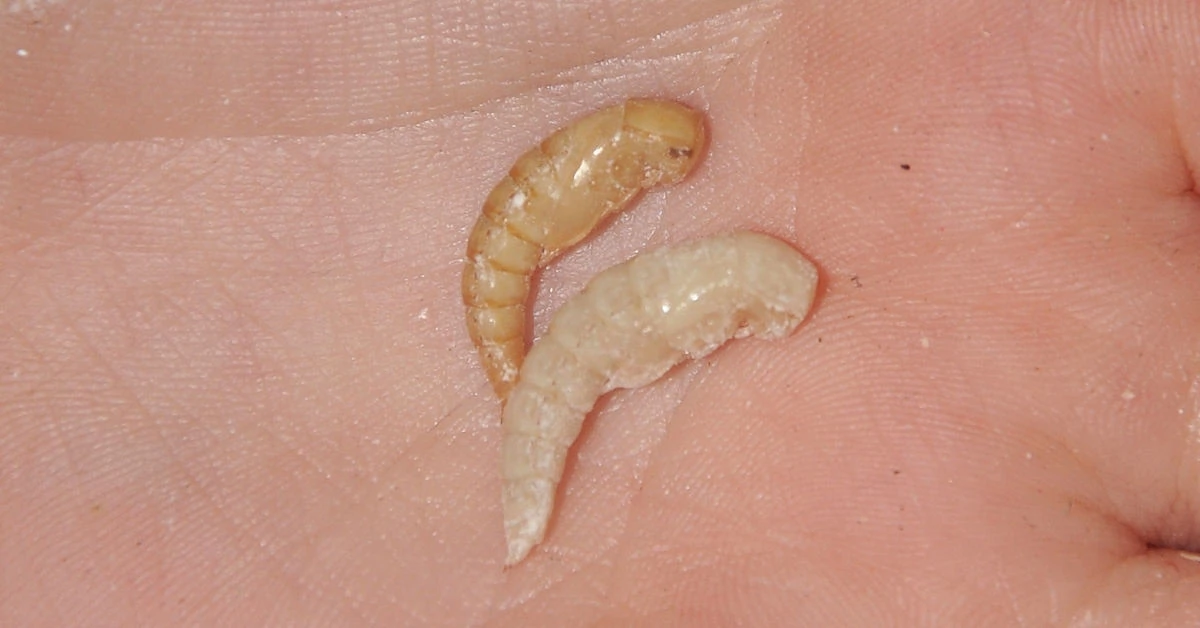
The worms will begin to turn from worms into pupae when they are 3-4 weeks old. My first batch started to pupate about 2 weeks after we received them. They will be very light at first and then turn darker.
A lot of people separate the pupae into a separate container so they can keep track of them, but I just keep them in the same container with the larvae (worms) for now. Either way works.
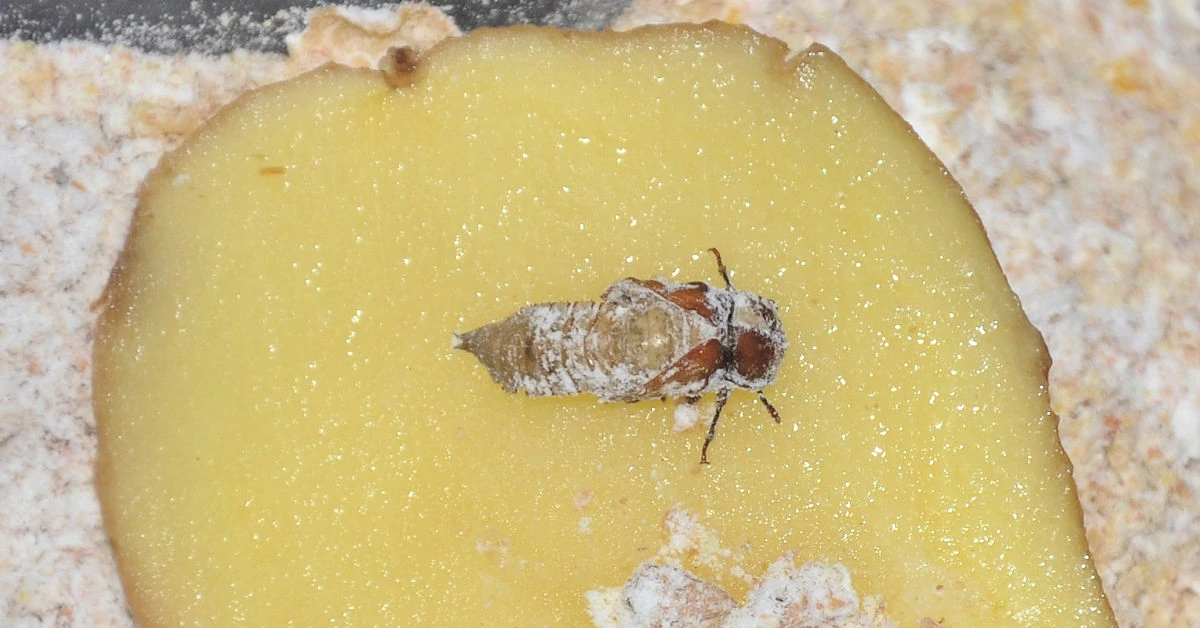
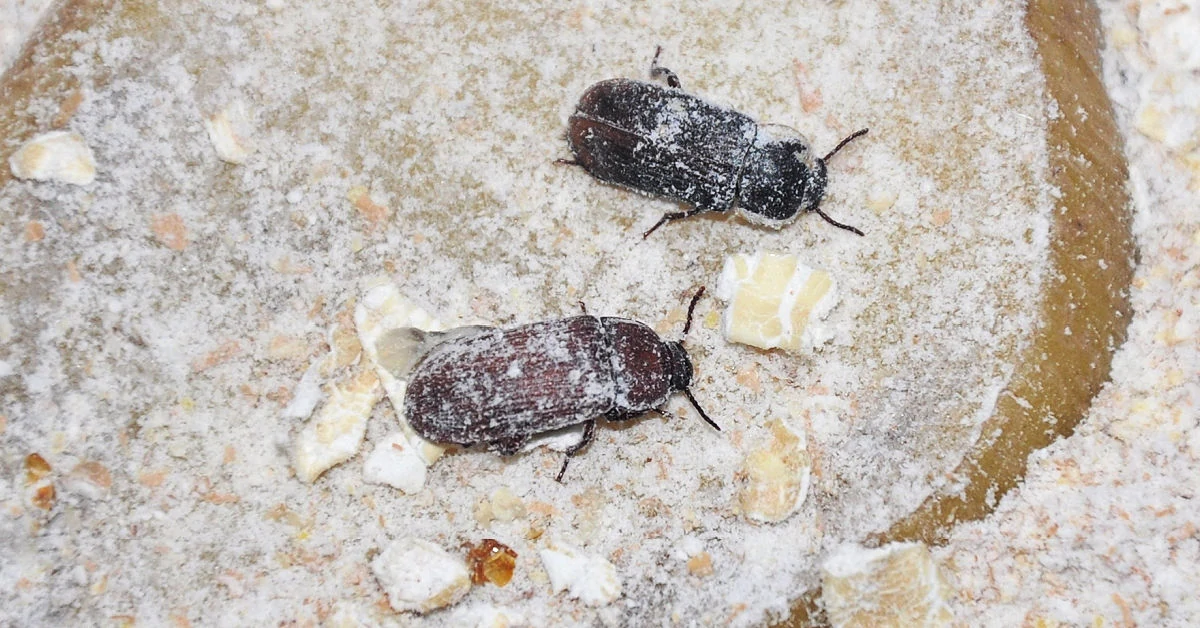
Step 7: Pupa Transform Into Darkling Beetles
A week or two later, the pupae will start turning into darkling beetles. They will be white – almost clear – when they first hatch. They will slowly get darker after a week or so.
Step 8: Separate Beetles from Pupae
Once the pupae morph into darkling beetles, it’s important to separate them into a new drawer as soon as they start emerging. This is to ensure they lay eggs in a new section (they’ll start mating and the female darkling beetles will begin laying eggs within a day or two of hatching).
Prepare the drawer the same way you prepared the first drawer. Put a date label on the drawer so you know when they were put in there. Adult darkling beetles don’t fly since they have fused wings, so you don’t have to worry about them getting out as long as your container has straight sides. But you should keep the containers covered to prevent pests from getting in.
Step 9: Move Beetles Again, Then Repeat
Two to three weeks later, move all of the beetles to a new drawer one level up, being careful to only transfer the beetles. You want to keep all of the bedding in the drawer so you don’t lose any eggs in the transfer (eggs will also stick to the bottom of the drawer). The beetles will continue laying eggs in the new drawer.
Step 10: Meal Worm Eggs Hatch
The eggs will hatch after about two weeks under ideal conditions, so it’s important to move the beetles every 2-3 weeks so they don’t eat the baby mealworms. It will take newborn larvae (worms) 3-4 weeks to pupate.

As the process goes on, you may need more than 3 drawers for your mealworm farm (depending upon your setup) since many beetles live for around 3-6 months (sometimes longer). My second 3-drawer unit is set up just for beetles that need to be moved. If you find your colony growing, just repeat this process over and over again.
Would you like to save this?
I like using the drawer setup instead of separate containers as it’s easier for me to maintain order with the system. But I’ve also seen complex setups with lots of smaller containers and even old fish tanks that look pretty neat too.
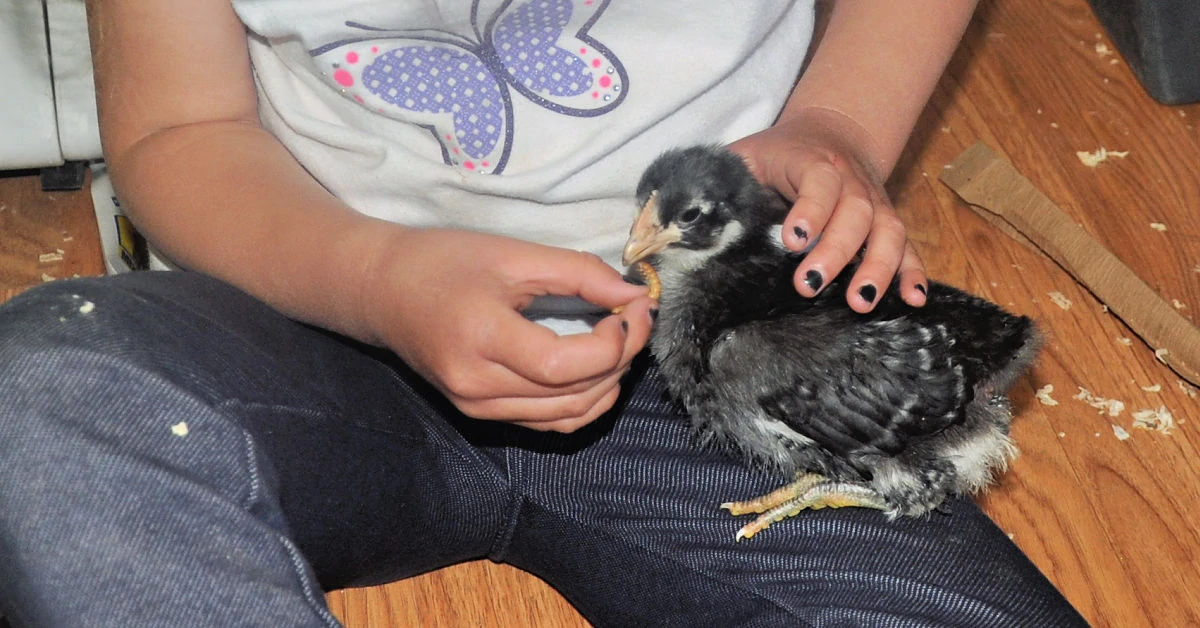
Step 11: Feed Your Chickens Treats
Once your farm is on a good breeding cycle, you can begin feeding mealworms to birds in your flock for special treats.
Tips for Breeding Mealworms at Home
Answers to all of your questions about setting up and maintaining a successful mealworm farm at home.
What type of mealworms to buy?
You just want regular old mealworms (scientific name: Tenebrio Molitor). Do not buy “giant” mealworms, as they’re often treated with an insect growth hormone, which discourages them from becoming beetles (so they’ll continue growing larger). If giant mealworms do become beetles, they’ll be sterile and you’ll have wasted your time trying to breed them.
Where to buy starter mealworms?
I buy my starter mealworms in bulk from Uncle Jim’s Worm Farm rather than a local pet store. They’ll ship live mealworms and other types of worms straight to your door. Their service seems to be the most reliable and I’ve had good success with raising their worms.
How many worms to start with?
I started with 2,000 worms, which was more than plenty for my flock. One beetle can produce up to 500 eggs (higher humidity = more eggs), so 2,000 worms (assuming 50% females) can easily morph into 500,000 worms pretty quickly with a higher humidity level!
How long is the mealworms’ life cycle?
If you want to see the meal worm life cycle at a glance instead of trying to figure it out through the instructions, here is how long each phase lasts.
- Egg Stage: 2-3 weeks
- Larva (Worm) Stage: 3-4 weeks
- Pupae Stage: 1-2 weeks
- Beetle Stage: 3-6 months
How often to change bedding?
While my favorite bedding method to use in chicken coops is the deep litter method, that doesn’t work for as long with mealworms. You need to change the bedding every 3-4 months and replace it with fresh bedding.
You can use a sifter to sift out the worms from the frass (the special word for worm waste). It’s a good idea to store the frass in a separate container for at least a month or so before using or discarding it to see if any worms emerge.
We once found a container of frass in the yard that had been sitting for a couple of years and it had a small colony living in it! Once you’re sure no more worms are hatching, the frass is a great fertilizer for your garden.
Can you feed chickens mealworms as their only food source?
While a popular treat that’s a great source of protein, the exceptionally high protein levels in mealworms is too much for it to be the main component of any chicken’s diet.
They need to eat a balanced diet to have their nutritional needs met. Our chickens get only to best food. We feed them scraps of human food, weeds from the yard and the best feed possible (Scratch & Peck Corn Free Feed has always been our favorite). They’ve also always been allowed to forage weeds and insects.
How much protein do chickens need?
The reason you can’t feed only mealworms to chickens is because they’re about 50% protein, which is much higher than an adult chicken or even baby chickens (who need extra protein) need to consume.
The percentage of protein that a chicken’s diet should include varies by age:
- Baby chicks up to age 6 weeks: 20-22%
- 7 weeks to laying: 14-16%
- After they begin laying: 15-18%
This is why mealworms should only be given to chickens as treats, not as their primary food source.
At what age can chickens eat mealworms?
If you’re wondering what age you can start feeding mealworms to your backyard chicken flock, they make a nice treat for baby chicks starting at about 2 weeks as long as you’re feeding them chick grit.
Young chicks need to have that grit in their bellies to help them digest food. If they’re outside, they’ll naturally eat small rocks they forage themselves. However, if they don’t have natural access, you’ll need to feed them grit to aid their digestion.
What other animals eat mealworms?
If you have pets other than poultry, you may be wondering if you can feed them mealworms too. Some that may enjoy a mealworm snack are geckos, bearded dragons, wild birds, hamsters, hedgehogs and bluebirds. Be sure to do a quick search to see if it’s safe for your pet.
You can also raise mealworms for fishing if that’s a hobby you enjoy. I have many memories of putting one on a hook during fishing trips with my family.
How to keep chickens busy?
I love that we always have an endless supply of natural treats for our laying hens! We just toss some out back in the morning when they’re making a bunch of noise and they’re completely focused on their treats!
Since our chicken coop was always outside of our bedroom window, I really wanted to keep them quiet. So I came up with lots of great ways to keep chickens busy if giving them some home-grown mealworms wasn’t enough to satisfy them.
Another great thing to have on hand for chickens, especially if you notice weak egg shells, is this DIY Egg Shell Calcium Supplement.
Read More About Raising Mealworms and Chickens.
- Mealworms: Breeding Guide, Profits for Chickens
- Breeding Your Own Mealworms: A Complete Practical Guide
- Free-Range Chicken Gardens: How to Create a Beautiful, Chicken-Friendly Yard
- Backyard Chickens: Beyond the Basics
How to Raise Mealworms for Chickens
Supplies
- 3-6 Plastic Drawers or Containers
- Edible Bedding - such as oats or wheat bran
- Vegetable Matter - like potatoes, carrots or apples
- Live mealworms
- Cardboard
Tools
- Gloves
- Mask
- Strainer
Instructions
- Fill your bottom drawer with a minimum of a 1-inch layer of edible bedding of your choosing.
- Place appropriate vegetable matter on top of the bedding.
- Add the live worms to one drawer of the mealworms habitat.
- Place your cardboard or egg cartons in the drawer so the worms can hide from light. The ideal place to keep the drawer will be dark and warm (around 78° F is ideal) to encourage the breeding process.
- Every few days, add more fresh veggies and remove old, dried pieces.
- When the worms are 3-4 weeks old, they’ll begin the pupa stage. At first, the pupae be a light color and slowly become darker.
- After 1-2 weeks, the pupae will begin turning into darkling beetles. They’ll be a white color that’s almost clear at first but turn darker after about a week. Put these beetles into a new, covered container or drawer filled with fresh bedding immediately so they can lay eggs there. I recommend wearing gloves and a mask when you are working with your mealworm farm.
- After the adult beetles have had 2-3 weeks to lay eggs, move the beetles to a new drawer, leaving the bedding that should now be filled with eggs to hatch. If you don’t move the beetles, they will eat the larvae as they hatch and you may wonder why the eggs aren’t hatching.
- Darkling beetles will lay more eggs in the new drawer. Move the beetles to a different drawer again after 2-3 weeks, and every couple of weeks after that. The beetles will live for 3-6 months, and it takes newborn larvae 3-4 weeks to pupate. I have a total of 6 drawers I use for my mealworm farm – you may need more or less, depending on the size of your colony.
- You can begin to feed mealworms as treats to your chickens as soon as your farm is producing well.
How do you get a coupon for live mealworms?
A coupon?
Best instructions for meal worm farm I’ve found yet. Thank you for the information. I’m starting my journey of mealworms for my chickens and quail. Thank you
Thanks Fred! I hope your mealworms thrive in their farm and that your chickens and quail are very happy! 🙂
How do you sift out the adult beetles? By hand? Or is there a faster way (ie-is there a specific sifter with perfect size holes to allow only beetle to not fall through)?
Yes, I usually pick up the adult beetles by hand and move them. You don’t want to wait until the drawer is overrun by beetles to start moving them – it’s best to move them as they hatch so you shouldn’t have a ton to move at a time.
I also read that you can grind the oatmeal for a finer food bedding. I’m going to try because I have moth problems.
That’s a great idea. I found that using flours is pretty messy. I’d suggest wearing a mask while working with your mealworm farm if using flours, including ground oats.
Great instructions! Thanks so much!
You’re welcome Shannon!
This is such a helpful guide! I’ve been wanting to start raising mealworms for my chickens but didn’t know where to begin. Your tips on habitat setup and care make it seem so manageable. Can’t wait to give it a try! Thank you!
When the beatles die do you feed them to the chick’s or are they not good for chicken food?
I don’t see why that would be an issue since they would likely eat a dead insect they found in the yard.