Dilly Beans Recipe (Pickled Green Beans)
Jump to Recipe

If you have a big bumper crop of green beans from your garden, a great way to use them is by making this flavorful Dilly Beans Recipe. It’s quick, easy and delicious!
If you’re looking for new ways to prepare green beans and you have a house of pickle lovers, you have to make homemade Dilly Beans! My whole house loves the flavor.
They’re a lot like dill pickles since they’re basically pickled green beans and they are super easy and fast to make. They can be stored in the refrigerator or water bath canned and stored in the pantry.
Even if you don’t have your own garden, you can pick up some fresh beans at the grocery store or Farmer’s Market to make this easy recipe. A small batch or a big batch… it’s up to you!
Ingredients
- 2 pounds of fresh green beans
- 2 ½ cups of filtered water
- 2 ½ cups of white vinegar
- 3 tablespoons of sea salt
- 4 cloves of garlic
- 4 sprigs of fresh dill weed
- 2 teaspoons of crushed red pepper flakes (optional)
Equipment
- Knife
- Cutting Board
- Mixing bowls
- Large pots
- Strainer
- 4 pint sized mason jars
- Paper towels
- Jar lifters
- Clean towel
Step-by-Step: How to Make Dilly Beans
Follow these simple step by step directions to learn how to make the best dilly beans at home.
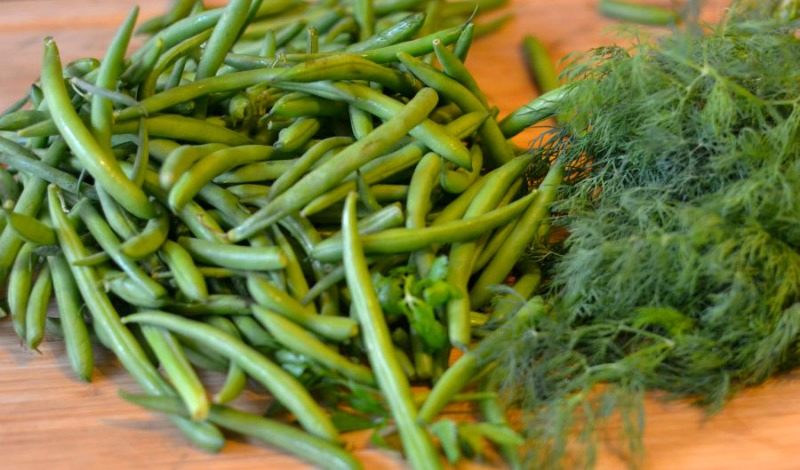
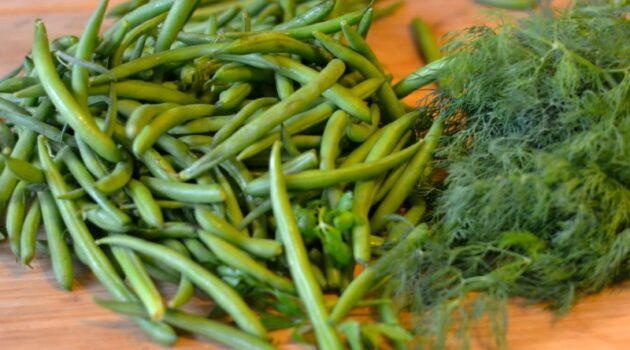
Step 1: Wash & Trim Green Beans.
Wash 2 pounds of fresh green beans, then trim the ends from the beans. You want to cut them to the size that they’ll fit in your jars.
Step 2: Steam Green Beans.
In a large pot, steam the green beans for 15 minutes.
Step 3: Rinse Beans in Cold Water.
Remove the pan of green beans from the heat and run them under ice-cold water for 5 minutes or until they’re completely cool.
Step 4: Prepare Pickling Solution.
In another pot, bring the brine ingredients, including 2 ½ cups of filtered water, 2 ½ cups of white vinegar and 3 tablespoons of sea salt, to a rolling boil and allow the solution to boil for 10 minutes.
While the pickling liquid heats, sterilize your jars and gently heat the jar lids in a small saucepan (do not boil them).
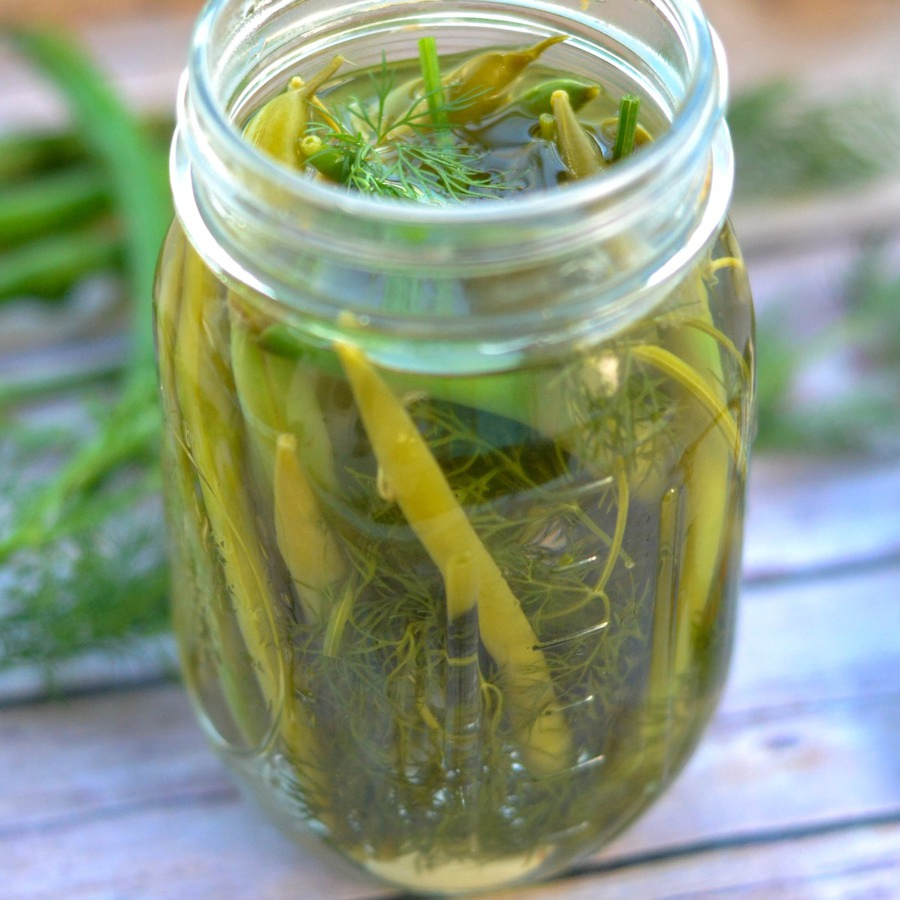
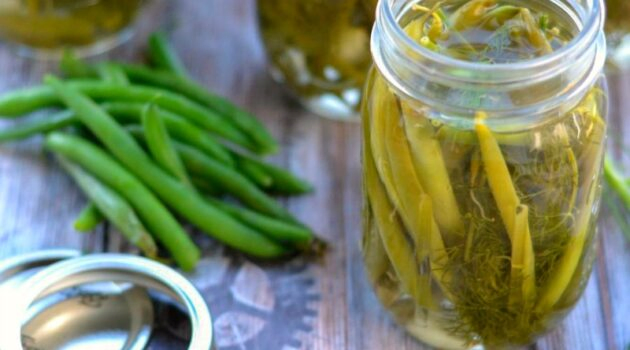
Step 5: Assemble Dilly Bean Jars.
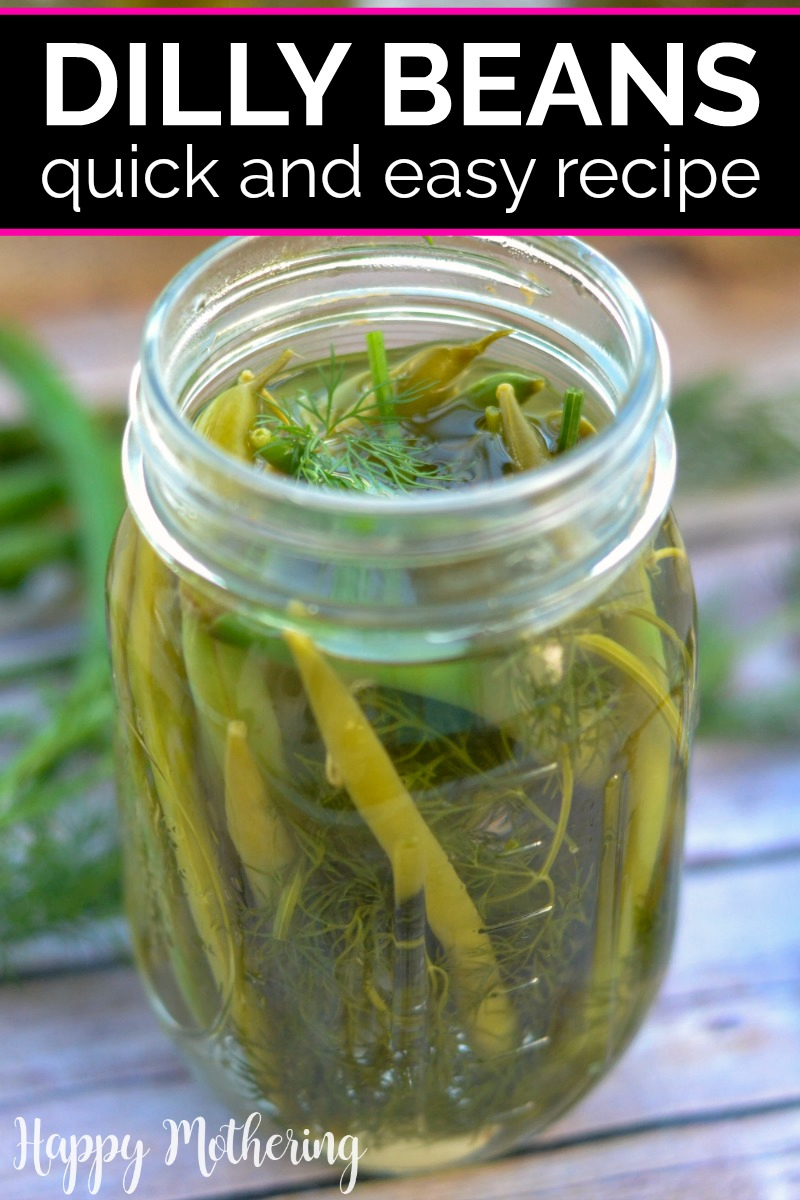
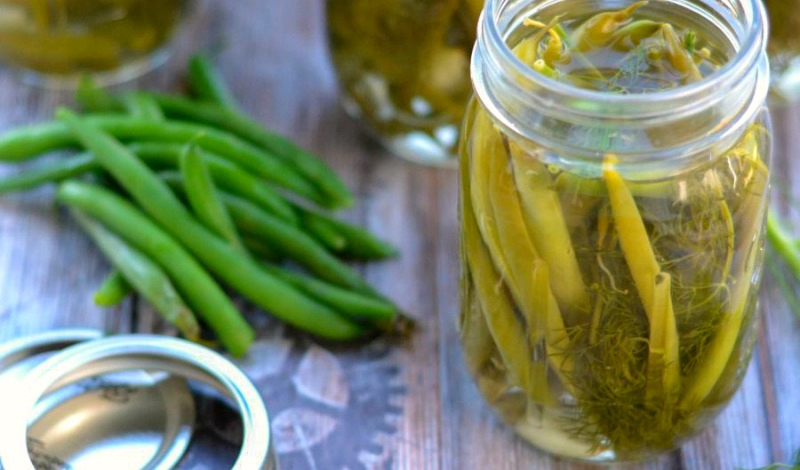
Add one clove of garlic, a sprig of dill and ½ teaspoon of crushed red pepper flakes to each of your sterilized pint jars. Pack hot jars tightly with green beans, then fill the jars with the hot vinegar water solution from the pan, leaving ½ inch of headspace.
Remove any trapped air bubbles from the jars, wipe the rims of the jars with a damp paper towel, then screw the mason jar lids on to finger tight. Allow to cool to room temperature, then store for 7 days in the refrigerator.
If you’d like to water bath can your dilly beans, see How to Can Dilly Beans under the tips section below for an easy way to preserve your garden’s bounty of fresh produce.
Tips for Making and Canning Dilly Beans
Answers to all of your questions about making homemade dilly beans, including tips and substitution ideas.
What type of beans work best?
The most important thing to consider when choosing beans is that they should have a straight shape to them so they pack vertically in your jars. I typically use the green beans (haricots verts) from the garden.
Both bush beans and pole beans work great as long as they’re straight. Most often I use green or yellow beans, but I’ve also seen Dilly beans made from purple string beans… they’re really pretty!
Would you like to save this?
Can other types of vinegar be used?
Yes, if you use apple cider vinegar in place of white vinegar, they will have a slightly sweet taste. I use cider vinegar in my Sweet Pickle Relish and it makes a great choice for many pickled veggies.
Canning salt vs sea salt vs table salt…
Canning salt is just pure salt without any additives or anti-caking agents added to it. You can use canning salt, but I typically use sea salt in my canning recipes because there are no additives in it.
Table salt, on the other hand, is usually iodized and often has anti-caking agents added to it. It’s not recommended that table salt be used for canning purposes for this reason.
Substitute for fresh dill?
If you can’t get your hands on fresh dill heads, try adding 2 teaspoons of dill seed to each pint jar instead.
How to make spicy dilly beans?
The best way to make spicy dilly beans is to put one whole hot pepper into each jar (you can also use slices). The heat from the pepper will infuse into the pickled beans and grow in intensity over time.
How to eat dilly beans?
For best flavor, wait at least a week before cracking into your first jar if you canned them. If you didn’t, go ahead and eat them right away so they don’t spoil.
There are lots of ways to serve dilly beans. If your kids like pickles, they should like dilly beans as a snack or side dish. They’re also great in salads, as a unique addition to a charcuterie board and some people enjoy adding them to their Bloody Mary.
Since they’re so versatile, home canned dilly beans also make great hostess gifts for the upcoming holiday season! Just tie a bow on a jar and you’re all set.
How to can dilly beans?
If you’d like to can your dilly beans to add to your food pantry, follow these simple steps for using a water bath canner after you seal your jars:
- Transfer sealed canning jars to a pan of boiling water with jar lifters or canning tongs. There should be enough water to cover the top of the jars by about 1 inch. Cover with a lid.
- Process the jars of dilly beans in the boiling water bath for 15 minutes. Turn off the heat, remove the lid and let the jars rest for 5 minutes in the water.
- Remove the jars from the hot water with jar lifters and set on a clean towel to cool to room temperature.
- Store sealed jars of Dilly Beans in a cool, dry, dark place like the pantry or root cellar.
Altitude adjustments for water bath canning?
If you live at an elevation higher than 1,000 feet, you’ll need to adjust the amount of time you process the jars in your water bath canner for best results.
| Feet Above Sea Level | Increase in Processing Time |
| 1,001-3,000 | 5 minutes |
| 3,001-6,000 | 10 minutes |
| 6,001-8,000 | 15 minutes |
| 8,001-10,000 | 20 minutes |
Can dilly beans be pressure canned?
You can use a pressure canner to process dilly beans. Follow the same instructions as using a water bath canner above except for you’ll want to leave 1 inch of headspace. Process the jars at 11 pounds of pressure for 20 minutes (if you use quart jars, leave 1 ½” of headspace and process for 25 minutes).
Altitude adjustments for pressure canning?
If you live at altitude, you’ll need to adjustment the pounds of pressure you process your jars at. Use the same processing time.
| Feet Above Sea Level | Pounds of Pressure |
| 2,001 to 4,000 feet | 12 pounds |
| 4,001 to 6,000 feet | 13 pounds |
| 6,001 to 8,000 feet | 14 pounds |
How long do dilly beans last?
Unopened jars of dilly beans that have been canned will be good for one year in your pantry. If you don’t can the jars, refrigerator dilly beans are good for one week in the fridge.
More Home Canning Recipes
Where to buy fresh produce?
I do a lot of my grocery shopping online through Misfits Market. They usually have fresh green beans and sometimes have fresh dill as well! If you haven’t tried this produce delivery service before, be sure to read my full Misfits Market Review.
Dilly Beans Recipe
Ingredients
- 2 pounds fresh green beans
- 2 ½ cups filtered water
- 2 ½ cups white vinegar
- 4 cloves garlic
- 3 tablespoons sea salt
- 4 sprigs fresh dill weed
- 2 teaspoons crushed red pepper flakes - optional
Equipment
- Knife
- Cutting Board
- Large pots
- Strainer
- 4 pint sized mason jars
- Paper towels
- Jar lifters
- Clean cloth
Instructions
- Wash and then remove the ends of your green beans so they’ll fit in the jars.
- In a large pot, steam the green beans for 15 minutes.
- Remove from heat and run the green beans under ice-cold water for 5 minutes or until they’re cool.
- In another pot, combine vinegar, water and sea salt and bring to a boil and allow to boil for 10 minutes.
- Place one garlic clove, ½ teaspoon of crushed red pepper flakes and a sprig of dill in a sterilized mason jar. Pack beans in vertically. Fill with the hot brine from the pan. Wipe jar rims and screw mason jar lid on tight then repeat with the other 3 jars. Cool to room temperature then store for 7 days in the refrigerator or process in a water bath canner.


Delicious! It has great crunch that you can’t get in water bathed pickled cukes—this may be my new favorite!
My kiddos prefer a slightly less spicy recipe so I’ll probably back the pepper down a bit. But so good!