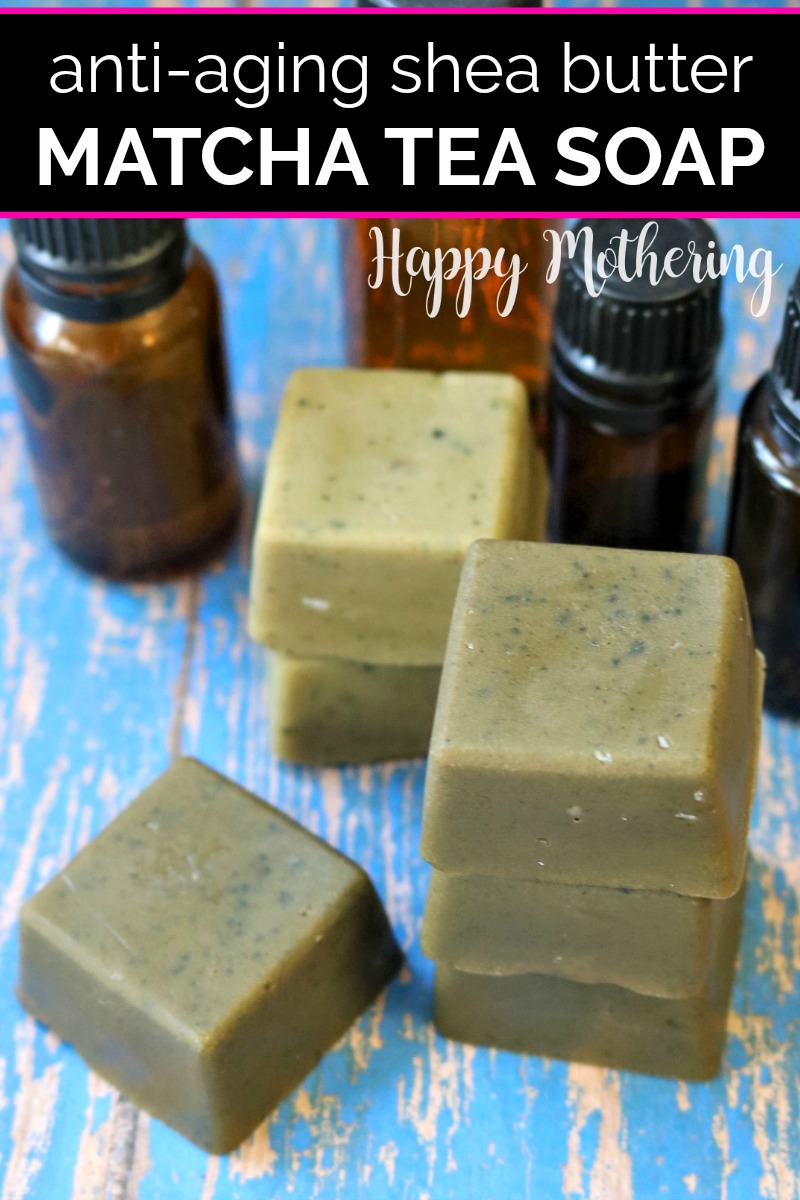
DIY Shea Butter & Matcha Tea Soap Bars
Jump to Directions
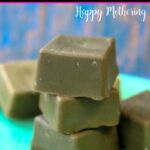
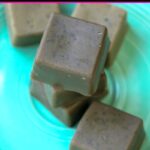
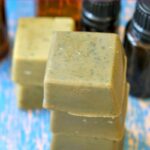
Learn how to make DIY matcha green tea soap bars that have great benefits for skin.
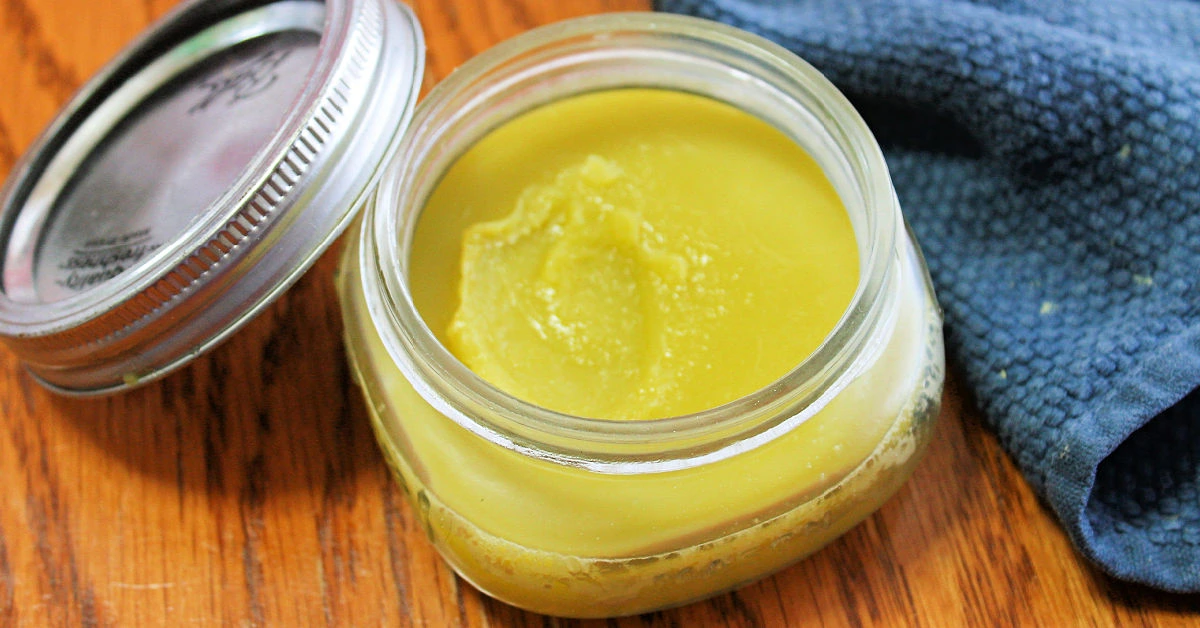
I love to make my own homemade soaps using either a goat’s milk or shea butter melt and pour soap base. I like using both soap bases, but change it up depending on what the soap is being used for.
For these Matcha Green Tea Soap Bars, I feel shea butter is a better choice because it’s more moisturizing. However, if you already have the goat’s milk soap base, it will work fine too.
You will be adding some awesome essential oils too. Frankincense oil, Geranium oil, Lavender oil and Lemongrass oil are all excellent for the skin and help to reduce the appearance of fine lines, wrinkles and give overall balance to the skin.
Would you like to save this?
Matcha Tea Benefits for Skin
If you’re wondering what is matcha good for, I love matcha for its benefits for skin and can help to improve the appearance of aging skin. Quality matcha powder is full of antioxidants and offers great skin benefits like helping to prevent sun spots.
While it’s great for many skin types, if you have oily or acne prone skin, matcha is an ingredient you should be looking at. It helps to keep skin clean, reduce puffiness and irritation. It’s even a minor exfoliant.
As you can see, the combination of ingredients in these DIY matcha tea powder soap bars makes this a perfect cleanser to use for your body when you bathe, or for your facial soap.

Shea Butter & Matcha Green Tea Soap Tutorial
Supplies
- ¼ pound shea butter melt and pour soap
- 1 teaspoon Matcha green tea powder
- 8 drops vitamin C serum
- 12 drops lavender essential oil
- 6 drops frankincense essential oil
- 6 drops lemongrass essential oil
- 8 drops geranium essential oil
Tools
- 1 ice cube style silicone mold
Instructions
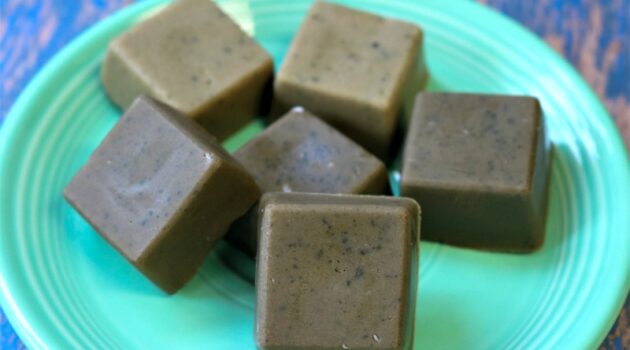
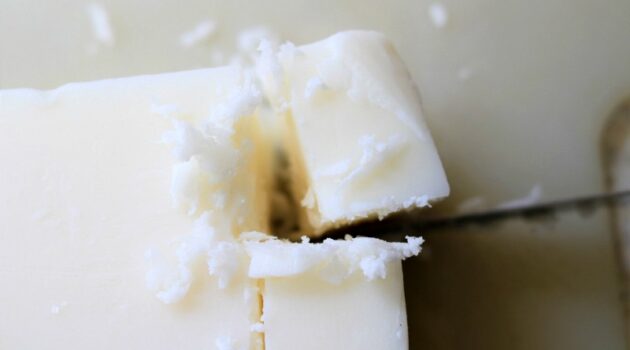
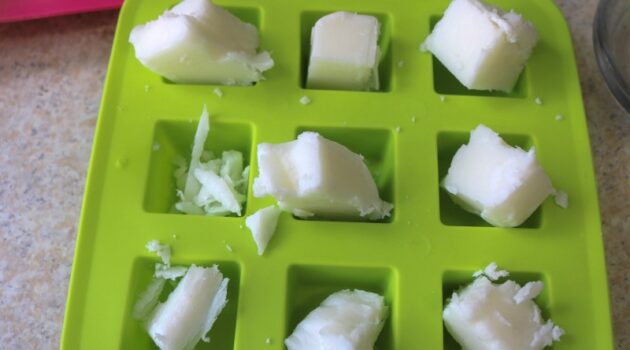
- Chop the soap base into small squares, around 1-2” in size.
- To determine how many cubes you'll need, count 1 to 2 per mold. I made 10 soaps, so I used about 15-16 chopped pieces. If the molds you are using are larger, it would be about 1/8 pound per bar. This part is the hardest, since every mold is different in size. Overestimate by 1 or 2 pieces to be safe.
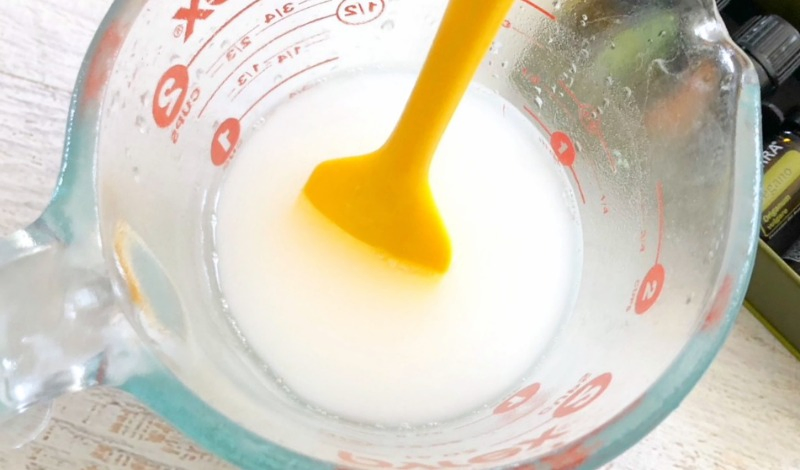
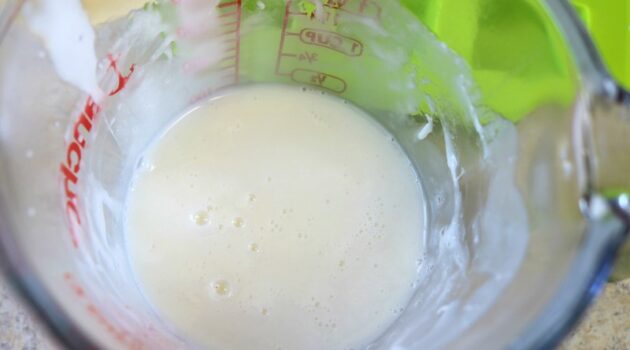
- Now, place the soap squares into the top portion of your double boiler (or your bowl or measuring cup fitted into a pan of hot water. Stir using a rubber spatula and scraping the sides, and mix until the soap is melted, smooth and free of lumps.
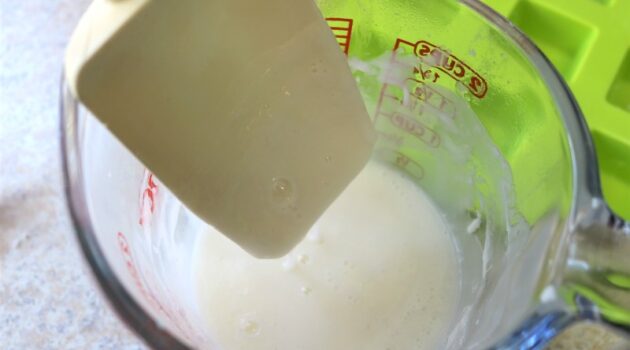
- Remove the pan from the heat and allow it to cool slightly. Next, add in your vitamin C serum and essential oils, one at a time, and mix them in well. The lavender and geranium are especially runny ones, so take your time when adding the drops, so that you don’t over-do it. Make sure they are well blended in the soap. You may notice the soap start to thicken and set up again. If it does, place the double boiler (or bowl or measuring cup) back over the heated water just until it melts again.
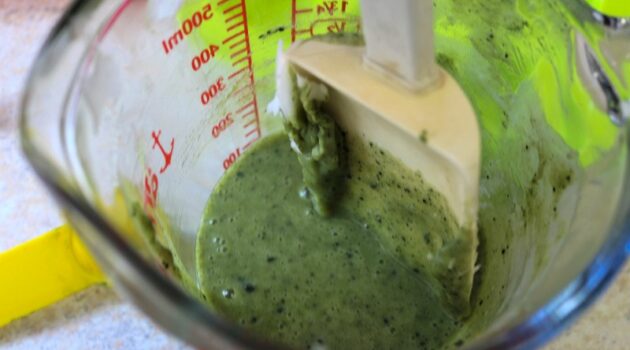
- Give it a stir, and then whisk in your Matcha tea (a bamboo whisk works best for blending matcha powder). This is the crucial part – matcha green tea tends to clump and stay in one spot, so make sure you are whisking it constantly and using a silicone spatula to break up lumps and scrape all edges of the pan to make sure everything is evenly combined. If you need to break it up any tea clumps, use the back of a spoon and push it against the sides of the bowl to mash it up, then mix it in. If the mixture gets too thick as you blend to get it well dispersed, put the double boiler back over the heat to soften it up.
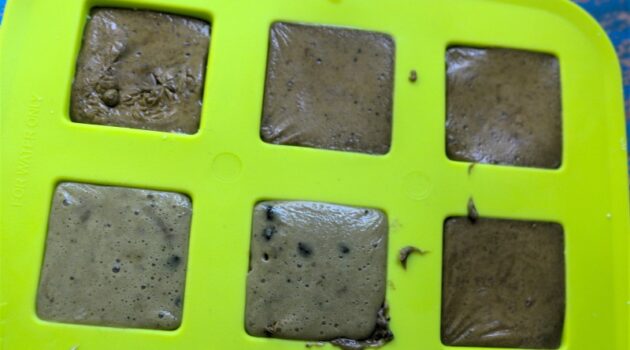
- Once it is mixed well throughout and you have no more tea or soap clumps, you're ready to pour it into your molds. You just need to leave a tiny bit of space at the top to help you pop the soap out later. Allow the soaps cool off fully at room temperature. It usually takes about an hour, but it will also depend on the mold size you choose.
- Feel the centers of the molds underneath to see if they are cooled. Once they’re cool, you can turn the molds over and carefully pop out the soaps. If they are still warm in the center, wait longer as it can dent or cause the soap to be misshapen.
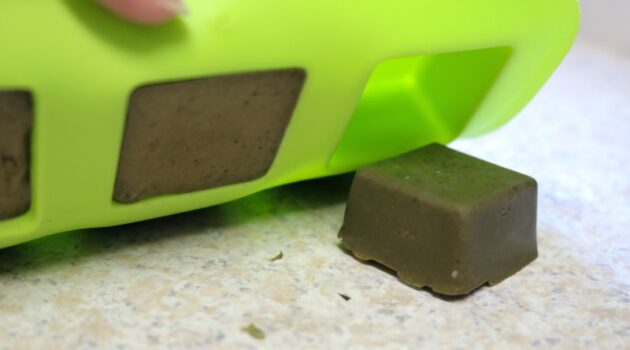
- Once you have the soaps all popped out, remove any loose pieces that may be attached from pouring, and the soaps are all set to use. I like to store them in a glass jar, or just place a few on a cute soap dish. They last longer than you may expect, so if you set out too many, they can accumulate dust.