Jump to Directions
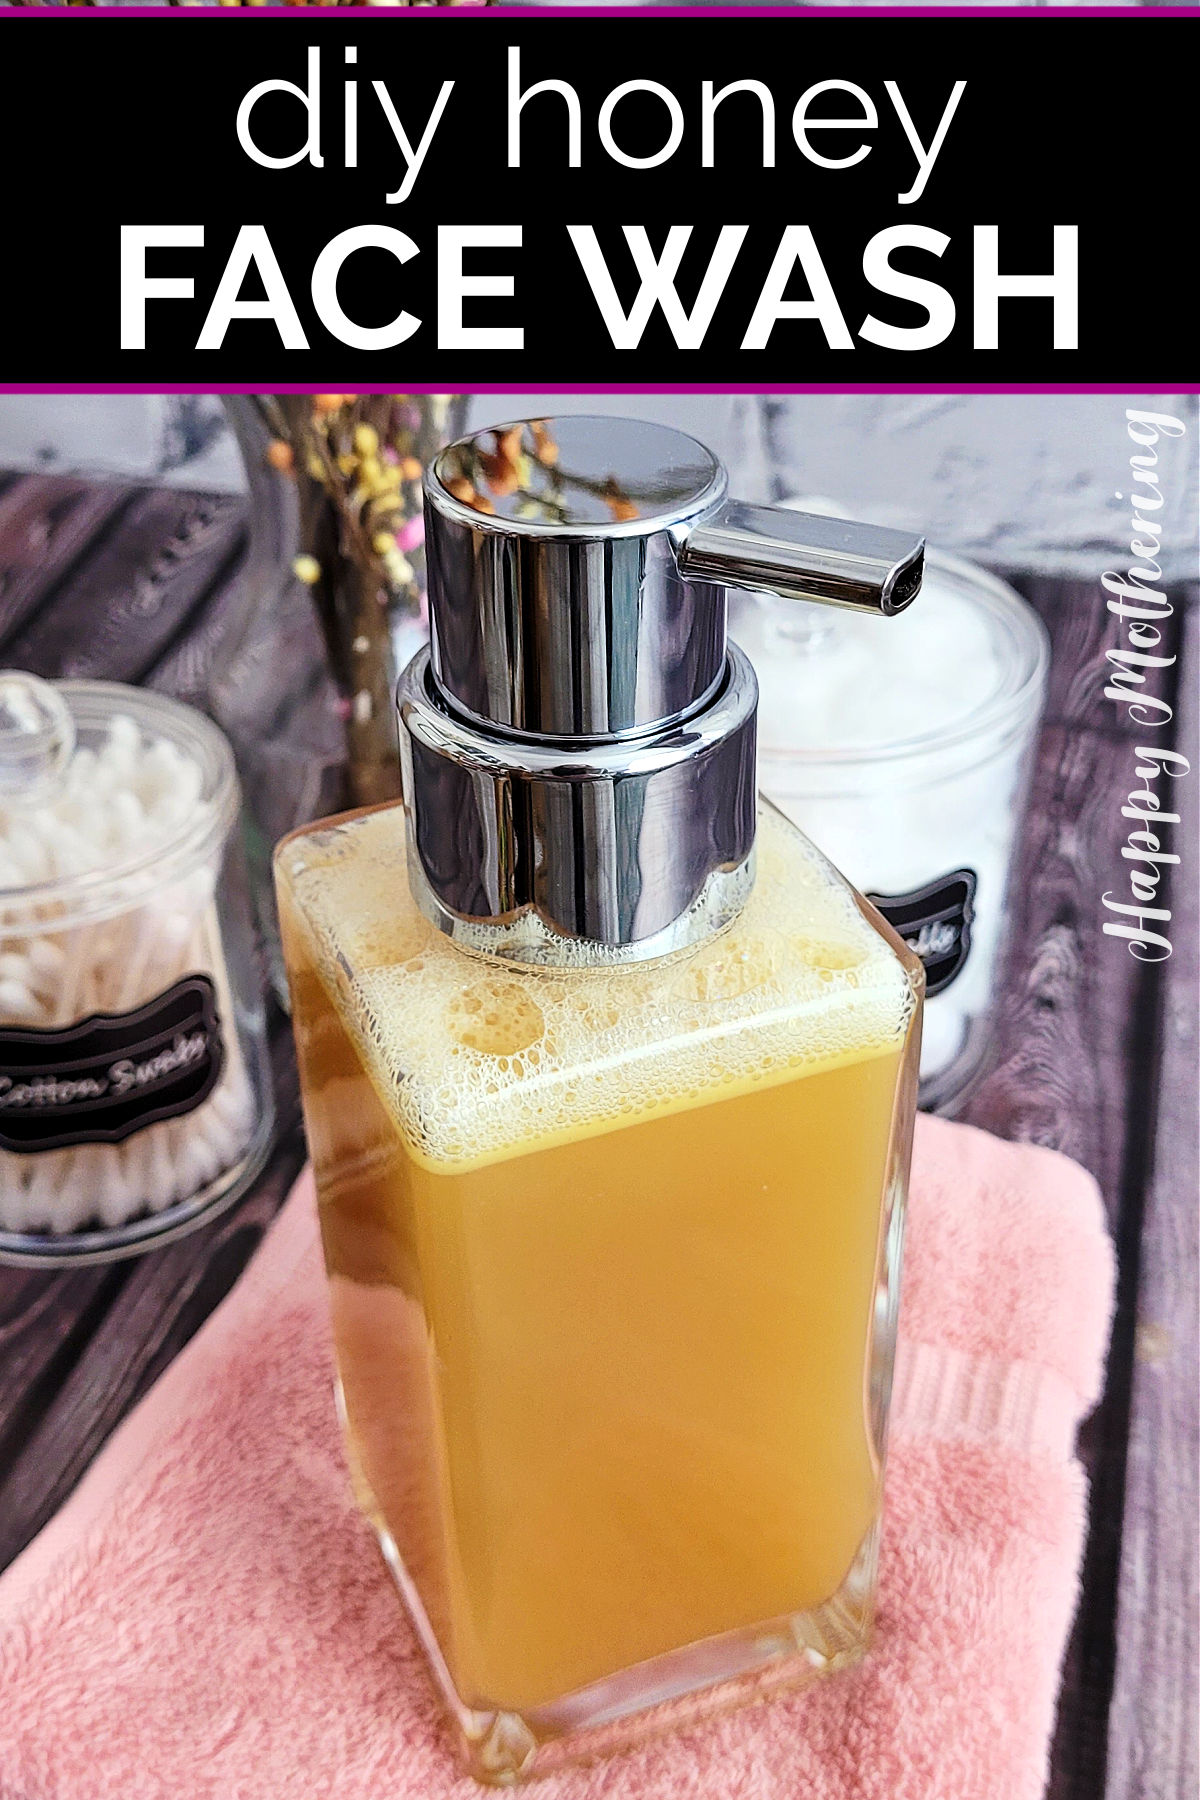
My DIY Honey Face Wash recipe uses natural ingredients like honey, green tea and nourishing oils to cleanse and moisturize skin as part of a simple beauty routine.
I have dry skin, so I always include moisturizing ingredients in my homemade beauty products, including my face wash recipes. I have one daughter with sensitive skin and another with oily skin, so I had to come up with a recipe that would work for each of our different skin types.
Surprisingly, this gentle cleanser works well for all three of us. I just have to make a few minor tweaks to the type of tea and the essential oils I choose, which I discuss in the tips section.
Best of all, it only takes about 5 minutes to whip up a batch of your own honey face wash so you can start washing your face without harsh chemicals.
Supplies
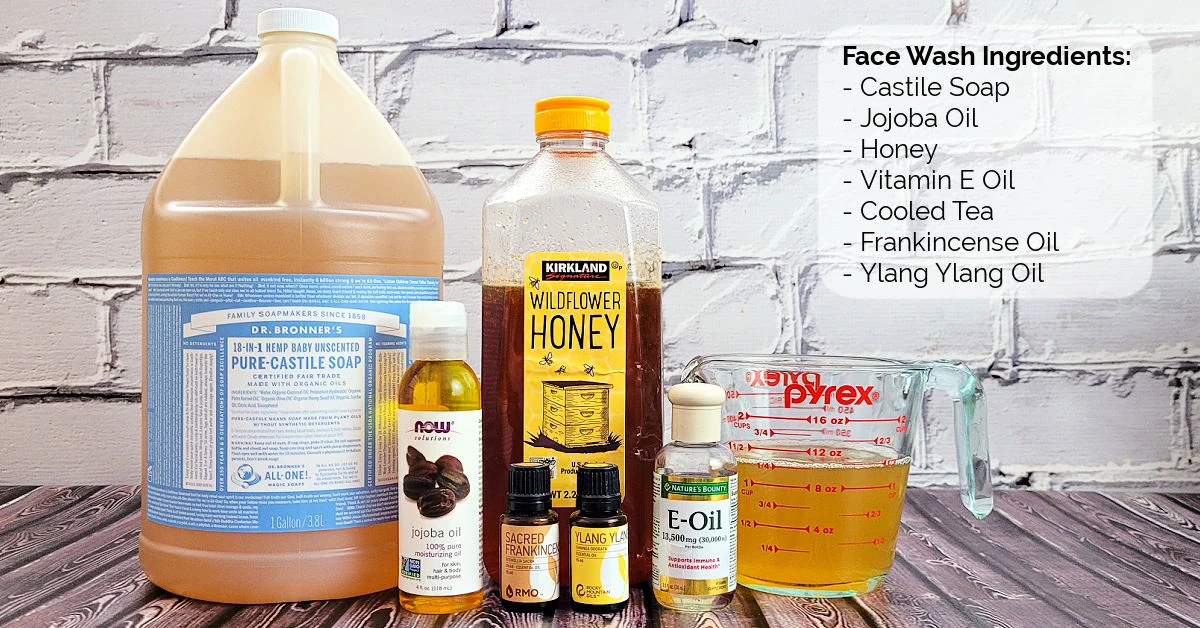
- 1 ¼ cups of cooled green tea
- 2 tablespoons of raw honey
- 6 tablespoons of liquid Castile soap
- 2 teaspoons of jojoba oil
- 8 drops of vitamin E oil
- 15 drops of Frankincense essential oil
- 15 drops of Ylang Ylang essential oil
Tools
- Glass measuring cup
- Measuring spoons
- Whisk
- Funnel
- 14-ounce foaming soap pump bottle
By the Numbers: How to Make Honey Face Wash
Follow these simple step-by-step instructions to learn how to make the best homemade face wash with honey and green tea.
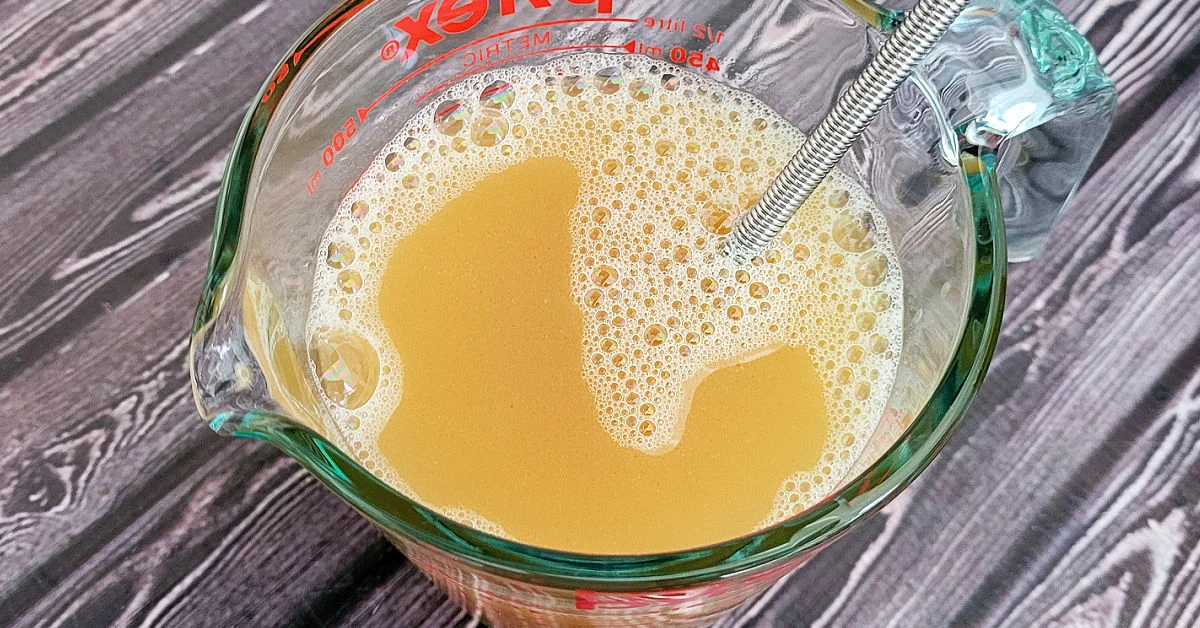
Step 1: Add Ingredients to Measuring Cup
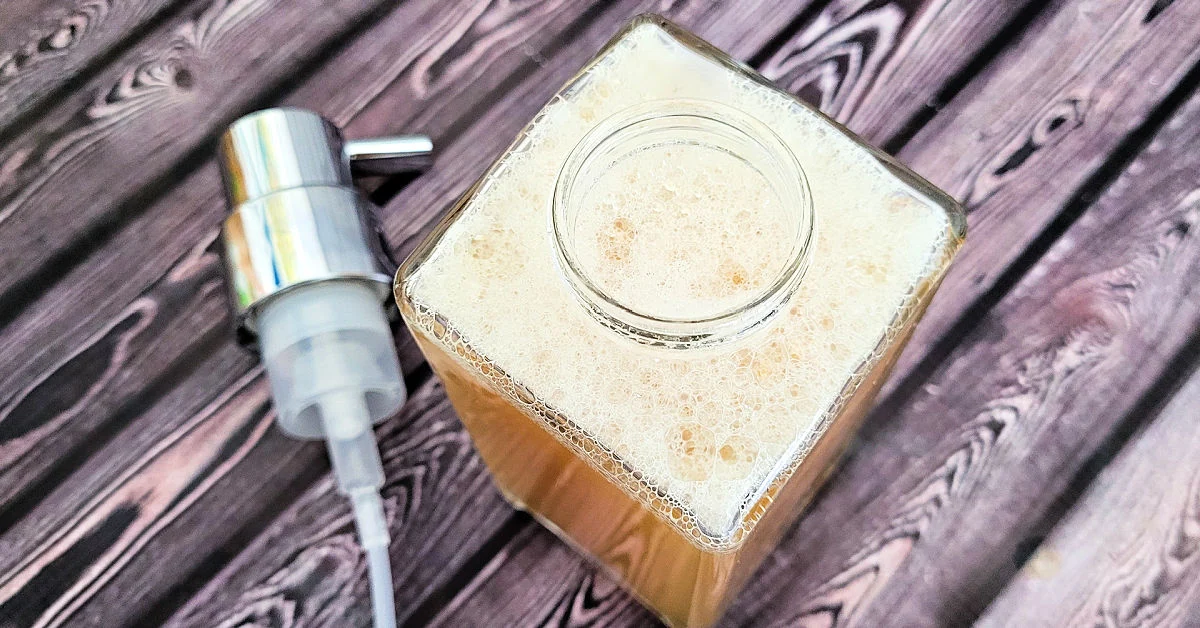
Add all ingredients to a small mixing bowl or glass measuring cup, including: 1 ¼ cups of cooled green tea, 2 tablespoons of raw honey, 6 tablespoons of liquid Castile soap, 2 teaspoons of jojoba oil, 8 drops of vitamin E oil, 15 drops of Frankincense essential oil and 15 drops of Ylang Ylang essential oil. Whisk them together gently, being careful not to froth up the castile soap too much.
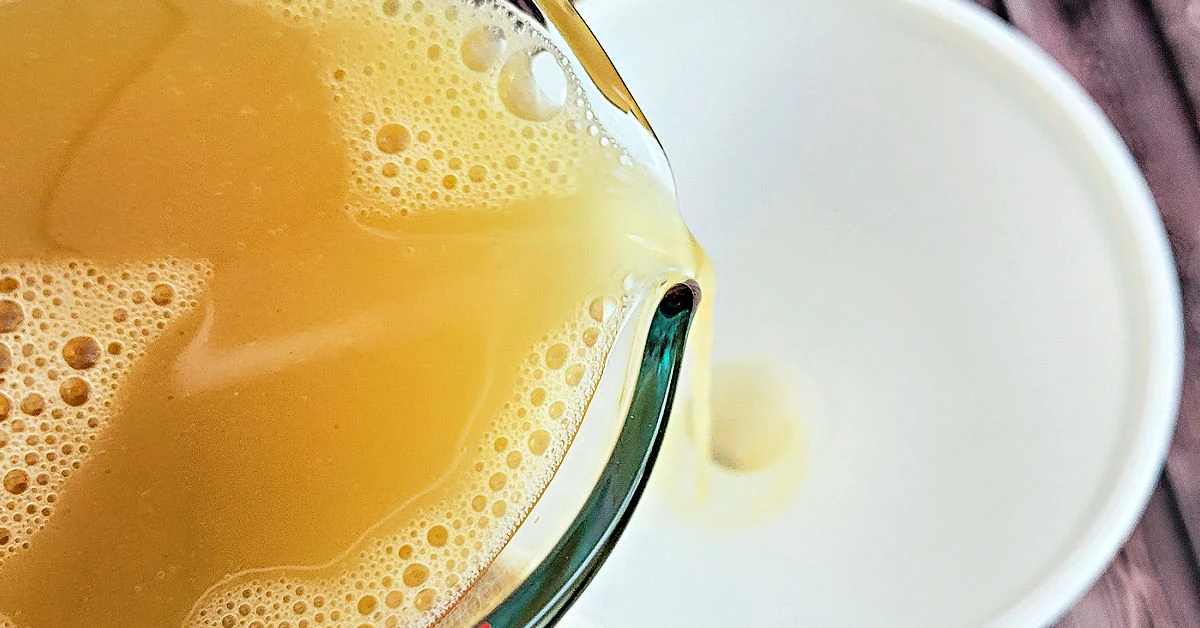
Step 2: Pour Into Soap Pump Bottle
Next, pour your honey face wash mixture into the foaming soap pump through a funnel, going slowly so you don’t make bubbles.
Step 3: Close Bottle and Shake
Once your bottle is full, replace the lid on the bottle and shake gently to make sure everything is still combined.
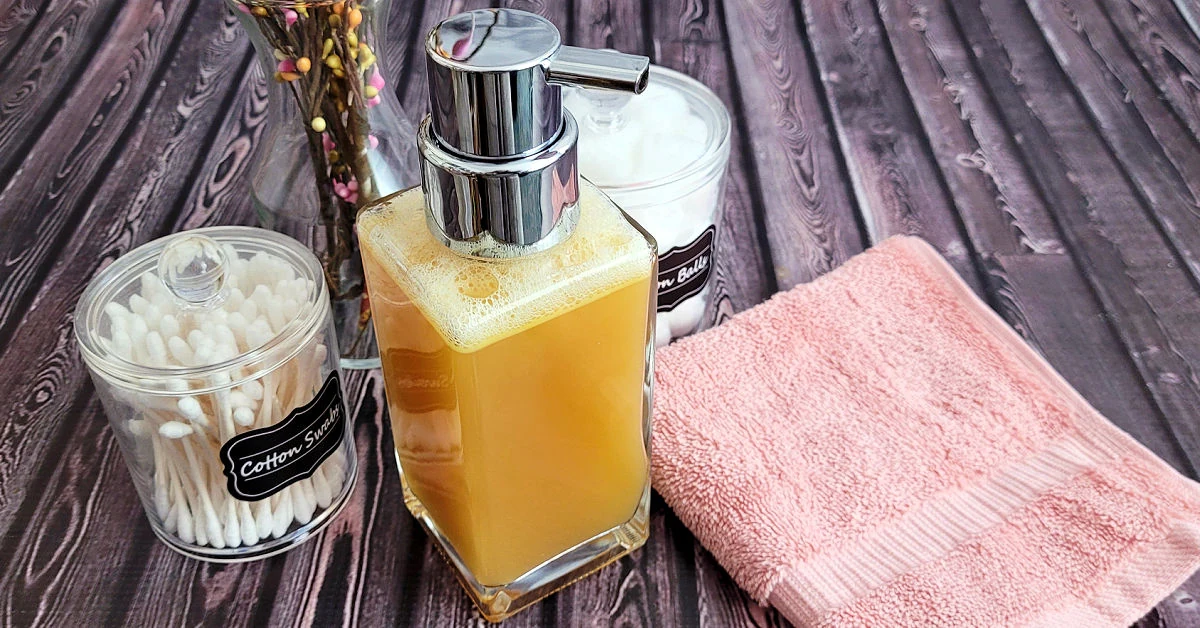
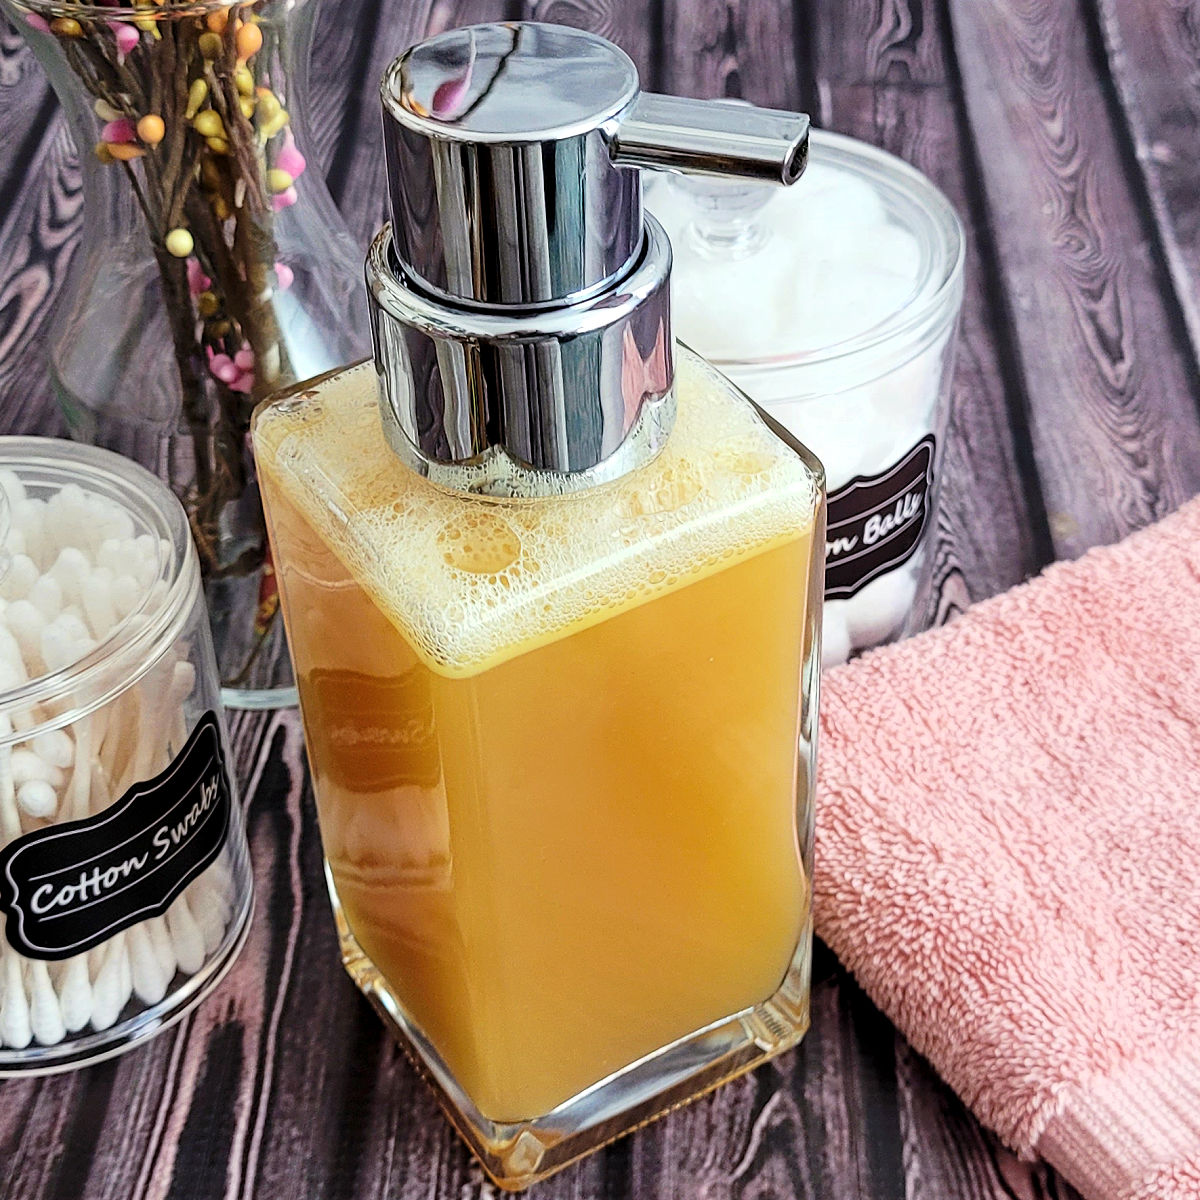
Step 4: Use Homemade Face Wash
You’re now ready to place the bottle of honey face wash in your bathroom and use it as you would any facial cleanser.
Tips for Making and Using Honey Face Wash
Answers to all of your questions about making and using this homemade face wash, including tips and substitution dieas.
How to use face wash
You will need to shake the bottle to re-combine all of the ingredients before each use. After shaking, pump a small amount in your hands and rub into skin in a circular motion. Rinse clean with a warm wash cloth to help remove dead skin cells.
Pat your skin dry, then finish your normal skincare routine. You may wish to apply a DIY Apple Cider Vinegar Face Toner followed by a DIY Whipped Face Cream.
Substitutions and variations
There are lots of ways to customize this gentle honey face wash to your skin type.
- Green Tea. You can also use Chamomile tea for calm skin or Peppermint tea for clear skin.
- Honey. I don’t recommend omitting the honey as it has antimicrobial properties and moisturizing properties. There isn’t a good substitute, but you can use almost any type of honey, including raw, pasteurized, manuka or local honey. Unfiltered honey doesn’t combine with the other ingredients as well, so I don’t typically use it in this recipe.
- Jojoba Oil. While I like jojoba oil for skincare products, you can use any carrier oil that works well with your skin, such as liquid coconut oil, argan oil, avocado oil, sweet almond oil and olive oil. If you need help choosing the right oil for your skin type, read my post on the best carrier oils to learn about their beneficial properties.
- Vitamin E Oil. This ingredient is a natural preservative, but you can also replace it with a Vitamin C serum if you don’t have vitamin E oil on hand.
- Essential Oils. You can use any essential oils that you like using in beauty products. Tea tree oil is great for clear skin. Geranium and lavender essential oil are great for calm skin. Lemon oil is great for evening skin tone and brightening dark spots.
For more ideas on substituting essential oils in this simple face wash recipe, be sure to request my free guide to using essential oils in homemade beauty products.
Also, be sure to read why I switched to Rocky Mountain Essential Oils if you need help choosing a brand you can trust.
Shelf-life tips and suggestions
Since this is a water-based recipe, it will spoil more quickly than a sugar scrub or bath bomb. There are three people in our home using this DIY face wash, so we go through a bottle pretty quickly.
If you won’t use a bottle quickly, you may want to halve the recipe or consider adding a natural preservative like leucidal liquid. I have an in-depth post about natural preservatives for cosmetics and beauty products, so I’d check that out if you’re interested in learning about natural preservatives for beauty products.
DIY Honey Face Wash
Supplies
- 1 ¼ cup cooled green tea - or herbal tea
- 2 tablespoons raw honey
- 6 tablespoons liquid Castile soap
- 2 teaspoons jojoba oil
- 8 drops vitamin E oil
- 15 drops Frankincense essential oil
- 15 drops Ylang Ylang essential oil
Tools
- Glass measuring cup
- Measuring spoons
- Whisk
- Funnel
- 14-ounce foaming soap pump bottle
Instructions
- Add all ingredients to a glass measuring cup or small bowl and whisk to combine.

- Pour the honey tea face wash mixture into the foaming soap pump through a funnel.
- Once full, replace the lid.
- Your homemade facial cleanser is now ready to use!
More DIY Skincare Products

Hello I am addicted to your blog .Thank you so much for sharing.How long does it lasts ? How you store it? Can I store it in the fridge ? Will it last longer?
Thank you so much Blanca. We use ours up within a couple weeks. It’s not possible to calculate the shelf life of water based beauty products (without preservatives) because there are so many factors that go into it. The humidity where you live and in your bathroom. If the bottle gets opened. The quality of the ingredients used. That said, if you store beauty products in the refrigerator, they should last longer because the cooler temperature helps inhibit the growth of contaminants.
Good morning from Bella Tu beauty & skincare ,ran across your blog & find some of your simplified recipes interesting & simple for individuals to comprise. As for the lip scrub a tad of phoenip will act as a preservative in case water should ever come in contact with lip scrub same with jellies. As for the facial wash a natural emulsifier could be used to keep the oil & water mixture cohesive.
I’m going to continue follow you now ,like I said love the simpler of things .Food for thought ,I’ve made the loofah bars but have found a better response to my natural sea sponge soaps .Basically same process ,find a Tupperware that is rectangle or square or you can use a 4 or 6 cavity,but have to cut your sponge to size that it fits in the mold the height can be larger,same process with any melt & pour soap ,you can mix a cple different color and alternate pouring over sponge ,use mica glitter if prefer on top spritz with alchohol and let sit to set or to speed up setting process ,put in fridge.They make wonderful gifts & the sea sponge “and there’s many types” are great exfoliators.
Thank you for sharing your DIY recipes & give it a whirl trying a sea sponge
Hello
Can you tell me the shelf life?
The shelf life will depend upon the circumstances the product was made in and is used in (e.g. whether all ingredients and supplies were sterile, humidity, water exposure, temperatures, etc.). I typically try to use water-based soaps like this face wash within a month or add a preservative like leucidal liquid. If it smells rancid or looks like anything is growing, definitely toss it sooner.
if i add a preservative will it last longer
It should. Leucidal liquid can be a good presevative choice for water-based beauty products.
I’ve made this a few times now and love it. I am the only one using this and use it twice a day. I dont recall how long it lasts (weeks) but I’ve never had an issue with it spoiling. I boil my water that I make the tea in if that helps at all. I also dont use foam pump as I find the oil clogs them fast, regular recycled hand soap pump for me.
Thanks for the recipe! 😊
Thanks so much for sharing your experience with my face wash recipe. I’m happy to hear you are enjoying it.
Can I substitute the honey for Aloe Vera and add tea tree oil and Grapefruit essential for an anti-acne cleanser?
Good question. You can use whichever essential oils you prefer. However, aloe is typically a substitute for water and honey is actually quite good in helping to soothe acne, so I’m not sure you’d want to skip that.
It’s soooo good! My first batch lasted for months and didn’t go bad, now I’ve made the second one.
I’ve used Yves Rocher consentrated soap instead of Castile – 1.5 tablespoon. And used different essential oils, the ones I have at home. It’s gentle, creamy and great scented.
Oh, that’s great to hear! Thank you for sharing!