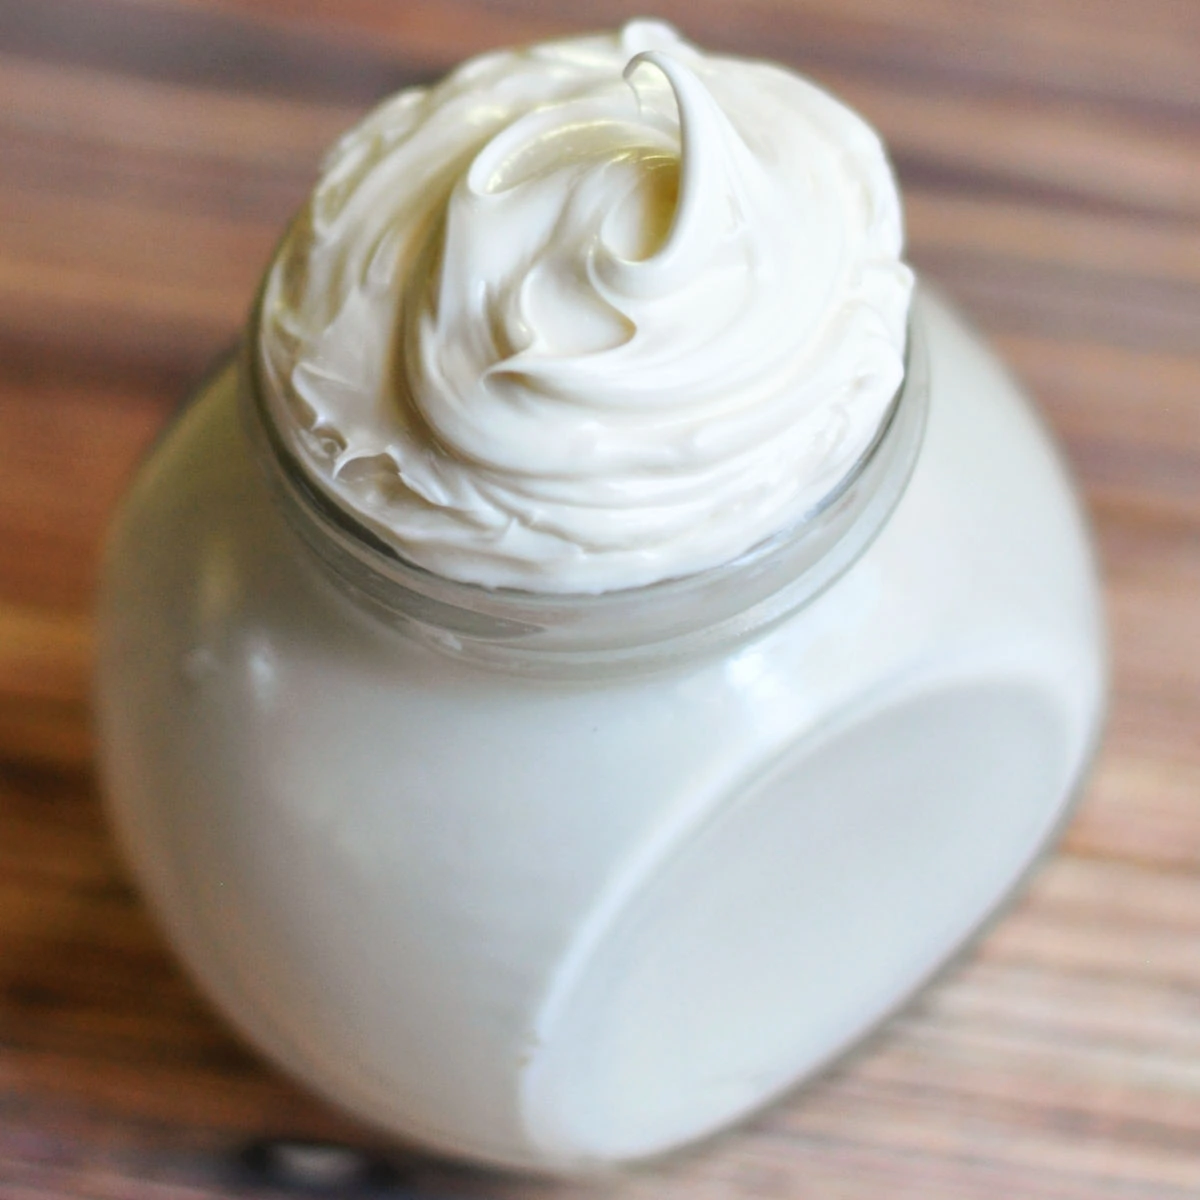
DIY Whipped Face Cream
Jump to Directions
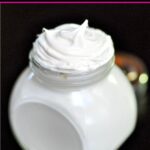
This DIY Whipped Face Cream is ideal for dry and sensitive skin. It’s very moisturizing and contains natural ingredients that can help improve the appearance of fine lines and other signs of aging skin.

Our face cream recipe is easy to make and smells absolutely amazing thanks to two essential oils – frankincense and ylang ylang. It leaves your skin feeling moisturized without being greasy.
Be sure to read our tips & detailed information for customizing this recipe for your skin before making it.
Supplies and Tools
- ⅔ cup of coconut oil
- ¼ cup of jojoba oil
- ¾ ounce of beeswax pastilles
- 1 cup of aloe vera gel
- 10 drops of frankincense essential oil
- 10 drops of ylang ylang essential oil
- Double Boiler
- Measuring cups and spoons
- Fork
- Blender
- Glass jar
Step-by-Step: How to Make Whipped Face Cream
Follow these simple step by step directions to make your very own moisturizing face cream.
Step 1: Add Ingredients to Double Boiler
Start by adding ⅔ cup of coconut oil, ¼ cup of jojoba oil and ¾ ounce of beeswax to the top half of your double boiler. Heat the ingredients over low, stirring frequently, just until they’re melted until well combined.

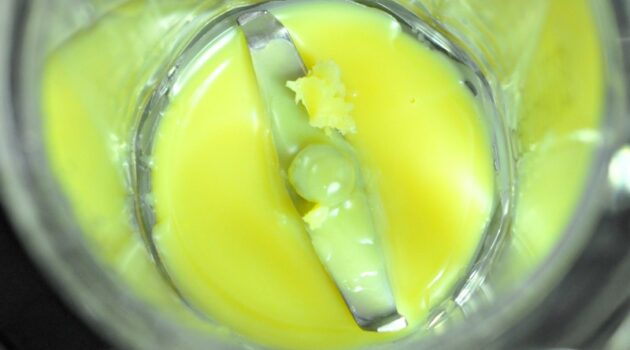
Step 2: Cool Mixture in Blender
After everything is melted, you can quickly pour the mixture into the blender then allow it to cool and harden completely. I recommend using a silicone spatula to make sure you get all of the ingredients out of the double boiler and into the blender.

The best blender for making this face cream recipe has a small pitcher. I typically use the small pitcher that came with my Blendtec blender.
Step 3: Blend in Aloe Vera Gel
After the mixture is completely cool and firm, grab a fork and use it to break up the hardened mixture in your blender. Stir in about 1 tablespoon of aloe vera gel, then blend on high for about 30 seconds.
Next, you’ll keep adding a small amount of aloe vera gel to the blender at a time, then blending until it’s combined. Don’t add the entire cup at once or it won’t combine and you’ll end up with a goopy mess.
It’s important to be very patient and know it will take you several minutes to get the aloe to blend smoothly into the other ingredients. You’ll know it’s starting to emulsify when it begins looking like a very thick cream.
Step 4: Add Essential Oils
When it takes a cream form, add 10 drops of frankincense essential oil and 10 drops of ylang ylang essential oil. Blend the face cream until the oils are incorporated and you have achieved the whipped texture you are after. Transfer to a glass jar for storage.

Tips for Making Homemade Face Cream
I recommend making this face cream recipe as written the first time. After that, there are so many things you can experiment with to make this the perfect moisturizer for your skin.
Tip: Use a smaller blender pitcher
This Frankincense Whipped Face Cream is definitely one of the more complex recipes I make. That’s because when you make a whipped cream in a blender, it works best if you have a higher volume of ingredients.
Since this is a smaller batch, it can be a bit finicky if the pitcher of your blender is large. You can double the batch if that’s the case, but you’ll end up with a boatload of face cream!
I like to use the small pitcher that came with my Blendtec blender for making this face cream. Their new travel bottle would work well too.
Alternative to coconut oil
Absolutely. You can use pretty much any skin safe oil in this recipe. If you have oily skin rather than dry skin, you may want to choose a different oil so it won’t be such a rich face cream.
Sweet almond oil, grapeseed oil and olive oil are great choices, but be sure to read my post on Choosing Carrier Oils to decide which one will work best for your skin type.
What to do if you add too much aloe at once…
One thing to keep in mind when making this recipe is that you do have to add the aloe vera very slowly or it won’t combine properly.
You also can’t add more than about a 50% ratio of aloe to the wax/oil mixture or it will separate, so it needs to be a pretty thick cream to be stable.
If you feel like maybe you added too much aloe at once, you can try draining the extra aloe out and then blending more if it hasn’t already been over-blended. If it’s already been overblended, you’ll likely need to start over and go slower next time.
How to make it the consistency of body lotion
The reason you can only add so much aloe to this cream and still have it hold together is because beeswax only has mild emulsifying properties. It’s not a true emulsifier.
The maximum ratio of aloe to oil and wax you can add to this recipe and have it still come together is 1:1. If you want to make a thinner lotion, you can try using an emulsifying wax instead of beeswax next time like I use in my Basil Face Cream recipe.
Would you like to save this?
Emulsifying wax is a vegan ingredient, and can usually be substituted in a 1:1 ratio for beeswax. So you’d use ¾ ounce to get the same consistency.
Which essential oils to use
I used Sacred Frankincense and Ylang Ylang essential oils from Rocky Mountain Oils in this batch. They’re two oils commonly used in skincare products for mature skin and they smell amazing together.
If you want to try switching out the essential oils for a combo you like better, get a free copy of my guide to using essential oils in DIY beauty products. It talks about which oils work best for which skin types, including normal skin, acne-prone skin and aging skin.
After deciding which scents you’d like to use, simply add 20 drops of essential oil of your choice (total drops) in place of the Frankincense and Ylang Ylang.
Best type of beeswax to use
You can use beeswax pastilles or wax grated from a bar in this recipe. Just make sure you’re choosing pure beeswax as adulterated wax does not perform the same way in beauty products (or in beeswax candles).
I like to buy my beeswax from Mountain Rose Herbs because I know it’s high quality (they also have super affordable aloe vera).
How to make this cream vegan
If you’d like to substitute a vegan wax for beeswax, try carnauba wax. It is firmer than beeswax, so you’ll need to use about 20% less carnauba wax.
Since this recipe calls for 0.75 ounces of beeswax pastilles, you’d use 0.6 ounces of carnauba wax.
You can also use an emulsifying wax if you want to make a cream that holds together longer. You can usually substitute emulsifying wax for beeswax without changing the ratio.
How to apply face cream
Start by washing your face with a good natural face wash and follow that up with a toner. Then gently apply your whipped face cream – I like to use it as a night cream. A little goes a long way, so start small for best results.
Best way to store this cream
It should always be stored in an airtight container in a cool, dry place that’s out of direct sunlight and it should not be exposed to water. I prefer to store it at room temperature, but it can also be stored in a fridge if you live in a hot climate.
Shelf life of this recipe
This face cream has a very short shelf life because it’s water based (aloe is considered water in beauty products) and there are no preservatives in it.
If it starts to smell funny or separate and not recombine with stirring, it’s time to toss it. You can store it in the fridge to extend the shelf life, but it still won’t last longer than a few weeks.
Best preservative for face cream
Ingredients like Vitamin E oil, rosemary oil and grapefruit seed extract are often toted as natural preservatives. However, they are not strong enough to inhibit microbial growth in most water-based beauty products.
You can try using leucidal liquid to extend the shelf life of this cream since it doesn’t last a long time. I like this natural preservative because it blends in well. Be sure to follow the manufacturer’s recommendations for measurements.
If you want to learn about all of the options you have for preserving your face cream, read my post about the best natural preservatives for cosmetics and beauty products.
Other ways to use this moisturizer
If you have more moisturizer than you can use on your face, try it as a hand cream, foot cream, body cream or body butter. It also makes a great handmade gift for a friend.
Best storage jars for DIY beauty products
I have an entire drawer of different bottles and jars I use for my homemade beauty products. I like buying them from Mountain Rose Herbs when I’m buying ingredients because they have a great selection and fair prices.
But there are tons of options out there. You’ll want to read my post on the Best Containers for Homemade Beauty Products if you plan to make your own skincare and personal care products.
Other natural beauty products to make
If you want a full homemade skin care routine, try making my Brown Sugar Face Scrub, Honey Tea Face Wash and Apple Cider Vinegar Toner.
DIY Whipped Face Cream
Supplies
- ⅔ cup coconut oil
- ¼ cup jojoba oil
- ¾ ounce beeswax pastilles
- 1 cup aloe vera gel
- 10 drops frankincense essential oil
- 10 drops ylang ylang essential oil
Tools
- Double Boiler
- Measuring cups and spoons
- Fork
- Blender
- Glass jar
Instructions
- Add the coconut oil, jojoba oil and beeswax to your double boiler and heat over low just until it’s melted, stirring frequently until well combined.
- Transfer the mixture to the blender and allow it to cool completely. It will harden – it's supposed to. After it's cool and hardened, use a fork to break up the mixture inside the blender and stir in about 1 tablespoon of aloe vera gel.
- Next, blend the mixture on high for about 30 seconds. Stir and blend in a little bit of aloe vera gel at a time. Don't add it all at once or it won't combine. It will take several minutes to get the aloe to blend smoothly. You'll know it's working when it starts to look like a thick lotion.When it takes a lotion form, add the essential oils and continue to mix until they're incorporated. Blend until you have the texture you want, then transfer to a glass jar for storage.


Hello, I want to try this facial moisturizer. I love the scent of rose essential oil and wondered if I could use it instead of the ylang ylang to mix with the francinsence.
Thanks,
Jane
Hi Jane, great question. Yes, you can absolutely use Rose essential oil – I love the scent of it too!
Hey there! Just curious what the shelf life is for this lotion, if it gets moldy or anything?
Thanks so much!
Ceara
It has a short shelf life because there is aloe in it. You can keep it in the fridge to extend the life or add preservative as recommended above.
What is the shelf life of this lotion both refrigerated and not?
Since this is a water-based beauty product (aloe is water), it has a short shelf life, which will vary depending on many conditions. It won’t last longer than a couple weeks unless you add a preservative like leucidal liquid.
How much preservative should be added.
That will depend on which preservative you want to use. Check out this guide to preservatives.
I need to try this one!
Hi, Love your recepie and thanks for sharing, I would like to make it with an emulsifier instead of bee wax, could you please give me the amount of wax and water please. I live in hot and humid weather all year round and the bee wax don’t feel right.
Emulsifying wax can usually be substituted for beeswax in a 1:1 ratio.
Should I use solid coconut oil or fractionated coconut oil?
I use solid coconut oil in this recipe.
I love the recipes. Thanks for sharing
I made this recipe but it feels greasy, What can i add to make it less greasy?
I’ve never tried it because I have really dry skin and use this as a night cream, but some people have had success with adding a bit of arrowroot powder.
Can i use water instead of aloe vera gel?
Hi Sherry, I’ve never tried making this recipe with water instead of aloe. If you give it a try, be sure to let me know how it turns out!
Hey, I enjoyed making this recipe and got it to whip up ok, I wouldn’t say it was very fluffy but it did come together fine. But as it cools, even in containers just from being in a cabinet during winter, it becomes grainy like coconut oil or looks that way though it does just soften in my hands. Do you know of any way to make it stay the lovely whipped consistency? Thanks!
What type of coconut oil did you use – refined or unrefined? Was the coconut oil grainy before you used it? I always use refined coconut oil as I find it has fewer consistency issues than unrefined. How long are you storing it and what is the temperature you’re storing it at? The colder the temperature, the more temperamental that coconut oil can become, especially if it’s unrefined.
I will look!! I believe I used an unrefined, organic one but I’ll double-check that! good to know about the refined/un difference. I am storing it at room temp in a dark cabinet in a cool house. I will definitely check into the unrefined and try it again. Thank you!!
You’re welcome!
Love this face cream, I was wondering if I could use aloe vera liquid instead of gel to extend the shelf life?
You can, but it won’t extend the shelf life as it’s still water-based.
Love this recipe but wondering if I could use aloe vera liquid instead of gel?
The consistency will be thinner if you use liquid instead of gel.
Hi,
Can I use a hand mixer instead of a blender ?
I haven’t tried that before – I’m not sure if it would be powerful enough.
Could I try a hand mixer or stick mixer and use a little less aloe Vera to maintain a nice texture? And add some emulsifier and preservative? Thanks
It’s still quite thick with the aloe (I use gel rather than juice). I haven’t tried a stick mixer but it may work. I do recommend adding some sort of preservative to DIY beauty products containing water or aloe if you want them to maintain stability.