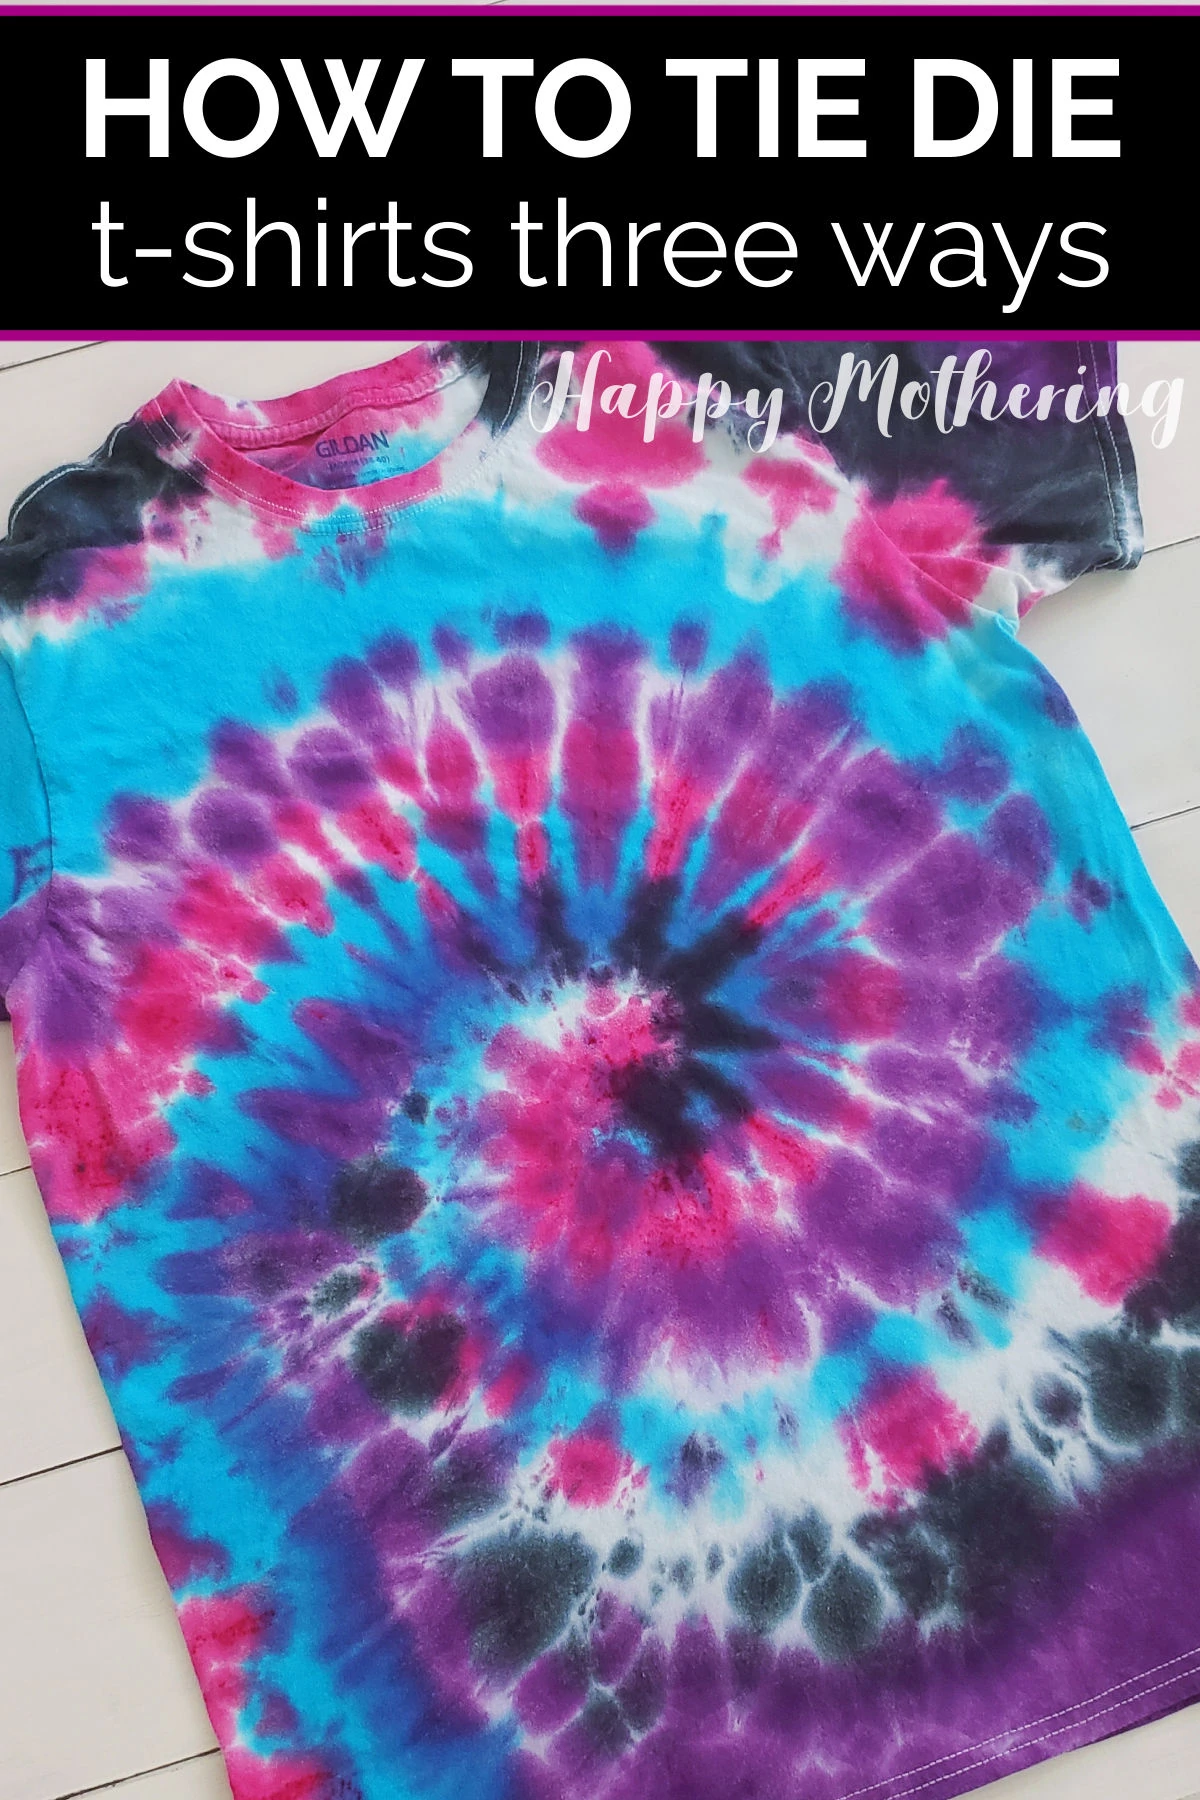
How to Tie Dye a Shirt 3 Ways (Spiral, Stripes & Crumple Patterns)
Jump to Directions
Have you ever wanted to learn how to tie die a shirt? It’s a fun craft to do on your own or with kids, and it’s easier than you might think! This guide will show you how to make 3 tie dye patterns.
We did some tie dyeing with Girl Scouts when I was growing up, and it seemed so complicated! The good news is that these days there are one-step tie dye kits that make it incredibly easy and fun.
I like the Tulip one-step kits because they’re readily available and include most of the things you need for your tie-dye t-shirt, but there are tons of options I’ll talk about if you keep reading. The best thing about the newer kits is you don’t have to pretreat your fabrics with soda ash.
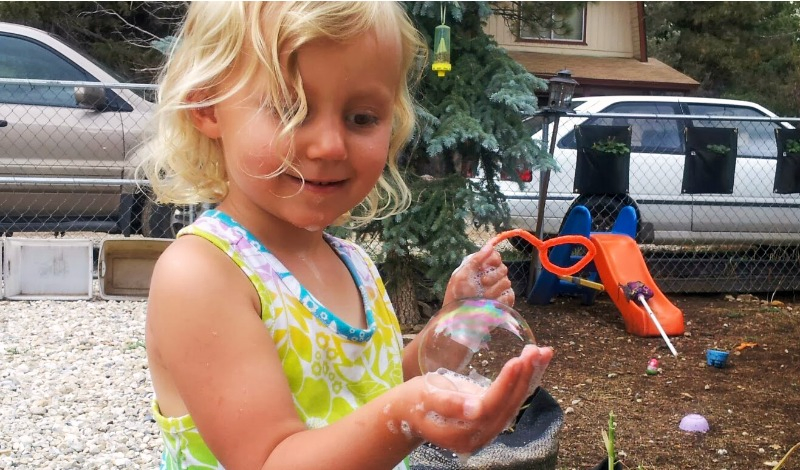
My daughters and I love making different tie-dye projects together. While there are tons of different ways to tie-dye t-shirts, I will teach you how to make 3 different tie dye shirt patterns: Spiral, Stripes and Crumple. Each of these tie-dye patterns can be made by people of all experience levels.
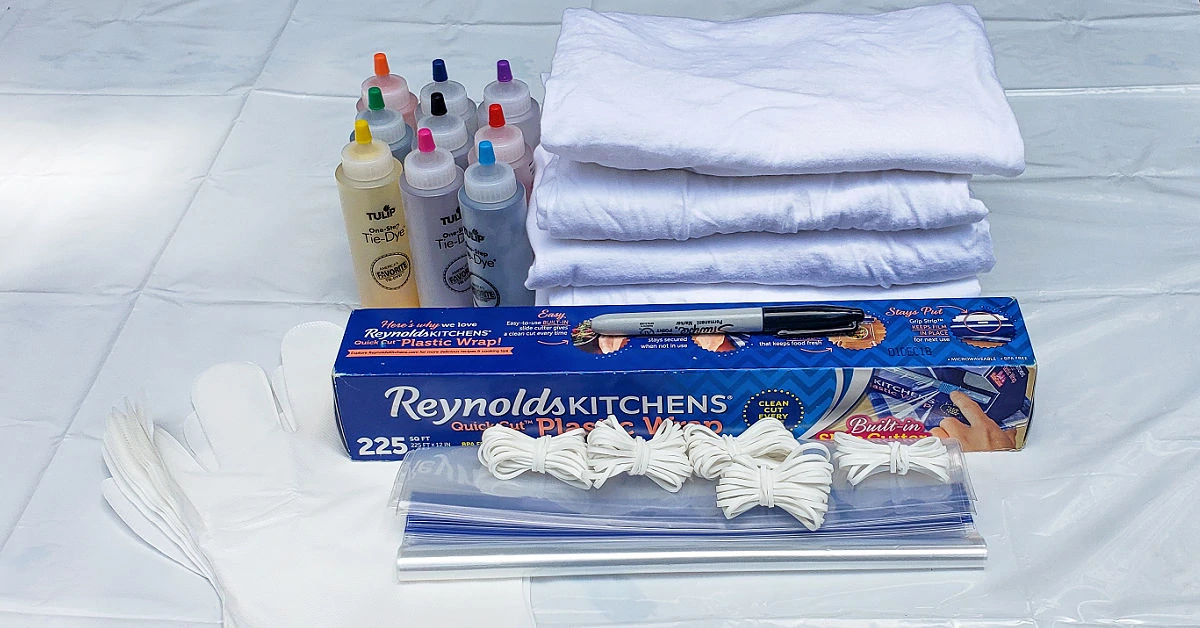
Supplies and Tools
All you need are a few simple supplies to design your own beautiful tie-dye creations.
- White T-Shirts
- Rubber bands
- Dye solution in various colors
- Empty dye squeeze bottles
- Plastic tablecloth
- Wire rack
- Gallon size freezer bags
- Gloves for each person
- Plastic wrap
- Paper towels
- Sharpie marker
Step-by-Step: How to Tie Dye a Shirt 3 Ways
Follow these easy step by step instructions to learn how to tie dye a t-shirt 3 different ways: Spiral, Stripes and Crumple patterns. I cover preparation, the dying process and the first wash in this tutorial.
Step 1: Prepare Shirts and Gather Tie Dye Supplies
The very first thing you want to do is wash the t-shirts you plan to tie dye so they shrink to size. Wash them in a simple detergent and nothing else. Do not use fabric softener or dryer sheets on the shirts or they won’t hold the dye.
Next, gather all of the supplies you need to dye your shirts. Prepare the colors you want to use by pouring the dye powder into each squeeze bottle, then mixing them with water. It’s a good idea to do all of this stuff first before you tell the kids you’re ready and make sure that you’re wearing rubber gloves so you don’t stain your hands.
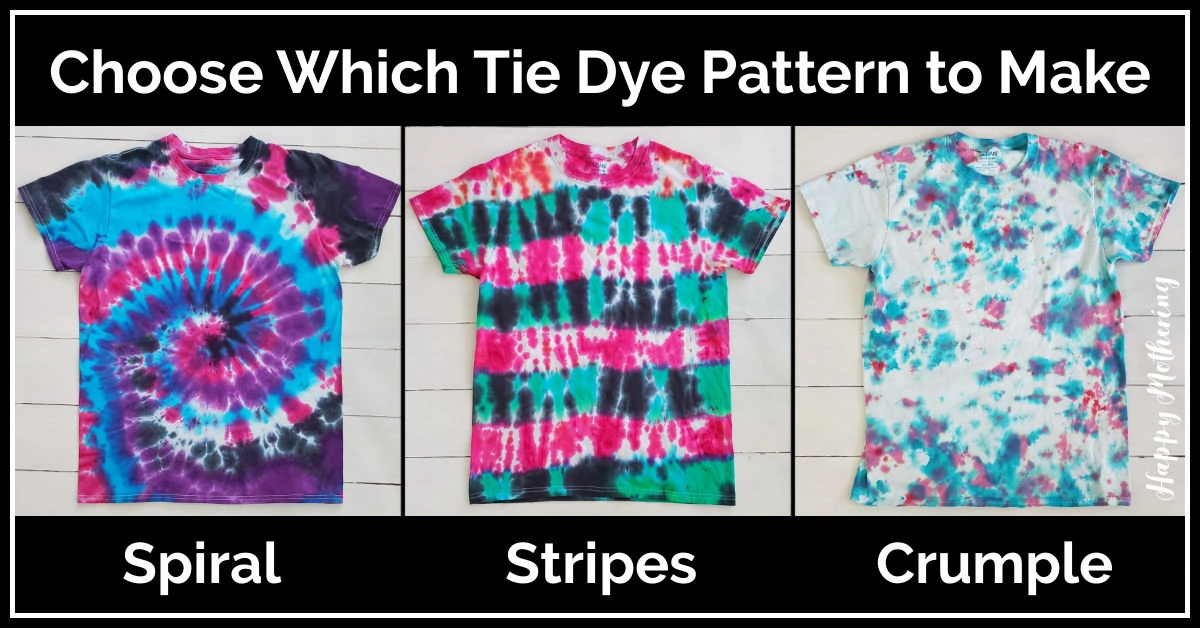
Step 2: Choose Your Pattern
Once you have your prepared shirts, it’s time to choose the tie dye pattern you want to start with from these 3 options:
For steps 3-5, only follow the instructions for your selected pattern.
Step 3: Fold Your Shirt
Now you’re ready to fold your shirt in the proper way to achieve your chosen pattern.
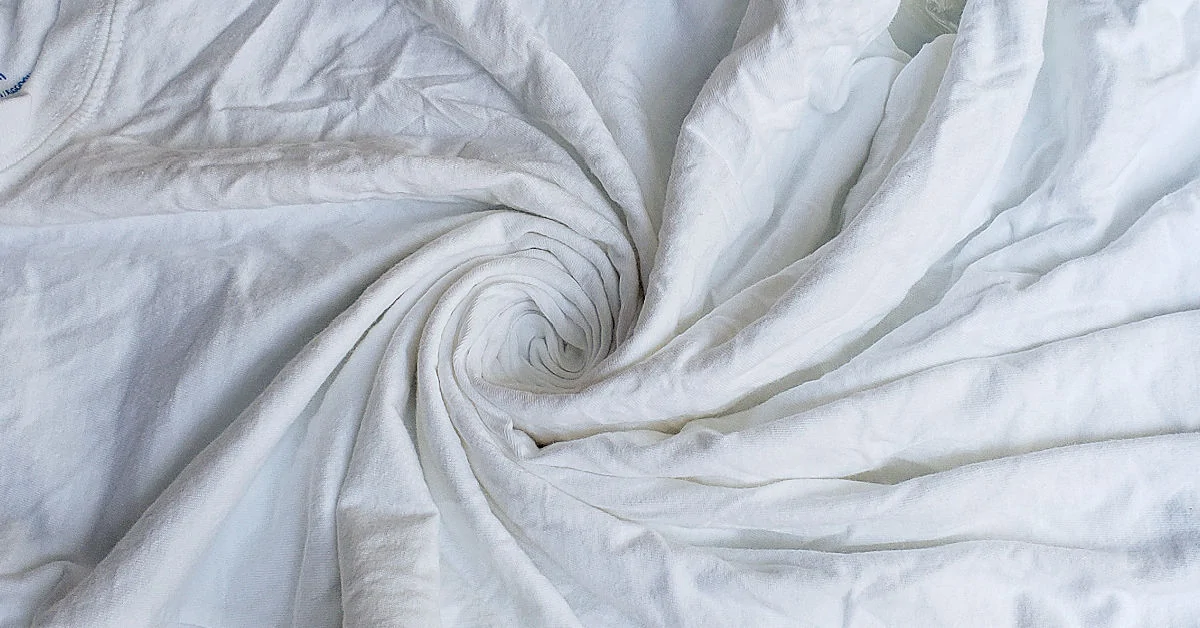
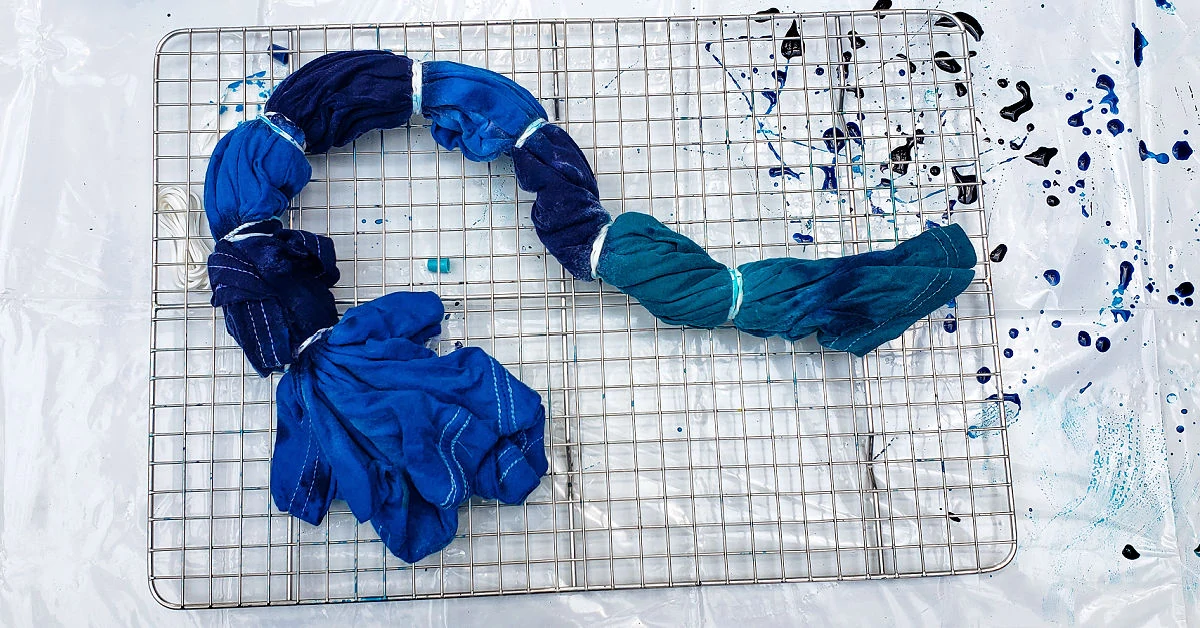
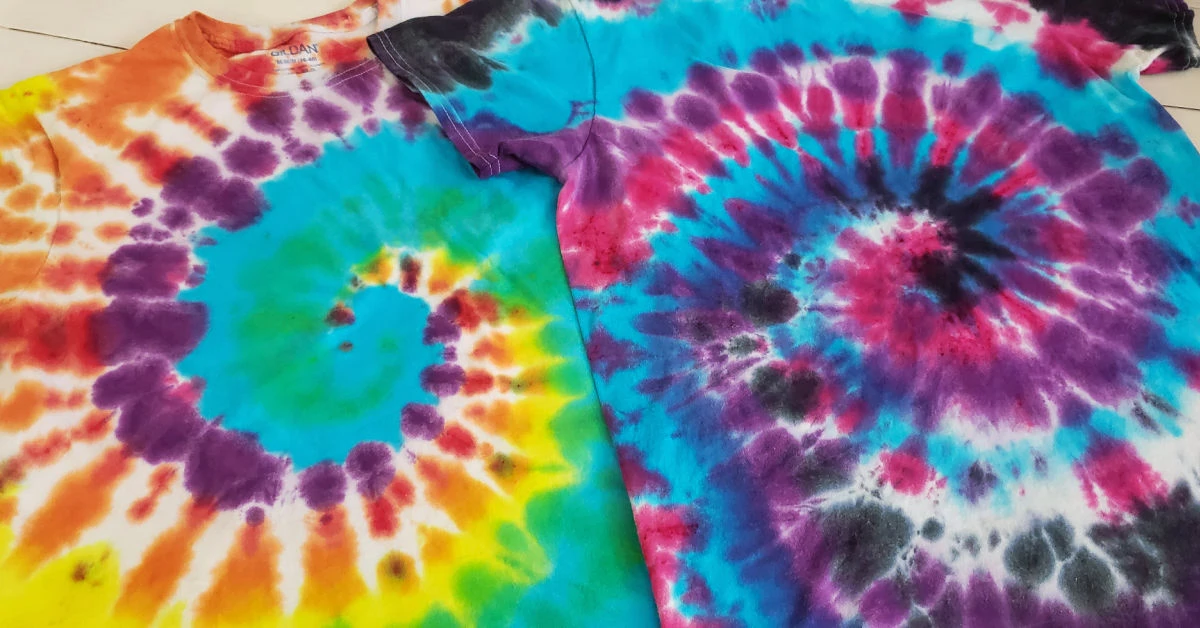
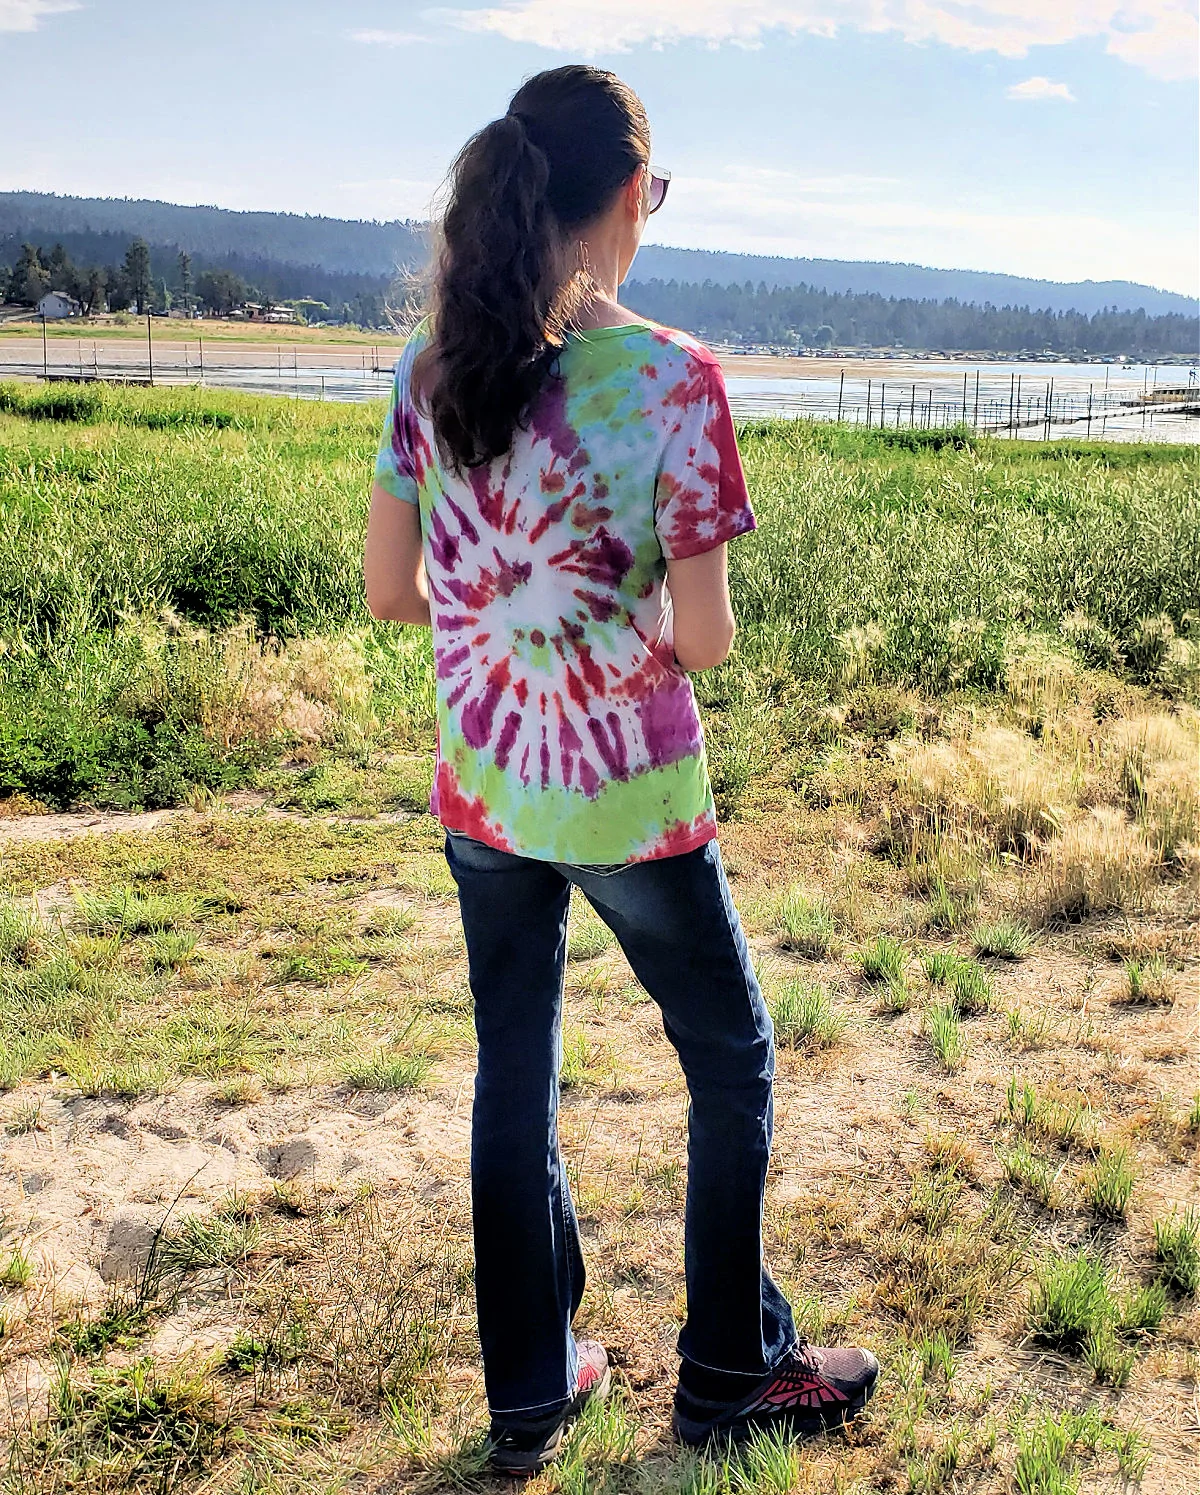
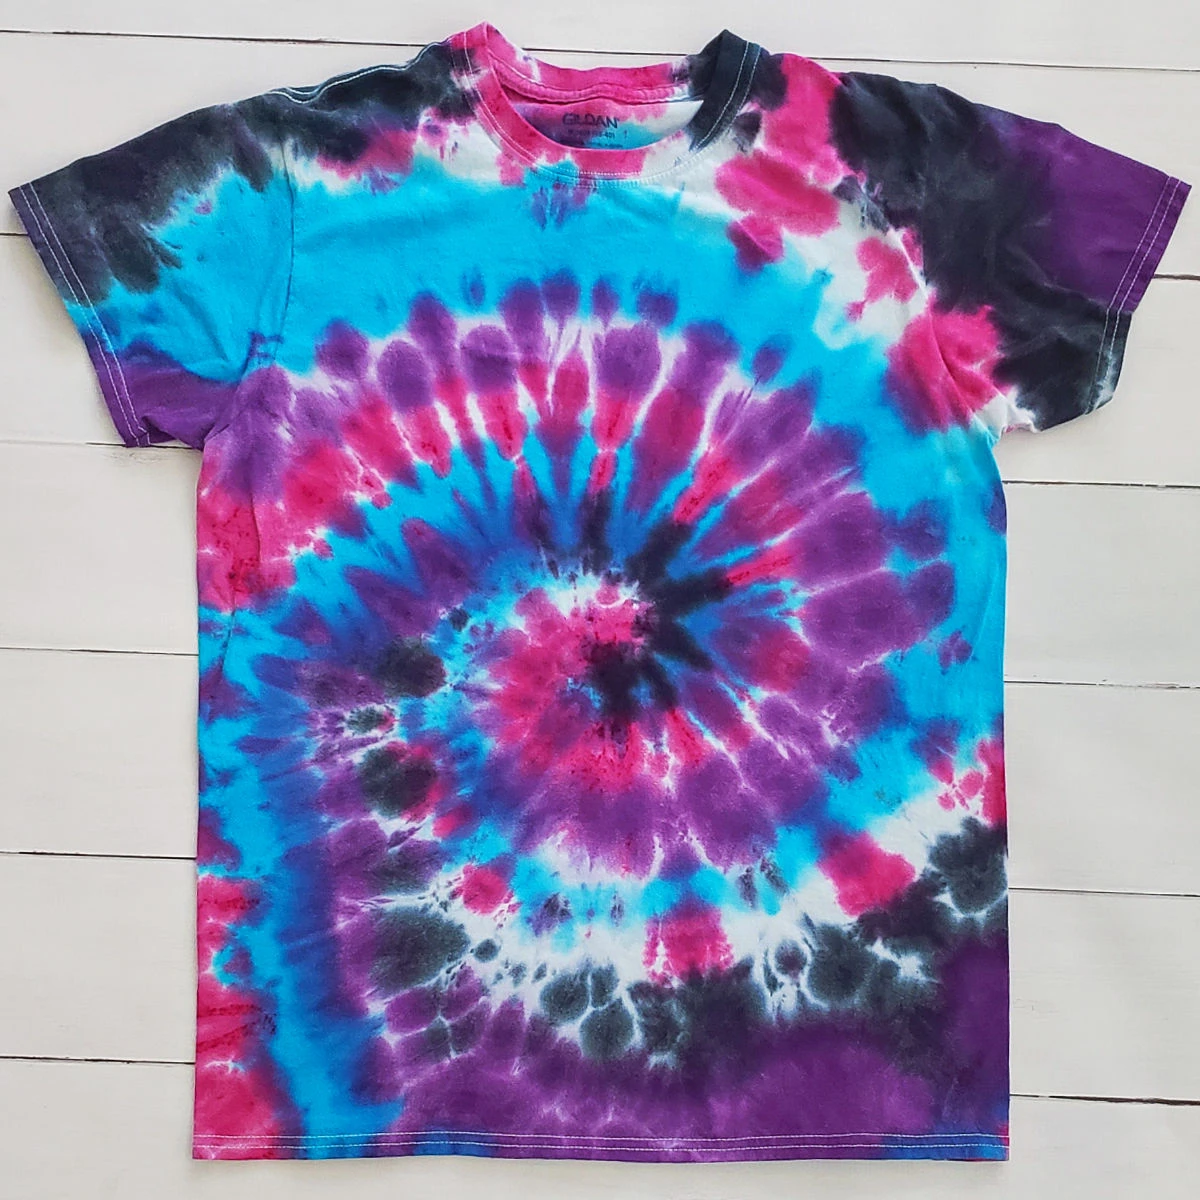
Spiral Design: You want to pinch the fabric in the middle of the tee and twist it into a spiral pattern.
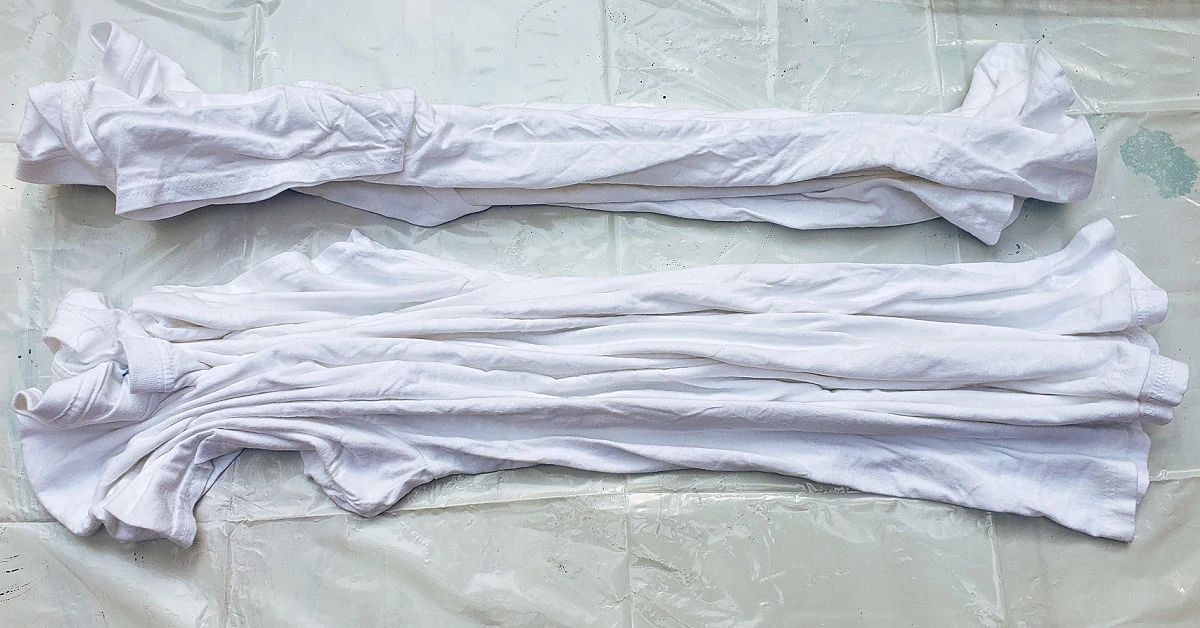
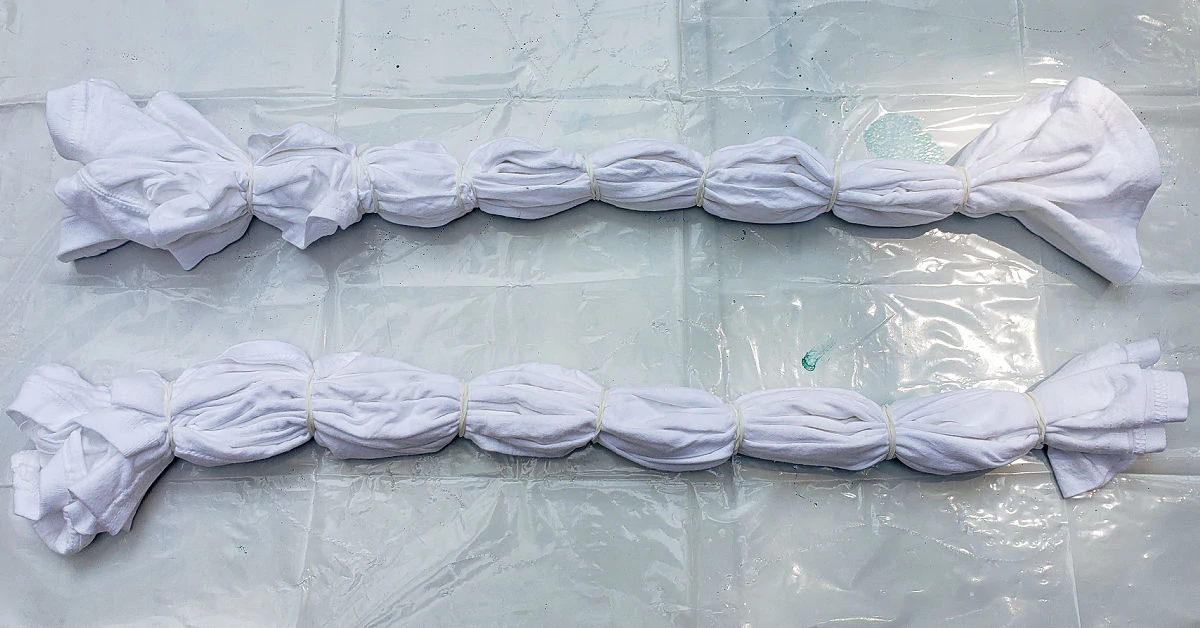
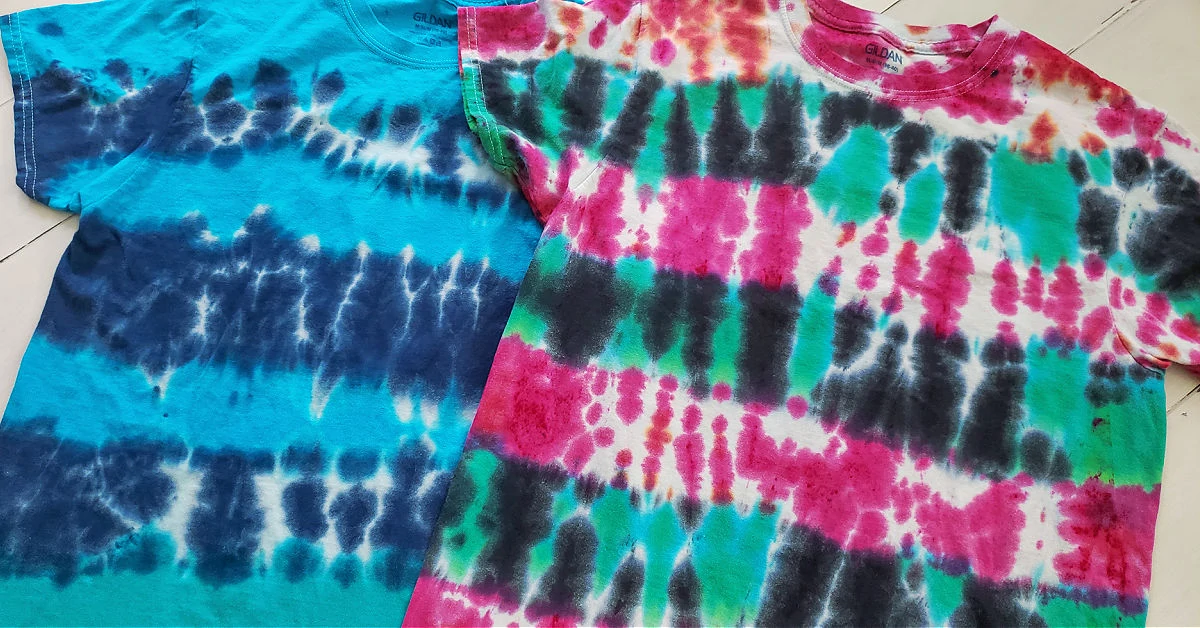
Stripes Design: Fold your t-shirt lengthwise into small pleats across the whole shirt.
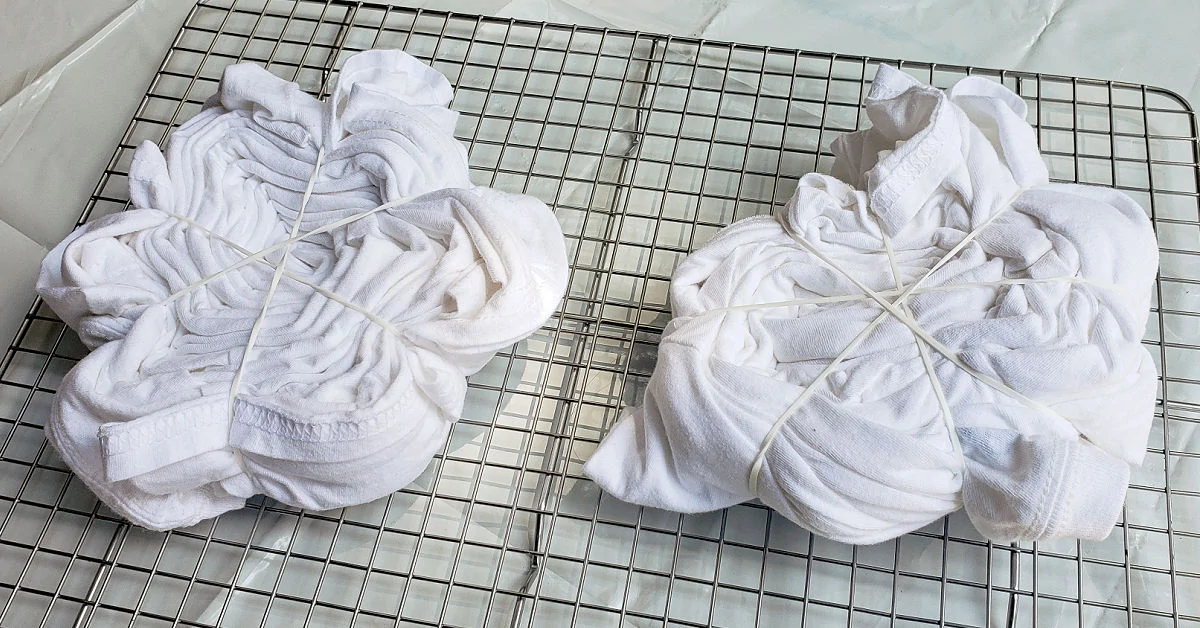
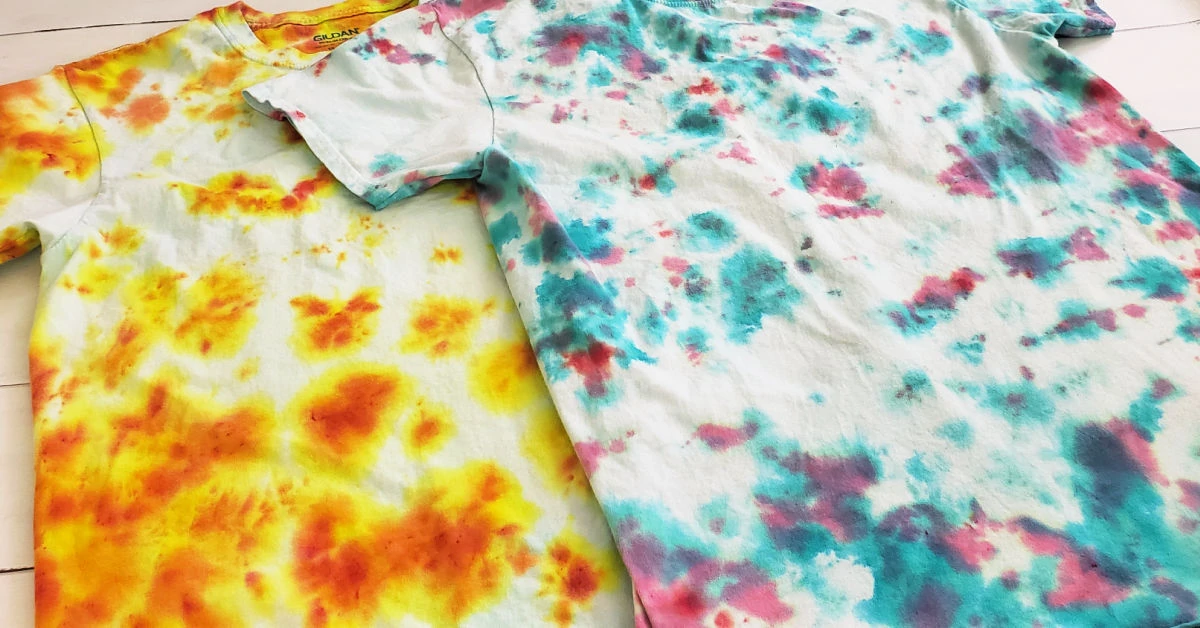
Crumple Design: Take your tee and just crumple it into a flat shape. This is the easiest pattern for younger kids with less finger dexterity to do themselves, but you’ll need to help them as you’ll need to rubber band it right away or it’ll lose shape.

Step 4: Tie T-Shirt with Rubber Bands
Spiral Design: Once you’re happy with the spiral shape you’ve created, it’s time to use rubber bands to tie it into that shape, making pie-shaped sections, so you can work with it.
Stripes Design: Next, take your rubber bands and create sections on the shirt.
Crumple Design: Use the rubber bands to hold your shirt in the crumpled up shape you’ve made.
Step 5: Dye T-Shirt
Now you’re ready to use the prepared dyes on your shirts. A great way to keep them from absorbing extra dye that ends up on your work surface is to place them on wire racks.
Spiral Design: Using the dye you prepared, color each section you’ve marked out with your chosen colors. Make sure it’s saturated with enough dye that you don’t end up with a bunch of white spots, but not so much dye that it bleeds all together. After you’ve dyed the first side, flip the shirt over and dye the other side.

Stripes Design: Take a bottle of your prepared dye and color one section of the shirt. Then take the next section and color it the next color you’d like. Repeat until all of the sections are dyed all the way around all sides and your color pattern is complete. Make sure not to saturate the shirt too much near the elastic bands or you won’t have the white streaks between colors.
Wrap each of the shirts individually in plastic wrap to preserve the striped design.

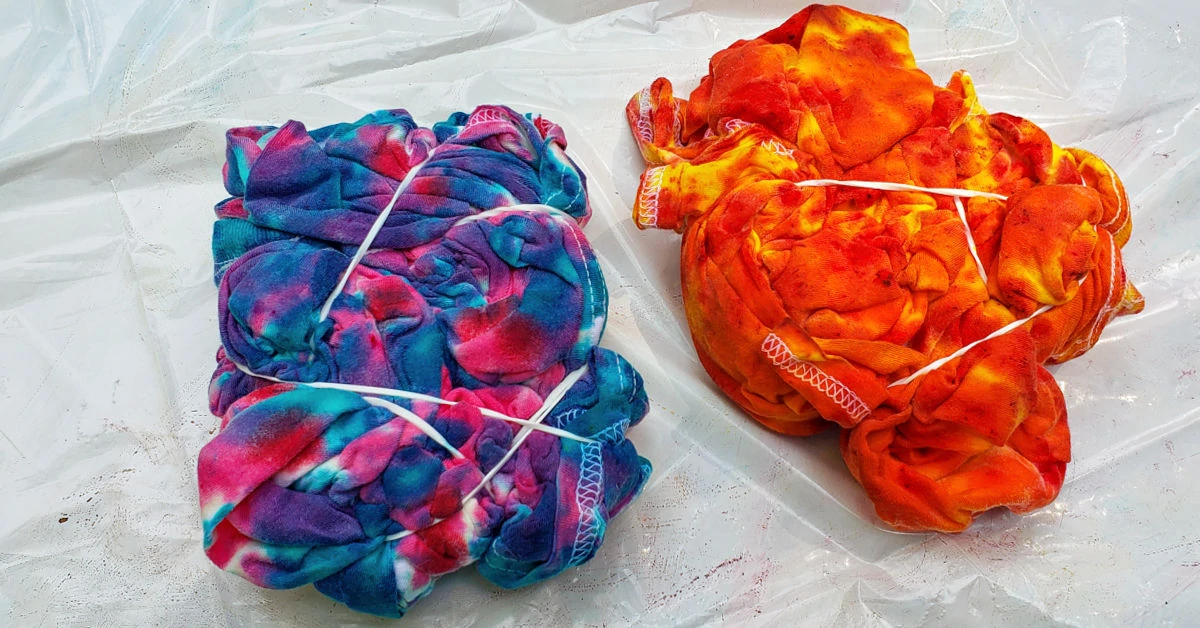
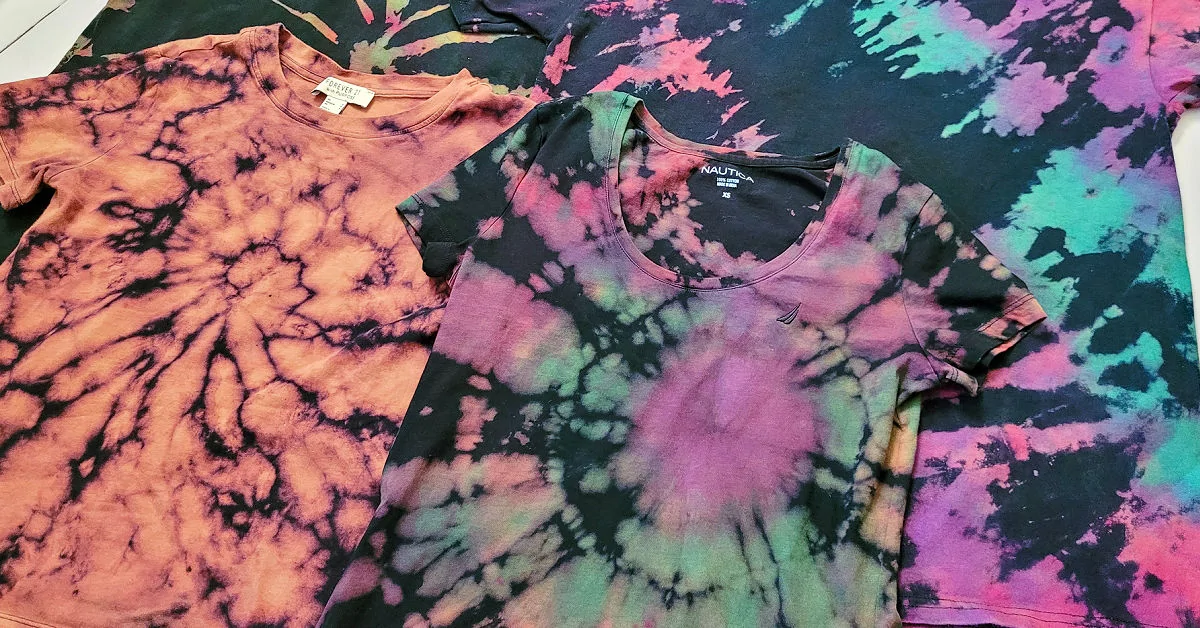
Crumple Design. Choose the colors that you want your shirt to be, and sprinkle dye across the whole shirt. It should be splotchy with different colors, but saturated enough that you don’t end up with blobs of white. Make sure to color both sides of the shirt. We found this style to use more dye than the other.
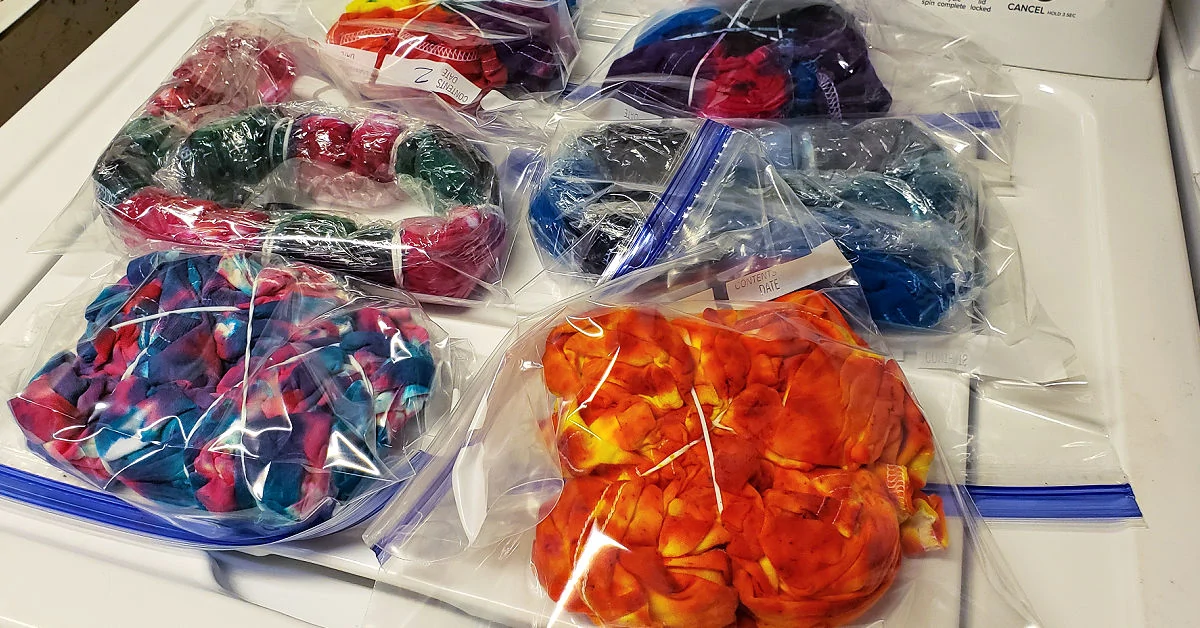
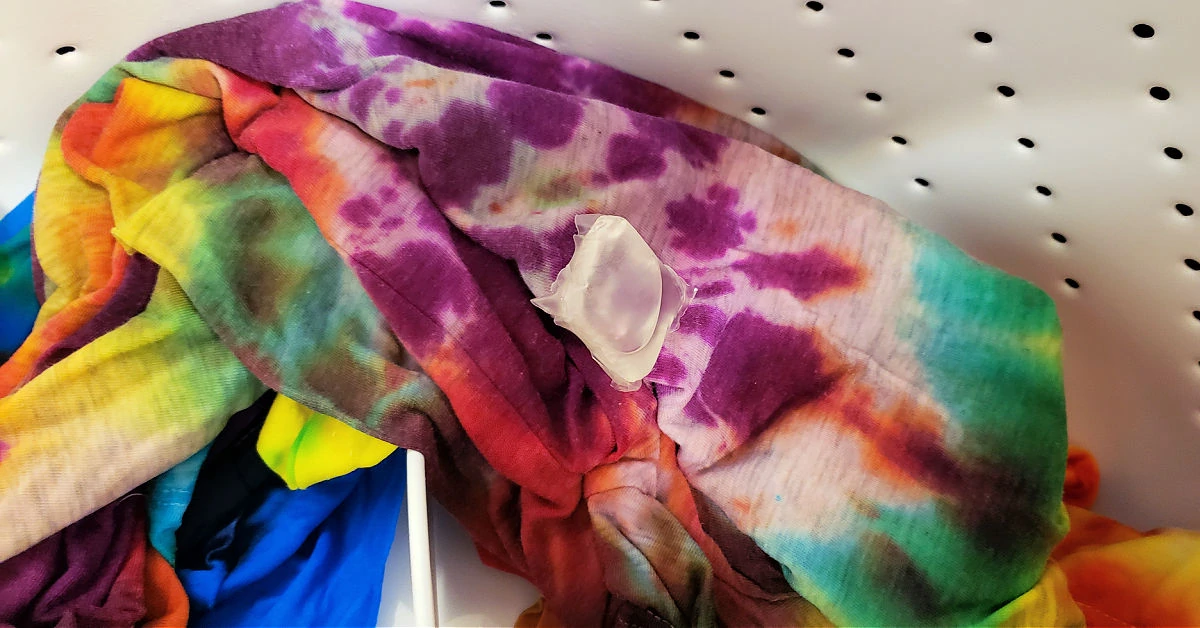
Step 6: Put Shirts in Plastic Bags
Once you’re finished dyeing your tees, place each of them carefully in a sealable plastic bag so the dye will stay wet as the colors permeate the fabric. Each shirt gets its own bag so the colors don’t bleed. Allow them to sit in sealed bags for 24 hours. Don’t skip this important step. The colors will fade if you wash too soon.
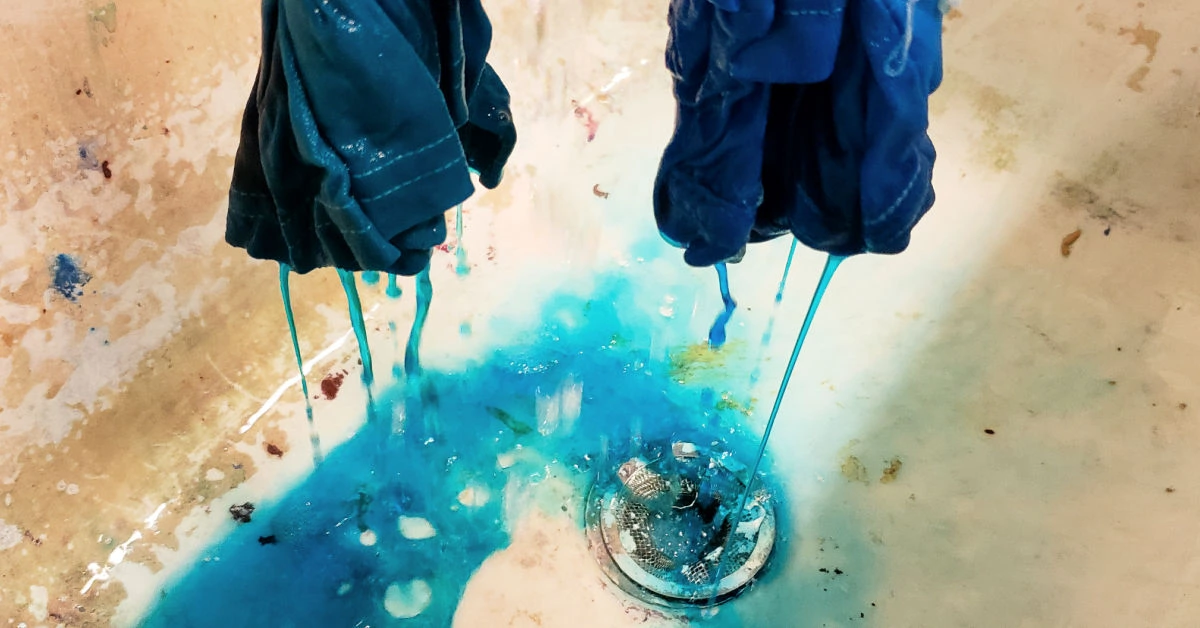
Step 7: Rinse Tie-Dye Shirts
After your shirts have been sitting for 24 hours, it’s time to rinse them out really, really well. You want to take each shirt and rinse it under cold water until no more dye runs from it. It will take several minutes for the water to run clear, so have patience. We like to do this in the utility sink in our garage because it can be messy.
Step 8: Wash Shirts
After you’re confident you’ve rinsed as much dye out of each shirt as possible, it’s time to wash them. You want to wash them on hot water on the largest load setting possible. The heat will help set the dyes even more.
Would you like to save this?
Step 9: Wear Shirts
After the shirts are dry, they’re ready to wear!
Tips for Tie Dyeing T-Shirts at Home
Answers to all of your questions about making a tie-dye t-shirt of your very own design.
What type of t-shirt works best?
Natural fibers like 100% cotton, rayon and silk t-shirts work best. Synthetic materials don’t typically hold dyes as well.
The reason I recommend white shirts is that the original color of the shirt will show through in the areas where you’ve placed rubber bands (“tied” your shirt to “dye”). You can choose another color shirt if you’d like those areas to be something other than white. The dye won’t show as well on darker colors though, so keep that in mind.
You can use pretty much any white tee you’d like to dye – Blick Art Materials has great blank tees for tie dyeing.
Can old t-shirts be tie dyed?
Yes, we have tie dyed old white shirts and they’ve turned out great. I’ve actually found it’s a great way to bring new life into white fabric that is too dingy to be worn anymore.
I had taken to wearing this tee as an undershirt because it was getting older. After tie dyeing it, I can wear it again and it looks brand new.
Best tie-dye kit to buy
You can get a tie dye kit that has almost everything you need at most craft stores. I like the kits with Tulip one-step dyes because you don’t have to go through the soda ash step. Plus they come with different colors of dye, squirt bottles, elastic bands, gloves and a plastic cover for the table.
My favorite place to order my craft supplies online Blick Art Materials. They have a huge selection and great prices on all of their Tie Dyeing Supplies. They have pretty much all of the Tulip One Step Tie Dye Kits as well, tons of different sizes and the reverse tie dye kit too.
They also have a Jacquard Tie Dye Kit, but I haven’t personally worked with that brand. The dyes are procion dyes, which a lot of people love for tie dyeing because they work really well. However, keep in mind they require the use of soda ash, which adds extra steps to your project.
While buying a kit makes it easier, you can also buy individual dye colors and empty bottles to put together your own kit.
And, if you’re more of an Amazon shopper, I put together a list of the Best Tie Dye Supplies in my Shop.
Soda ash solution info
The wonderful thing about the newer one-step dyes is that you don’t need to use a dye fixative (like a soda ash pre-treatment solution) on your shirts. The dyes are formulated to work without pre-treatment. If you go with a different type of kit, you will need to add this step in.
Set up tips
I like to set up our tie dye work are outside. I cover a table (or anything with a flat surface) with a plastic table cloth to protect it and make cleanup easier. I also like to have lots of extra paper towels around to soak up extra dye as we go. It’s really easy to get splotches of dye from the table on the clothes, so it’s important to be careful as you go.
Other items to dye
Yes, if you don’t want to make your own shirt, you can also use this same process to tie dye just about anything. Check out my tutorials on How to Tie Die Socks and How to Reverse Tie Dye.
Here are some more fun ideas:
Tips for tie-dyeing with kids
The first tip is to make sure your kids wear old clothes so they don’t accidentally give their favorite shirt a splash of new color. If no old clothes are available, you can just make sure they have something to wear as protective clothing like an apron or one of your old shirts.
It’s also important to make sure kids wear gloves. They’ll be tempted to take them off and play with the fabric dye, but it’s best not to expose our skin to these types of dyes.
Finally, if you have a group of kids, make sure each plastic bag gets labeled with their names. You don’t want to deal with disagreements about who dyed which shirt, so keep things straight with labels.
Can you use food coloring?
It is possible to make a tie dye project with food coloring, but they aren’t going to be as vibrant or as long lasting as if you use real fabric dye. It will hold for a bit in natural fabrics like cotton, but it won’t hold at all in synthetic fabrics like polyester.
If you use wool or other animal-based fabrics, the color may become permanent. While I personally prefer to use fabric dye, if you want to give tie dyeing with food coloring a try, check out Silver Bobbin’s tutorial.
Natural dye options
As much as I normally prefer natural ingredients, I haven’t found any commercial tie dye kits that use natural dyes. You can make your own natural dyes for tie dyeing, but it’s a much more involved process you can read about on House Beautiful.
How to get tie dye off hands
So you forgot to wear your rubber gloves, or they leaked. It happens to the best of us. If you need some ideas for getting dye off of your hands after you’ve already tried scrubbing them with soap and water, try one of these methods:
- Make a baking soda paste and roll it around on your skin. It should help pull some of the dye out of your skin.
- Rub with a cotton ball soaked in vinegar, rubbing alcohol or nail polish remover.
- Make a solution with laundry detergent and warm water, and soak your hands (use caution with sensitive skin).
- Rub hands repeatedly hand sanitizer to help lighten up the dye.
Does tie dye stain sinks?
It could. We have a utility sink in the garage that we use for all of our crafts and outdoor projects, so I always rinse my tie dye in there. If you have a white porcelain sink, the dye could stain it, but should bleach out.
An alternative is to get a big plastic tub you can wash your dyed fabrics out in. Then you don’t have to worry about staining your sink.
Tips for the first wash
The first wash of a tie dye shirt will be a determining factor how long the colors last. The most important thing to remember is do not wash right away. While most directions say to wait at least 6 hours, I like to let the shirts sit for a full 24 hours before washing to help ensure bright colors that last.
You want to wash only the dyed shirts together with no other laundry in the washing machine the first few times. The excess dye will come out of the shirts and stain any other clothes in the load.
Reverse tie dye
Once you’ve mastered the art of traditional tie dye, you’ll want to take your skills to the next level by making Reverse Tie Dye projects!
How to Tie Dye a Shirt
Supplies
- 1 White T-Shirt - per person
- 6 Rubber bands - per shirt
- Dye solution in various colors
- Empty dye bottles
Tools
- 1 gallon size freezer bag per shirt
- 1 pair of gloves for each person
- 1 Plastic tablecloth
- Plastic Wrap
- Paper towels
- Wire rack
- Sharpie marker
Instructions
- Wash your new shirts in a simple laundry detergent without fabric softener or dryer sheets. Gather your clean shirts and supplies and set them up on a work station outdoors.
- Choose the tie dye pattern for your shirt: Spiral, Stripes or Crumple. Only follow the instructions for your chosen design.
Fold Shirt.
- Spiral Design: Pinch the fabric in the center of the shirt and twist it into a spiral pattern.
- Stripes Design: Pleat your entire t-shirt lengthwise.
- Crumple Design: Crumple the shirt into a flat shape.
Tie Shirt with Rubber Bands.
- Spiral Design: Make pie-shaped sections with the rubber bands.
- Stripes Design: Create sections on the shirt with the rubber bands.
- Crumple Design: Use the rubber bands to hold your shirt in its shape.
Dye Your Tee on a Wire Rack.
- Spiral Design: Dye each section with a different color, saturating the shirt with a good amount of dye in the folds so there aren’t too many white spots. Color both sides of the shirt.
- Stripes Design: Color each section of the shirt, one by one, until all sections are dyed around all sides.
- The best way to keep the dye on the striped shirts from bleeding is to individually wrap each one with plastic wrap.
- Crumple Design. Sprinkle dye across your tee. Make sure it’s well saturated… we go for a splotchy look. Color both sides of the shirt.
- Place each tie dyed shirt into its own sealed plastic bag to keep the dye wet while the colors permeate the fabric. For best results, I recommend waiting a full 24 hours before proceeding.
- While wearing gloves, give the shirts a good wash in running water in the sink to remove excess dye. Rinse until the water runs clear.
- Wash the rinsed shirts in hot water on the largest load setting possible to further set the dye.
- Once they’re washed and dried, you can wear your new tie-dye shirt.