DIY Galaxy Melted Crayon Ornaments
Jump to Directions

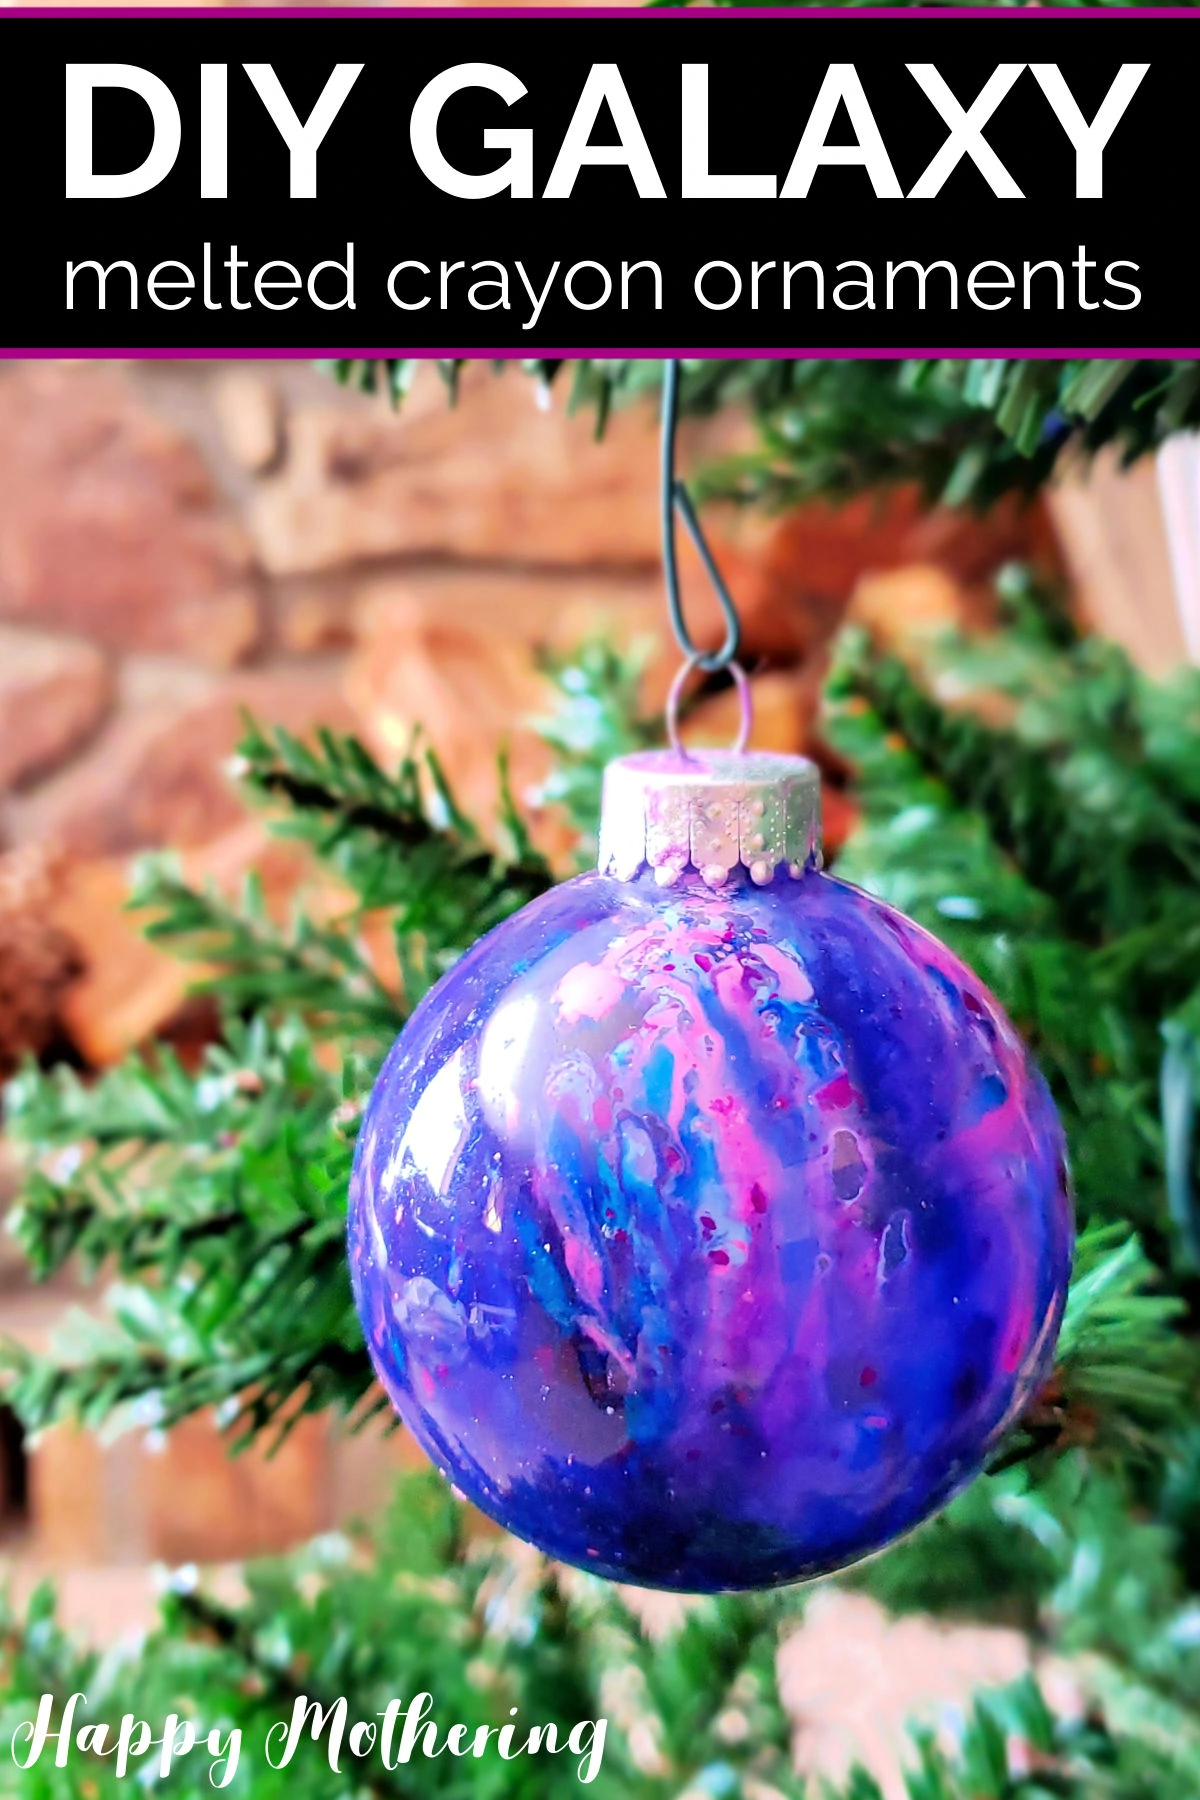
These DIY Galaxy Melted Crayon Ornaments are easy to make with a few simple materials. It’s the perfect Christmas craft to make for your tree or as a beautiful handmade gift for a loved one.
I love making DIY Christmas Ornaments with my daughters. We have so many broken crayons from when they were little, and we’re always looking for a new fun way to use them.
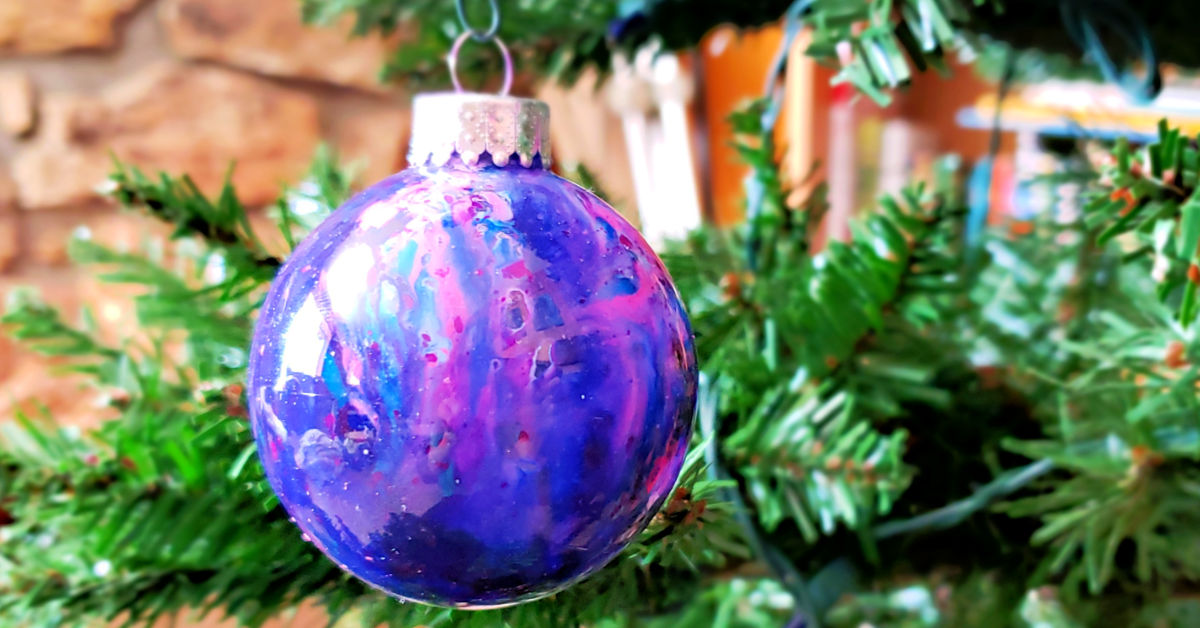
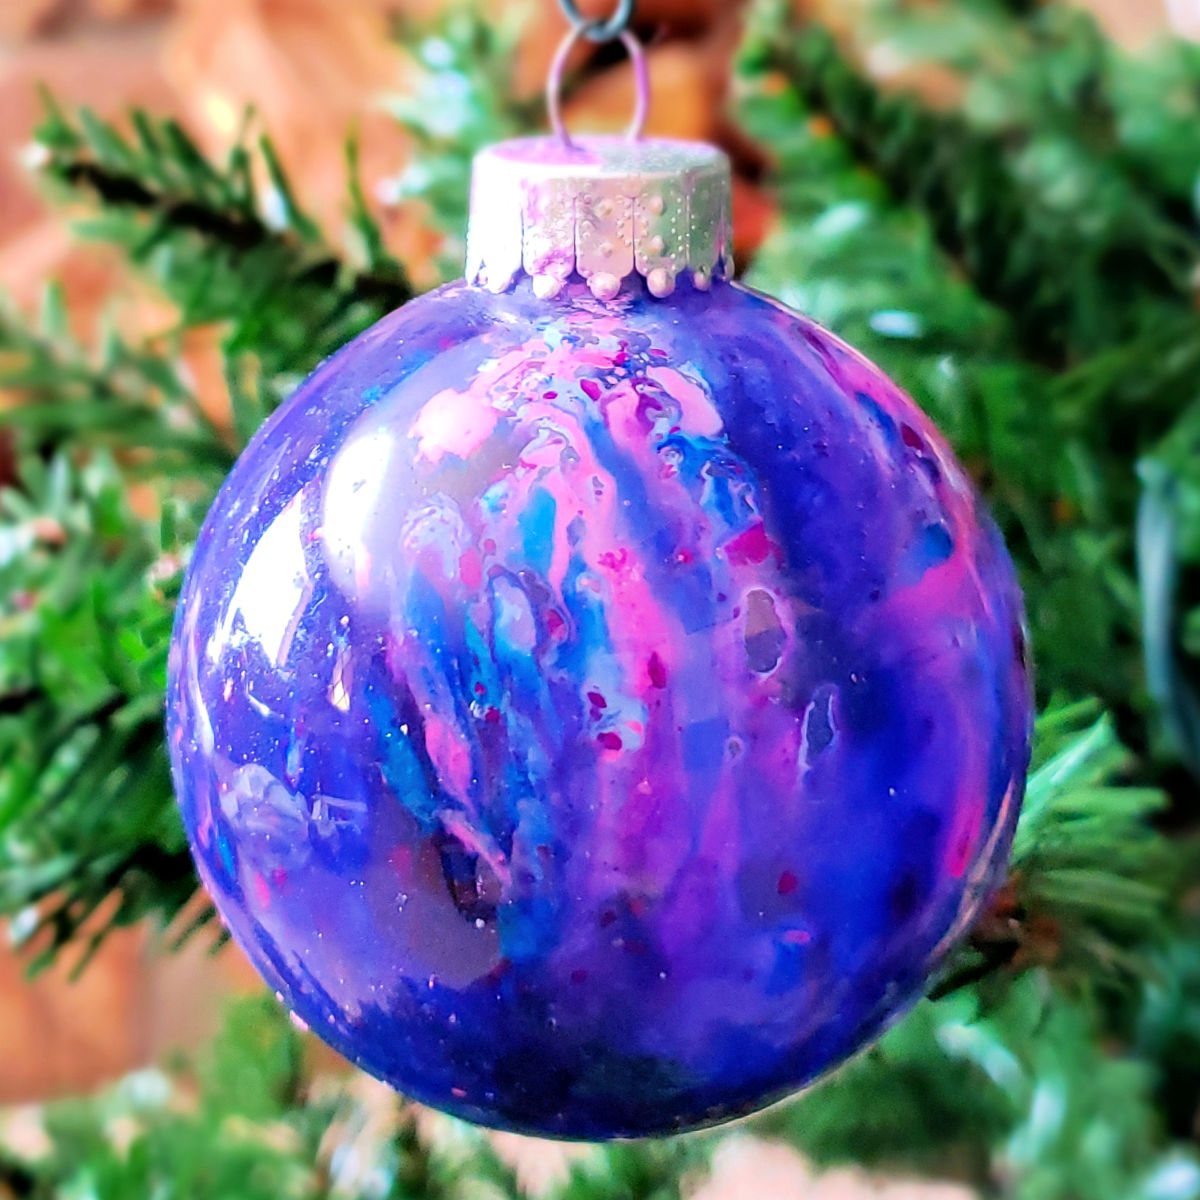
Since I had some empty glass ornaments, we decided to turn them into melted crayon art we can hang on our Christmas tree. While this particular ornament is galaxy themed, the best part about this easy Christmas craft is that you can personalize it by choosing your favorite colors.
Making homemade Christmas ornaments is a great way to spend quality time with your kids during the busy holiday season. So set some time aside, and I’m sure you’ll have so much fun together.
Supplies and Tools
- Clear glass ornaments
- Ornament hooks
- Crayons without wrappers
- Scissors, craft knife, vegetable peeler or other whittling tool
- Paper plate or sheet of paper
- Hair dryer
- Oven mitt
Step-by-Step: How to Make Galaxy Melted Crayon Ornaments
Follow these simple step-by-step instructions to learn how to make DIY melted crayon Christmas tree ornaments.
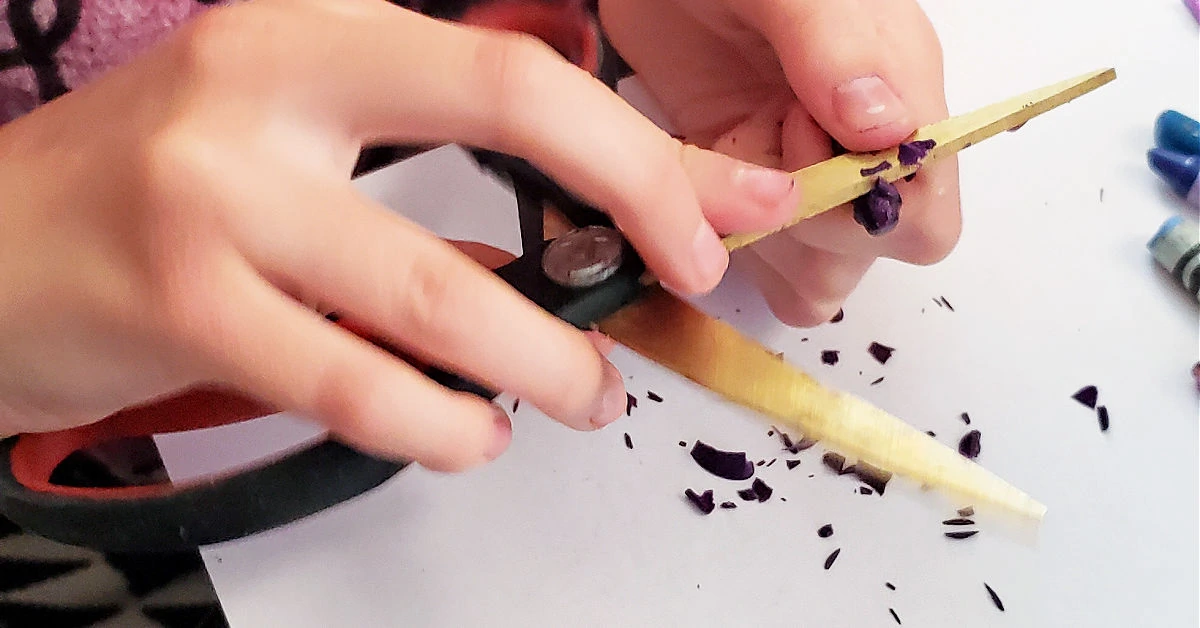
Step 1: Make Crayon Wax Shavings
Choose 3-4 colors of crayon that you’d like to use. This easy melted crayon ornament used a variety of blues, purples and pinks.
After you have your choice of colors, use your whittling tool to shave thin slices of crayon onto a paper plate or piece of paper. Smaller pieces will melt easier than bigger pieces of the crayons.
Make a really good sized pile… you want at least half tablespoon of crayon shavings or more.
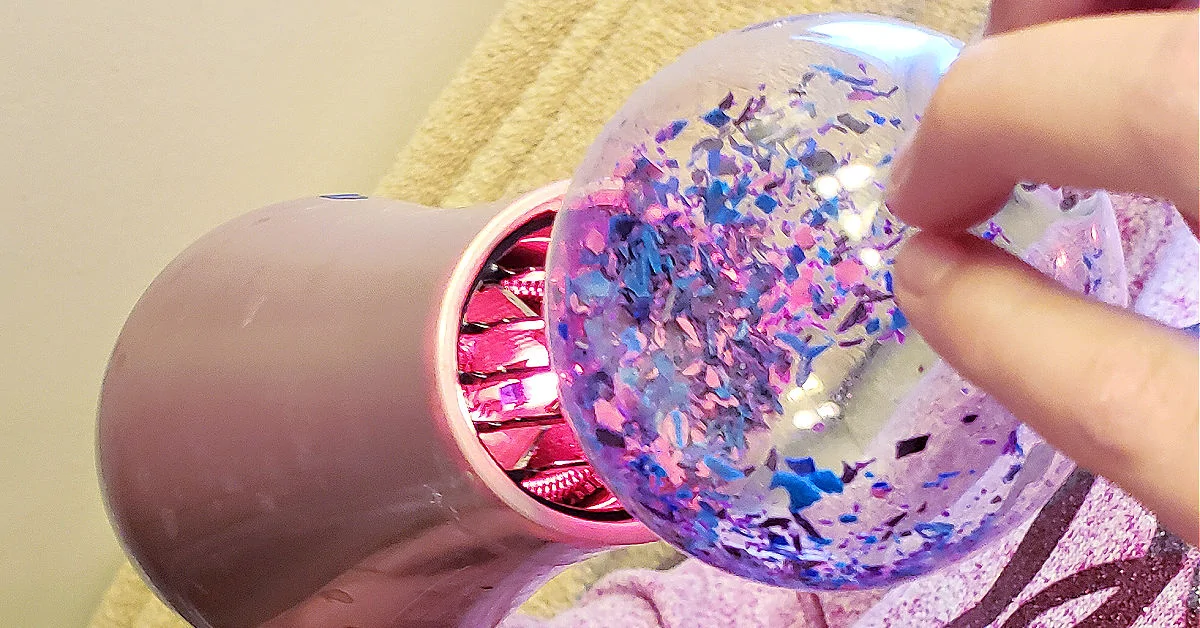
Step 2: Melt Shavings Inside Clear Ornament
Once you have enough crayon shavings for your ornament, pour them into the inside of the ornament. You can use your hands or a small paper funnel – whatever works best for you.
Get out your blow dryer and use it to melt the crayon pieces inside of the glass ornament. We used the high setting and directed it right at the shavings (if it’s too hot, you can wear an oven mitt).
As soon as the layer against the glass starts to melt, twirl the ornament around so the crayon bits are in a new location. Blow dry again until more pieces begin melting, then turn the ornament again. Keep doing this until the entire inside of the ornament is covered in melted crayons.
Would you like to save this?
Step 3: Hang Melted Crayon Ornament on Tree
When you’re happy with how it looks, let the ornament cool, then attach an ornament hook and hang your new ornament on your Christmas tree.
Tips for Making Amazing Melted Crayon Ornaments
Answers to all of your questions about making this fun DIY Christmas ornament craft, including tips and variations.
Can clear plastic ornaments be used?
You want to use glass bulb ornaments for this craft. The plastic kind of clear ornaments aren’t durable enough to hold up to the high heat of a hair dryer and may melt.
Alternative to hair dryers
If you don’t have a hair dryer, you can also place your ornaments filled with crayon bits into the cavities of a muffin tin. Then heat them in your oven on the lowest setting, turning them every couple of minutes as they melt. You’ll absolutely need to use an oven mitt to handle the glass ornaments and swirl them around.
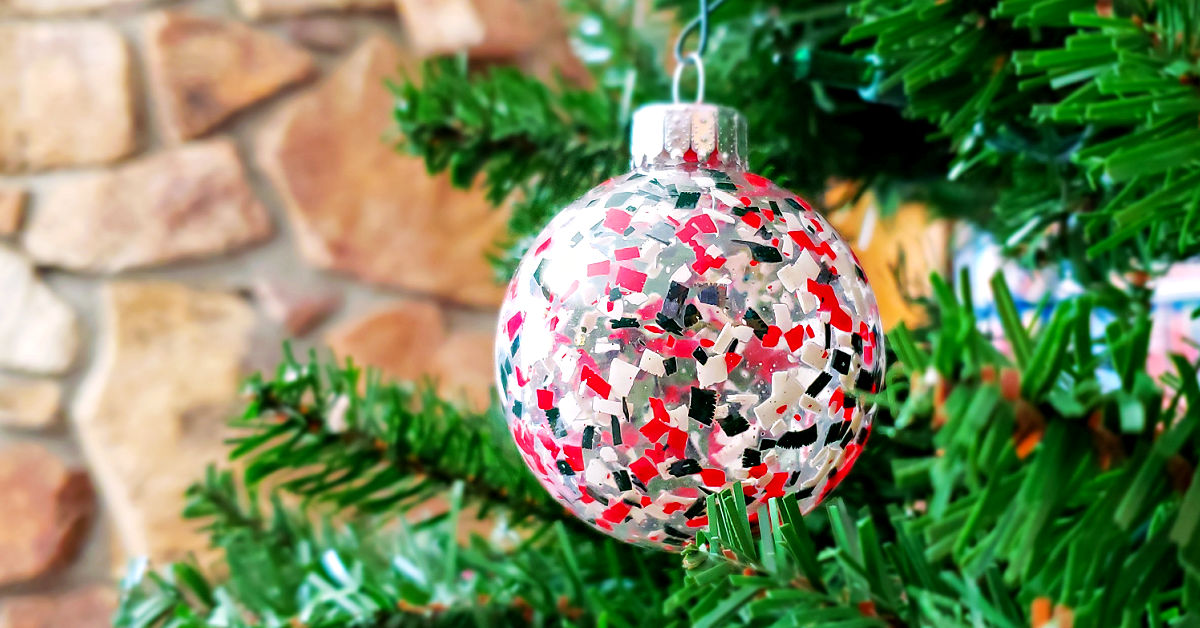
Make speckled ornaments instead
What gives you that swirly galaxy look is blow drying the ornament until the crayon is totally melted. If you want to make speckled melted crayon ornaments, you only blow dry until the pieces melt just enough to stick to the side of the glass.
Keep your work area clean
Since this fun Christmas craft uses pieces of crayons, younger kids will want to help, which means it can turn into a huge mess if you turn your back. I recommend doing this craft in the kitchen over a tile floor if there’s any chance of your carpet getting crayon drippings on it… you don’t want to try to get crayon out of carpet.
It’s best if you can line your work area with garbage bags that can catch the drips and make sure you’re making your pile of shavings onto a paper plate or piece of paper so it’s easy to clean up.
More DIY Christmas Ornaments
If you liked this fun Christmas craft, try making some of these other ornaments for your tree:
DIY Galaxy Melted Crayon Ornaments
Supplies
- Clear glass ornaments
- Ornament hooks
- Crayons without wrappers - blues, purples, pinks or your favorite colors
Tools
- Scissors, craft knife, vegetable peeler or other whittling tool
- Paper plate or sheet of paper
- Hair dryer
- Oven mitt
Instructions
- Choose 3-4 colors of crayon for your colorful ornament (we used blues, purples and pinks). Use your whittling tool to shave small pieces of crayon onto a paper plate or piece of paper. You need at least half tablespoon of crayon bits.
- Pour your crayon shavings into the inside of the bulb using a small paper funnel. Use your hair dryer on the high setting to melt the crayon pieces inside of the glass ornament. Direct the heat right at the shavings (wear an oven mitt if it’s too hot). As soon as the layer against the glass starts to melt a little bit, turn the ornament so the crayon pieces are in a new spot. Keep blow drying until more pieces start to melt, then turn the ornament again. Repeat until the entire inside of the ornament is covered.
- When you’re finished, let the ornament cool, attach an ornament hook and hang on your Christmas tree.