How to Reverse Tie Dye
Jump to Directions
Learn everything you need to know to make amazing Reverse Tie Dye projects. From choosing the right supplies to tying different patterns to the tie dye process, this tutorial will show you how to make professional looking shirts with colorful patterns.

The first time I tie dyed shirts, it was with my Girl Scout troop as a kid. Now my daughters and I have a fun tradition making tie dye projects together.
We decided to take our skills to a whole new level by making our first reverse tie dye project – t shirts. To make them, you first have to tie dye with bleach or a color remover, then color the bleached areas.
Don’t worry… it’s much easier than it sounds! Tulip has some pretty amazing kits you can buy, but you can use a bleach spray too. This simple tutorial will show you how to use each method.
Supplies and Tools
- Black t-shirts
- Reverse tie dye kit that includes:
- Color changing solution
- Rubber bands
- Disposable gloves
- Plastic tablecloth
- Plastic bags and/or plastic wrap
- Washing machine
Step-by-Step: How to Reverse Tie Dye
Follow these simple step-by-step instructions to learn how to reverse tie dye t-shirts with a kit or bleach.
Step 1: Prepare Supplies
Make sure you’re wearing old clothes before starting. Set up your supplies outside or in a well ventilated area.

Step 2: Prepare Shirt
Choose a dry t-shirt that you’d like to reverse tie dye, then tie it into your chosen tie dye pattern. You can use any pattern you like. To do the bullseye pattern, start by grabbing one section of your black shirt and pulling the shirt from that point.

Step 3: Tie Shirt Pattern
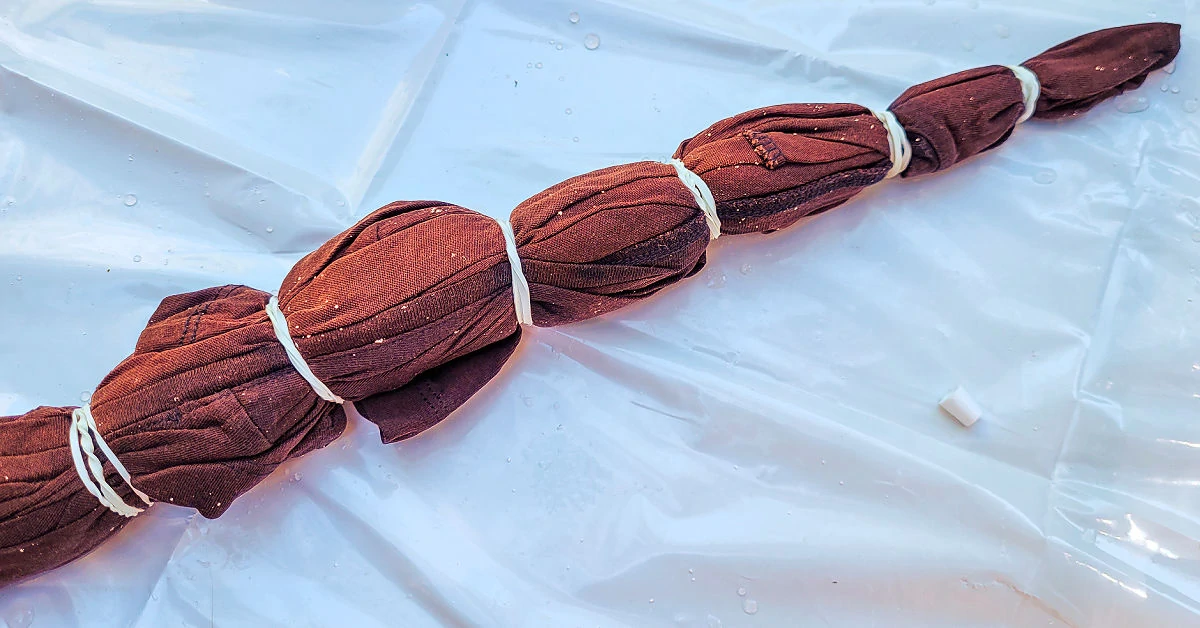
The next step is to take several rubber bands and place them along the shirt to hold it into shape. You can band it as many times as you like.

Where the rubber bands are is where the black color of the cotton shirt will remain after bleaching. So more rubber bands will mean more black remains and fewer rubber bands will mean more bleached areas.
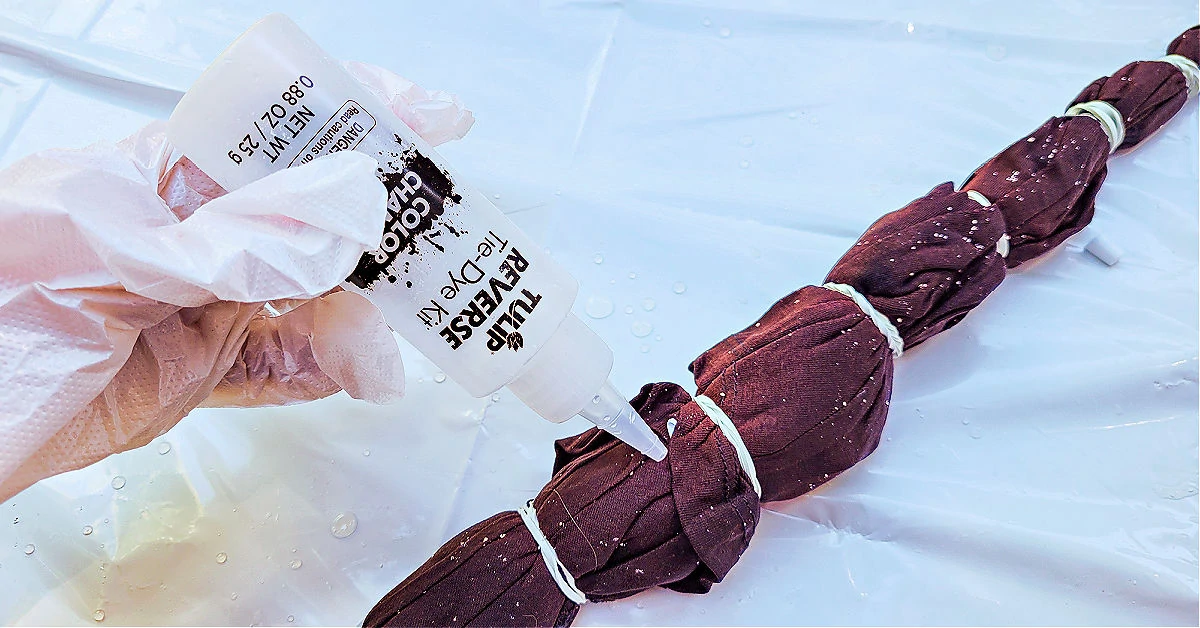
Step 4: Bleach Shirt
You’ll want to wear gloves for this step. Grab your color remover and soak the shirt in it. The more you apply, the more light areas of the shirt you will have to dye and the less you apply, the more black that will remain. Make sure you apply enough that it reaches the inner layers of fabric.
Step 5: Let Shirt Soak
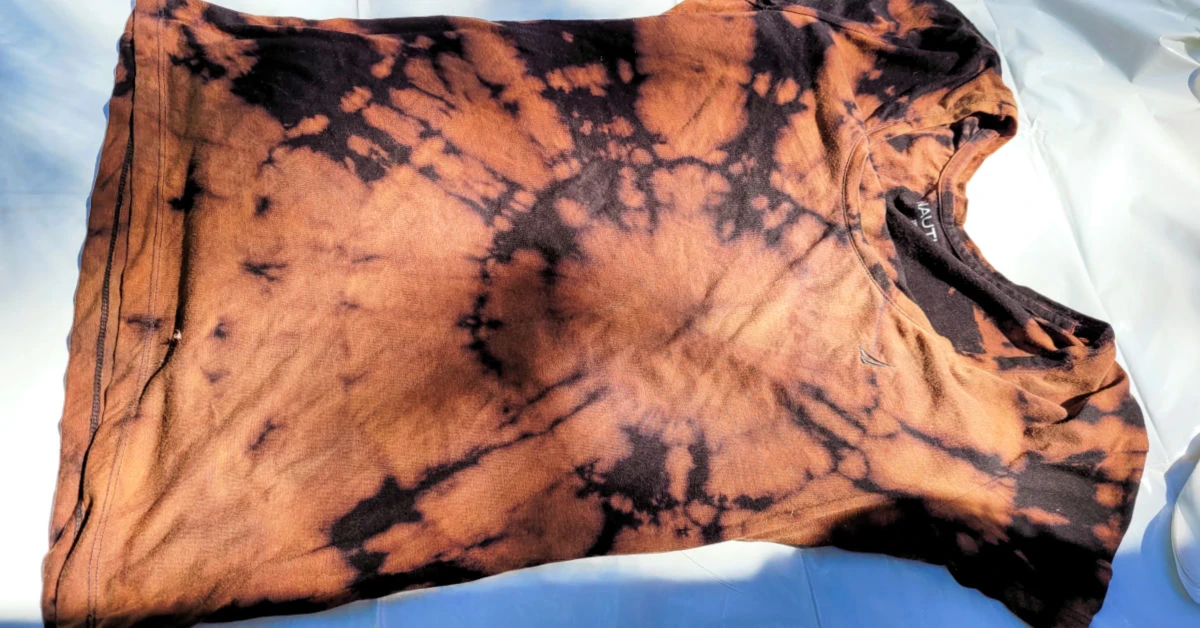
Once you’ve soaked your shirt, let it sit in the sun for 10-15 minutes. When it looks like it has lightened, it’s time to rinse it out.
Step 6: Rinse and Wash
Take your shirt or shirts to the sink and rinse them under cold running water to remove as much of the color remover as possible. I do this in the utility sink in our garage, but you can also do it in a kitchen sink.
Once it’s rinsed well, place your bleached shirts into your washing machine and wash them in hot water. After the wash time is up, remove the shirts from the washing machine. If you want to keep your shirt as is, you can dry it then wear it.
However, if you want to add color, you want to dye it while the shirt is still wet so it accepts the color evenly. Take it back outside to the table you set up and lay it out flat.
Step 7: Tie Dye Bleached Spots
Apply tie dye colors to the bleached-out areas. Make sure to dye both the front and back of your shirts.
Keep in mind that the original color of the shirt will affect the dye colors. So, for example, if you have an orange color to your shirt after bleaching, blue may end up looking more like green than blue.

Would you like to save this?
Step 8: Let Color Set
Place each shirt in an individual plastic gallon bag and let them sit for at least 8 hours for best results. The longer you let them sit, the stronger the colors will be.
If you’re afraid that the colors will mix, you can wrap your shirt in plastic wrap before putting it into the bag. This will help hold the colors in place.

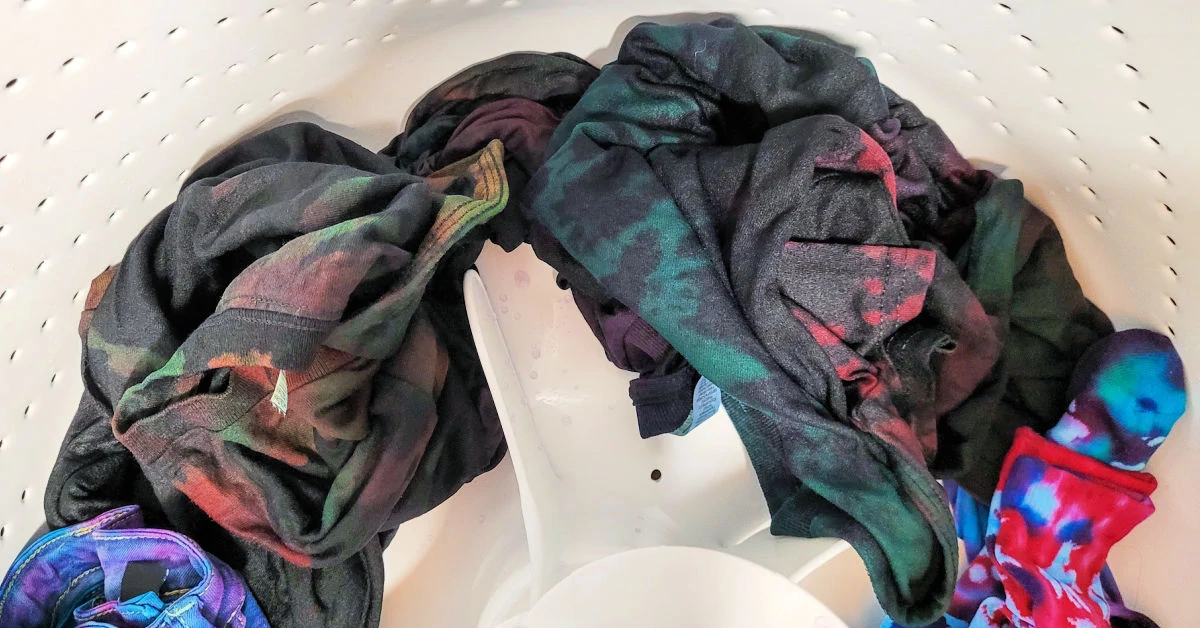
Step 9: Rinse Shirts
Once they’ve had time to sit, take the shirts out of the bags and rinse them individually under cold, running water until the water runs clear.

Step 10: Wash Shirts
Once they’re rinsed well, put the shirts back in the washing machine. Wash your shirts again in cold water and dry on low heat.
Step 11: Wear Your Reverse Tie Dye
Your new reverse tie dyed shirts are ready to wear. I love the cool patterns we made!
Tips for Reverse Tie Dyeing Shirts
Answers to all of your questions about making reverse tie dye shirts with a tie dye kit or bleach.
Where to buy reverse tie dye kit
I like the kits from Tulip. You can buy the Tulip Reverse Tie-Dye Kit on the Blick Art Supplies site or on Amazon. We were able to make 4 t-shirts with the 4 bottles of color changer that came with the kit. If you want to make more than 4 shirts, I recommend buying multiple kits.
Be sure to also pick up a Tulip color kit to color your shirts with after bleaching them. I like the Tie Dye Party Kit, but you can see my favorite tie dye supplies in my Amazon Shop. Be sure to compare prices with Blick Art Supplies as their prices are often lower than Amazon’s.
Best fabric to tie-dye
I typically choose cotton shirts. Natural fibers like 100% cotton, rayon and silk tend to hold color the best when compared to synthetic fibers. You can also tie dye old shirts to give them a new life.
How to tie dye with bleach
If you want to use household bleach instead of a kit, you’ll want to make a solution of chlorine bleach and water at a ratio of 1:1. Then spray bleach solution all over the shirt instead of using the color-changing solution and let the bleach soak for about 20 minutes to remove the color from the shirt.
After bleaching the shirt, you’ll want to neutralize the bleach by pouring hydrogen peroxide on the shirt. This will help stop the bleaching process once you’re happy with the amount of color that has been removed. Then you can rinse the shirt and follow the rest of the directions in the tutorial.
Some people also prefer to use a bleach-based toilet bowl cleaner because it’s easier to control a squeeze bottle than a spray bottle. One of the reasons I love reverse tie dye is because there are so many different ways to do it… no project is ever the same as the last.
Other tie dye patterns
You can use this reverse tie dye technique with any of your favorite tie dye patterns. Check out my post on How to Tie Dye Shirts to see how to tie more patterns.
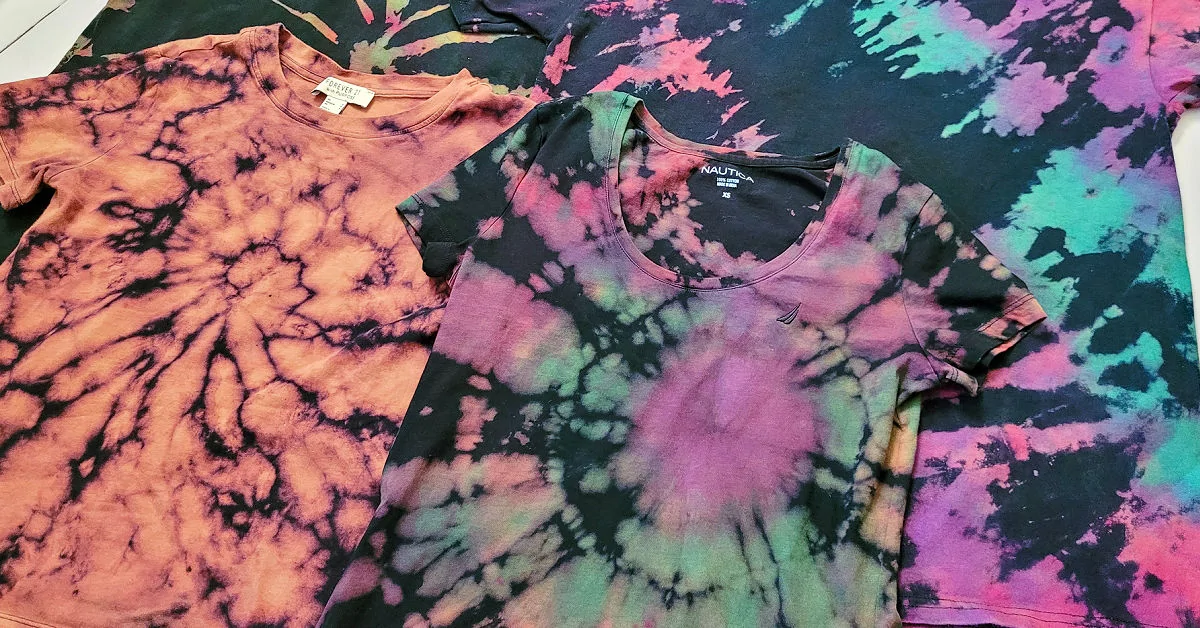
Here are three examples of reverse tie dyed shirts that we made using different methods:


Reverse tie dye any colored shirt
You can use this same process on any solid color fabric, not just black fabrics. If you want to tie dye white t-shirts be sure to check out my post on traditional tie dye.
Tie dye socks
If you enjoyed tie dyeing these shirts, be sure to check out my tutorial on how to tie dye socks.

Reverse Tie Dye Shirts
Supplies
- Black t-shirts
- Color changing solution - or bleach solution
- Rubber bands
- Disposable gloves
- Plastic tablecloth
- Plastic bags - and/or plastic wrap
- Color tie dye kit
Tools
- Washing machine
Instructions
- Gather your supplies and set them up outside or in a well-ventilated area.
- Form a dry shirt into your chosen tie dye pattern. For a bullseye pattern, grab one section of your shirt and pull the fabric up.
- Tie rubber bands along the shirt.
- Soak the shirt in the color remover.
- Let it sit in the sun for about 10-15 minutes, or until the color has lightened.
- Rinse the bleached shirts well, then place them into your washing machine and wash them in hot water. Remove from the washer. You can either stop here and dry your shirt, or you can color the shirt while still wet. If you want to color the shirt, lay it flat on the table while still wet.
- Apply dye to the bleached areas on both sides of the shirt.
- Place shirts in plastic bags and let them soak for 8 hours or longer.
- Remove the shirts from the bags and rinse them under cold, running water until the water runs clear.
- Wash your shirts again in cold water and dry on low heat.
- You can wear your new reverse tie dye t-shirts.

What a great tutorial! I’ve never done reverse tie-dyeing but I want to try it eventually.
I hope you enjoy it!