DIY Essential Oil Diffuser Necklaces with Baked Clay
Jump to Directions


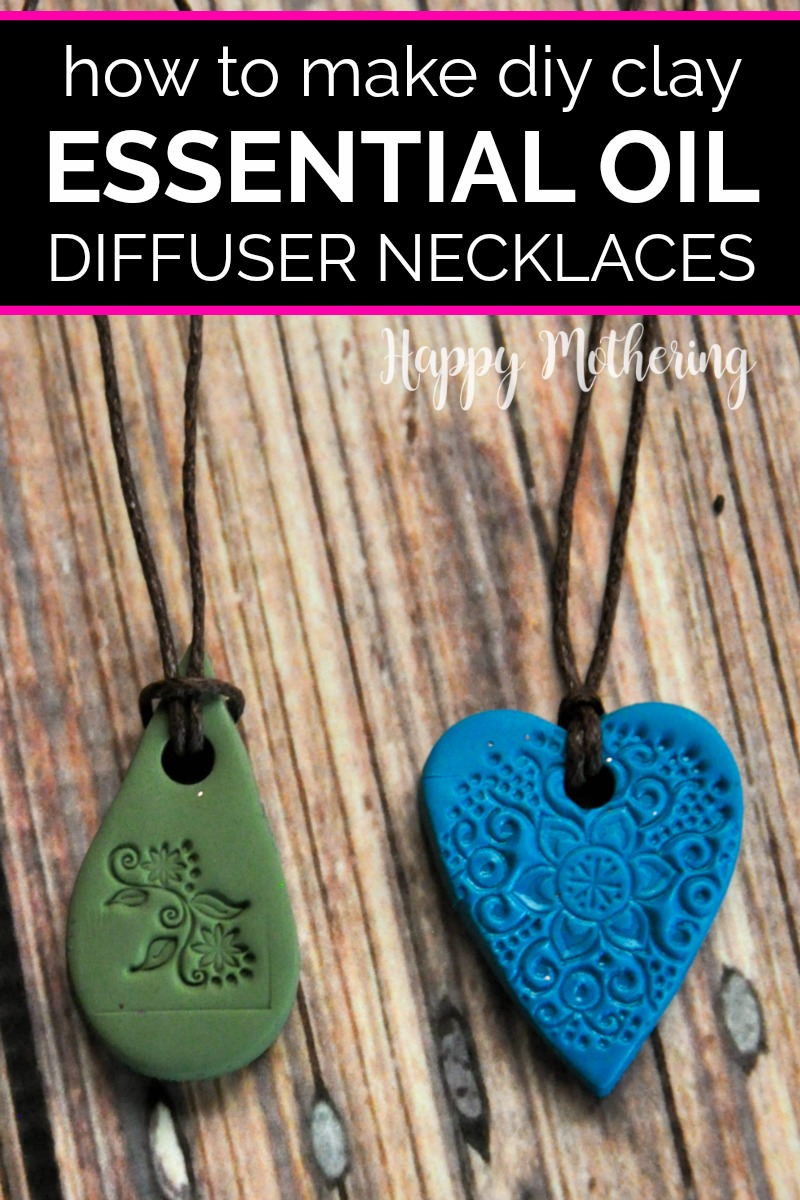
Want a beautiful essential oil diffuser necklace without the high price? Learn how to make DIY Baked Clay Diffuser Necklaces in this easy tutorial.
Wearing an essential oil diffuser necklace is one of my favorite ways to enjoy essential oils on the go. They’re simple and pretty.
If you don’t want to make them, you can also buy a diffuser necklace, but it’s not as much fun as making them. And making them is way easier than you might think!
All you need is some clay, stamps and beading twine to make these adorable baked clay diffuser necklaces. You can use polymer clay for vibrant colors or try air dried terracotta for a more natural look.
Would you like to save this?
I love using clay you can bake to dry because the pendants are ready for use very quickly. But if you’re looking for the best clay to use as an essential oil diffuser medium, terra cotta is a better choice (it’s available in air dry or oven baked forms).
And you can totally skip the essential oils and they’re still really cute to wear! Great for birthday parties, classroom events and more.
DIY Baked Clay Essential Oil Diffuser Necklaces
Supplies
- Polymer clay - in colors of your choice
- Mini cookie cutters
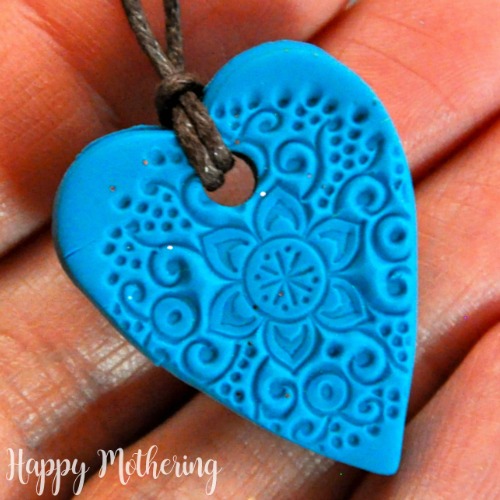
- Floral stamps - or your favorite stamps
- Beading twine
Tools
- Rolling pin
- Small straw (we used one from a juice box)
- Baking sheet
- Parchment paper
Instructions
- Remove the clay from the package, and roll it out using a rolling pin until it’s around 1/4″ thick.
- Cut shapes out of the clay with the cookie cutters, just like you would when baking cookies.
- Stamp a pattern onto the pendant, then use the straw to make a hole where the pendant will be tied to the string.
- Transfer the pendant to the parchment paper lined cookie sheet, then repeat until you’ve made all of your clay pendants.
- Bake the pendants according to the package directions and allow to cool completely.
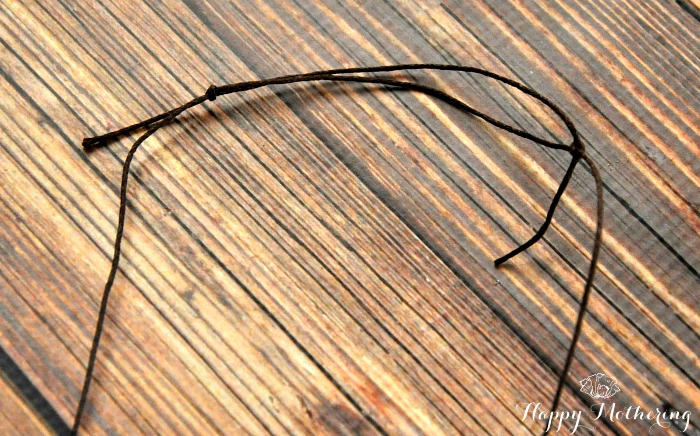
- Once they’re cool, cut a piece of twine to your desired length – go a little longer than you think you want because I’ll show you how to make them adjustable.
- Fold the twine in half, then insert the loop through the hole on the pendant.
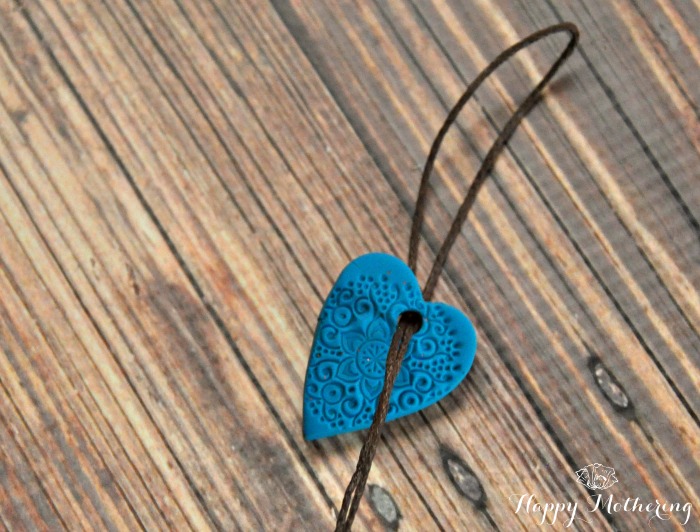
- Take the other end and stick it through the loop.
- Then tighten and adjust.

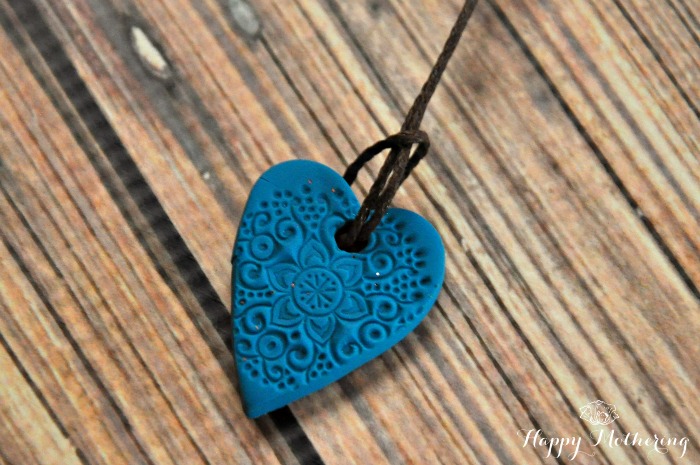
- Next, take one end of the string and tie it to the other end. You should be able to move the knot up and down the string it’s tied to.
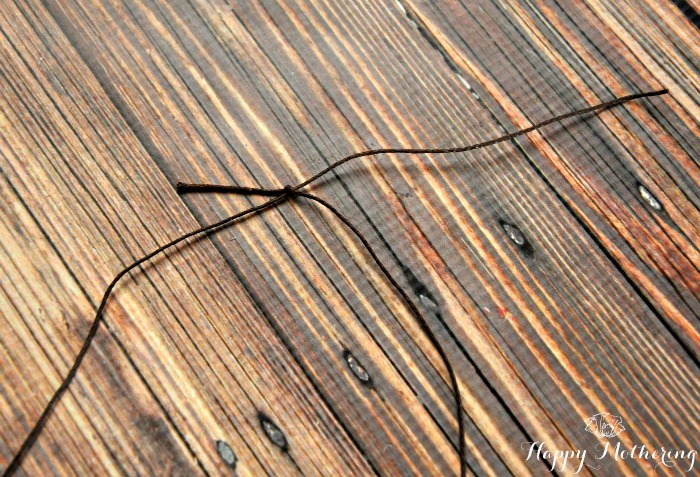
- Then, tie the other end to the other string, again making sure you tie it so the knot will move up and down.To adjust, all you have to do is move the knots up or down to make the necklace larger or smaller.

This sounds like a good idea for a “room freshener”, a light scent for a small room, closet, bathroom. Could be made larger and just reapply essential oil as needed.
Just an idea, I’m really enjoying your website.
marjie
Absolutely. A lot of people also like to hang them from their rear view mirrors as car fresheners!