How to Make and Can Chicken Stock on the Stove Top
Jump to Recipe
Chicken stock is one of the easiest kitchen basics to make at home and it’s easy to can for later too. All you need are chicken bones, water, sea salt and apple cider vinegar to make several quarts of stock.

Making chicken stock on the stove top is easy and rewarding. You just need chicken bones, water, apple cide vinegar and salt to get started.
Canning the stock lets you keep it for longer. It’s a smart way to make sure you always have homemade stock on hand.
This recipe is all about simplicity and the joy of cooking at home. Every jar of stock you make is a little victory in your kitchen!
Ingredients
- As many chicken bones as you have
- 10 quarts of water
- 1 teaspoon of apple cider vinegar
- 1 teaspoon of sea salt
- 3 tablespoons white vinegar (for canning)
Equipment
- Stock Pot or Dutch Oven
- Fine mesh strainer
- Mason jars
- Pressure canner
- Jar lifter
- Headspace measurement tool
Step-by-Step: How to Make and Can Chicken Stock on the Stove Top
Follow these simple step-by-step instructions to learn how to make the best homemade chicken stock on your stove top, then preserve it in a pressure canner.
Step 1: Add Ingredients to Pot
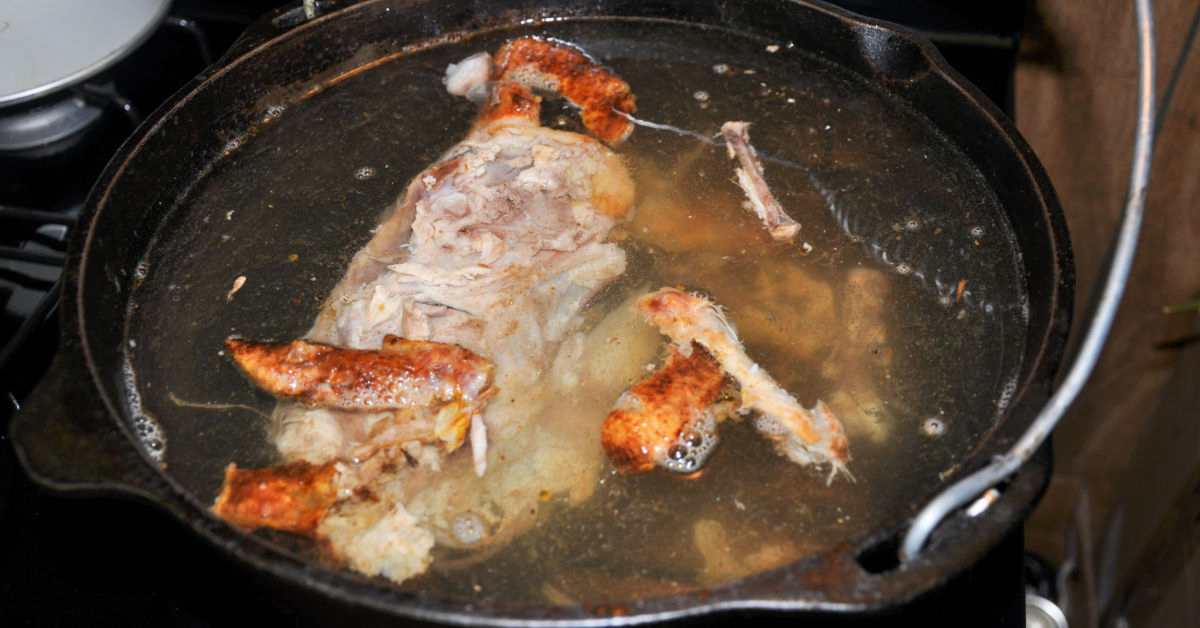
Put the chicken carcass and bones into a large stockpot or cast iron dutch oven, cover with water and add 1 teaspoon of apple cider vinegar and 1 teaspoon of sea salt.
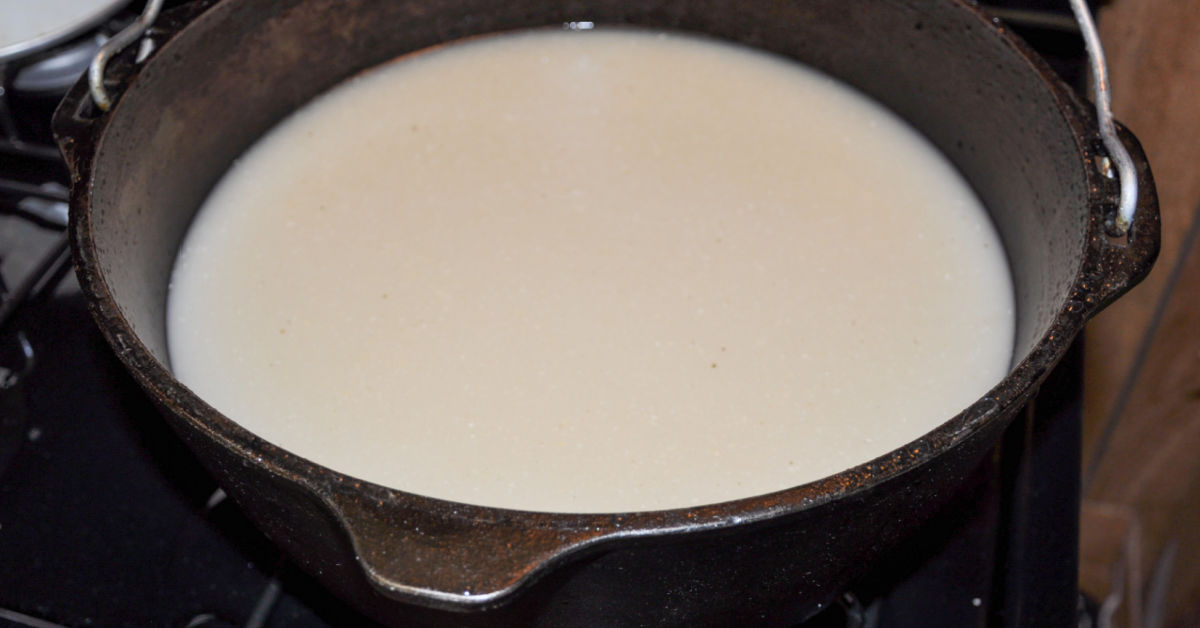
Step 2: Boil then Simmer Ingredients
Bring it to a boil over high heat, then turn it down and allow it cook on a gentle simmer for 8-12 hours. Add more water as needed to keep the bones covered. I usually add water that has already been boiled.
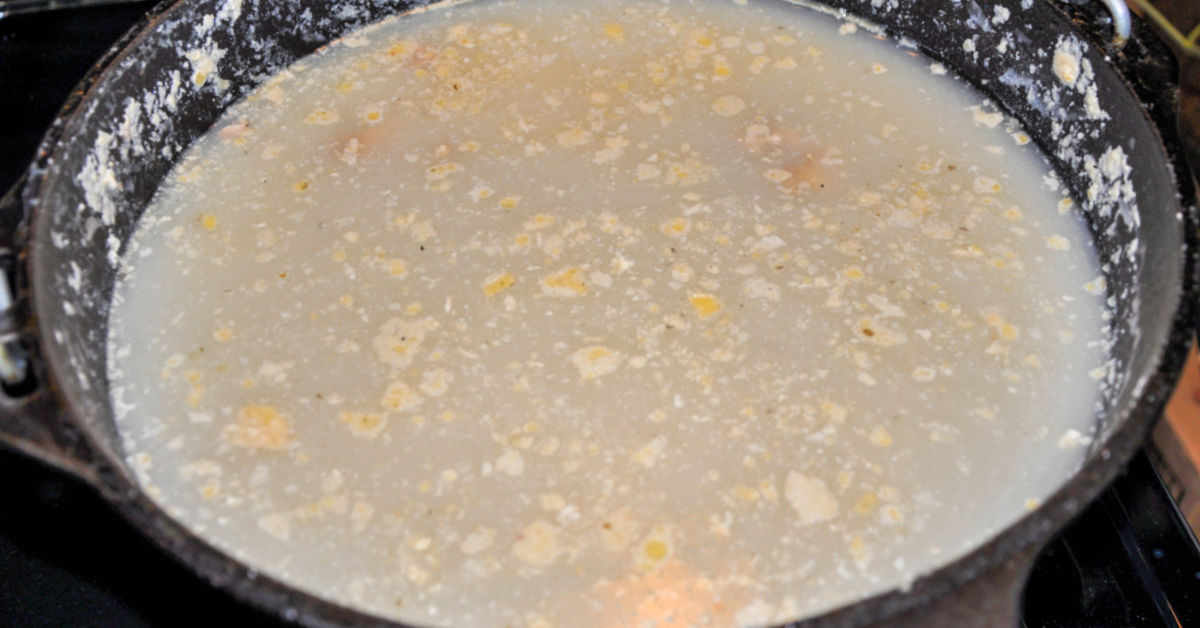
Step 3: Strain Bones from Stock then Refrigerate
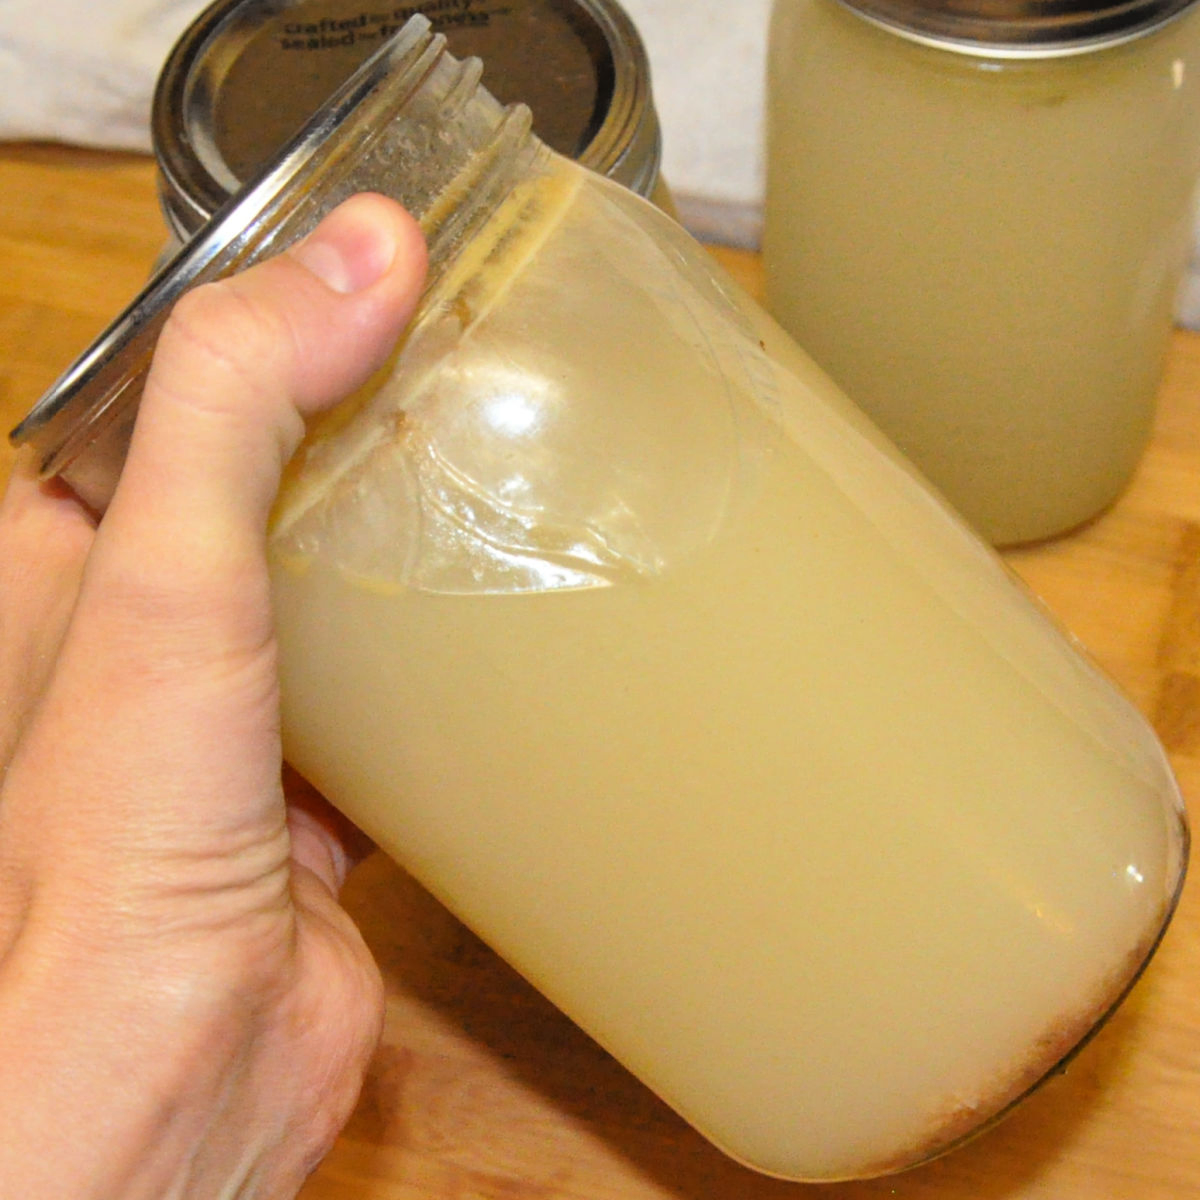
Strain the stock through a fine mesh strainer into a large bowl or another pot. You can use it right away or refrigerate overnight to skim more fat out.
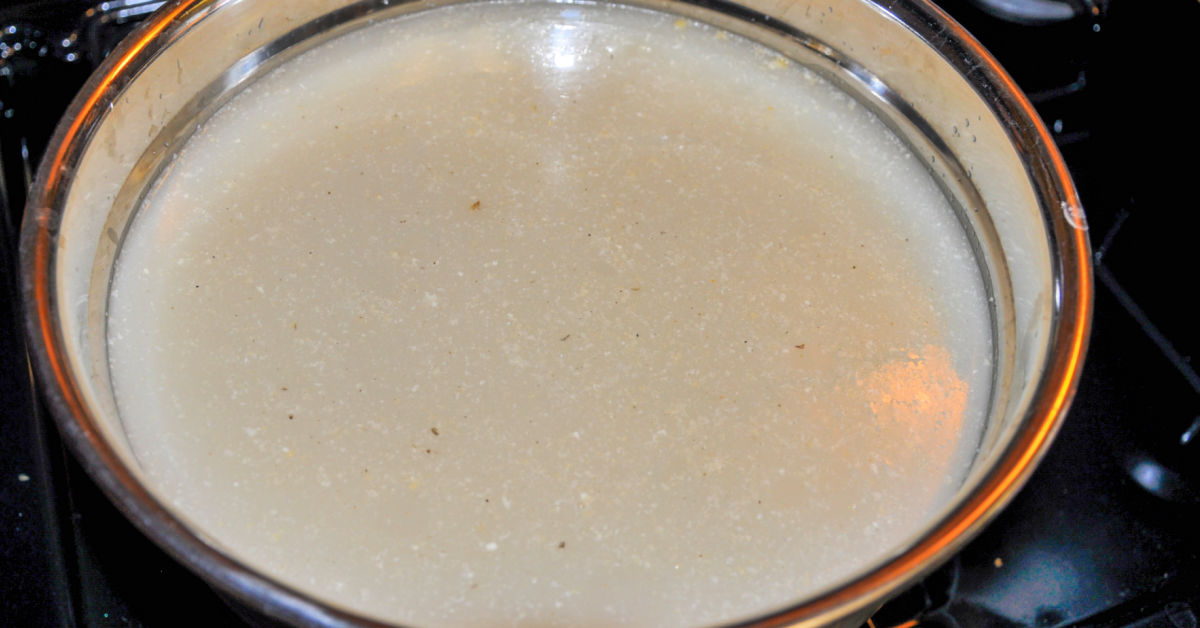
Step 4: Strain or Skim Fat Again Then Boil
After pulling it out of the refrigerator, strain it once more through a fine-mesh strainer into a stock pot or dutch oven if you’ll be canning it or into mason jars if you’ll be using it soon or freezing it.
Once it’s strained, bring your chicken stock to a boil so it’s ready to can. If you’re not canning it, you can put it in jars in the fridge or freeze it according to the directions in the tips section.
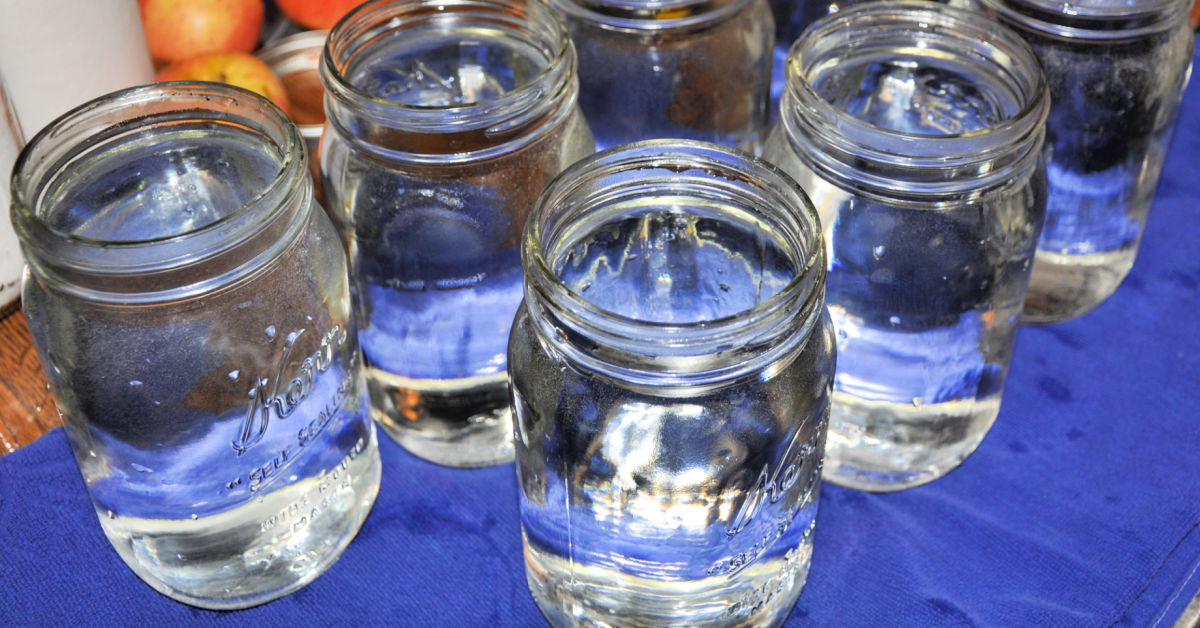
Step 5: Sterilize Jars and Prepare Canning Tools
While you’re waiting for your chicken stock to come to a boil, clean your jars and fill them with hot water. Set them out on a towel with your other canning tools. At the same time, put all of your lids into a small pan and boil them.
You’ll also want to put your pressure canner on your stove and put 3 quarts of water and 1 tablespoon of vinegar in it. Be sure the rack is in the canner. I like to start getting it heated up now.
Please note: You cannot can chicken stock in an Instant Pot. You need a pressure canner. See notes below recipe for more info.
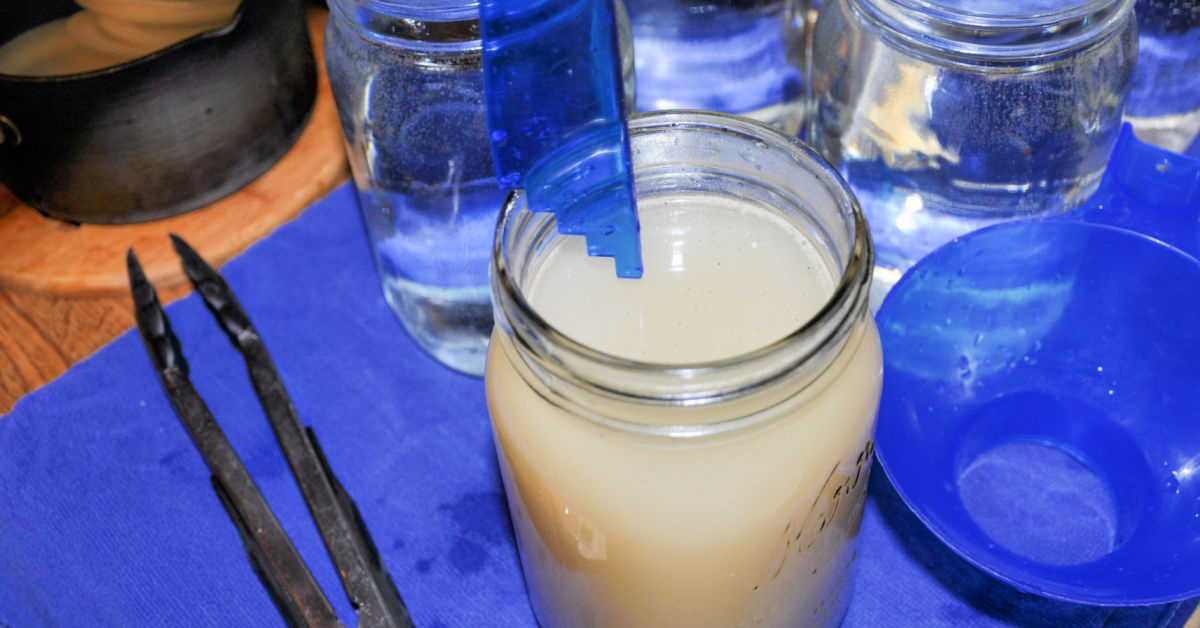
Step 7: Add Hot Chicken Stock to Sterile Jars
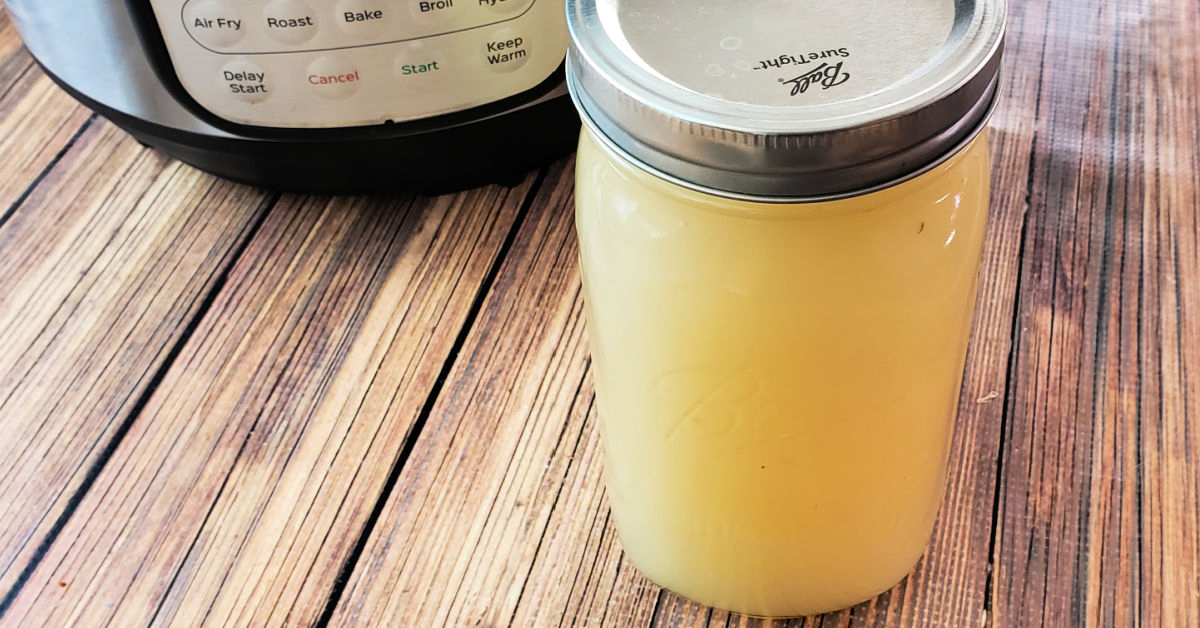
After your chicken stock comes to a boil, dump the water out of one jar and fill it with chicken stock. Use your headspace measurement tool to be sure you have 1-inch of headspace.
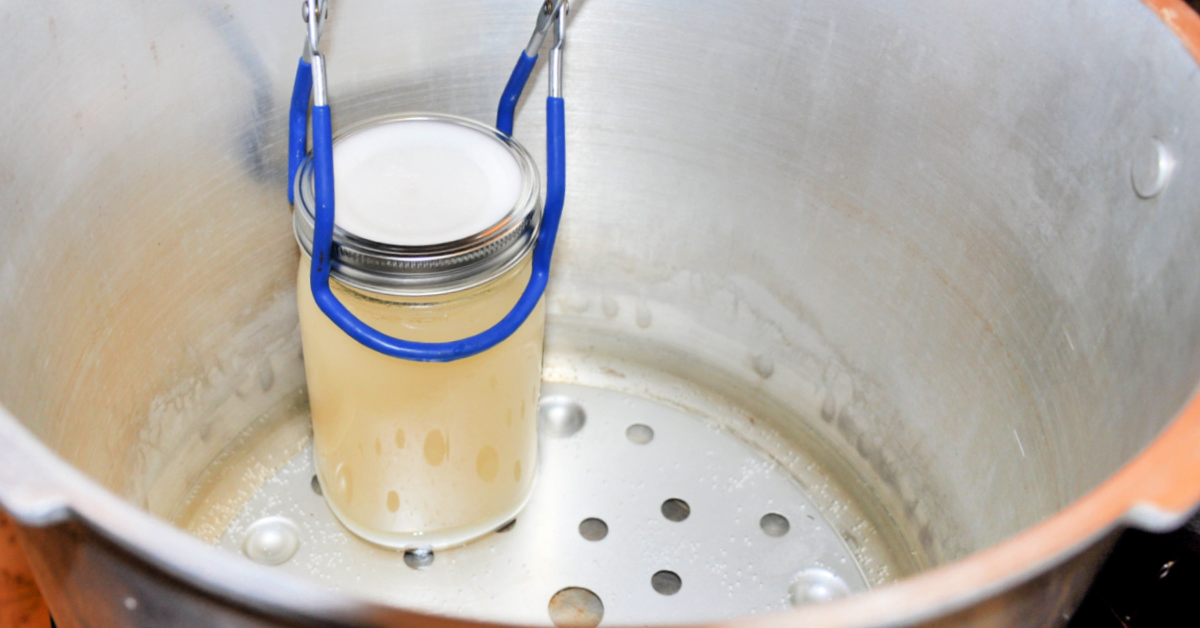
Step 8: Seal Jars and Place in Pressure Canner
Then use a damp towel to wipe the top of the jar. Carefully place the lid over the jar and screw the band on to fingertip tight. If you’re using the Tattler reusable lids as shown, be sure to follow their directions precisely. Regular canning lids work perfectly fine too. Using your jar lifter, move the jar to your pressure cooker.
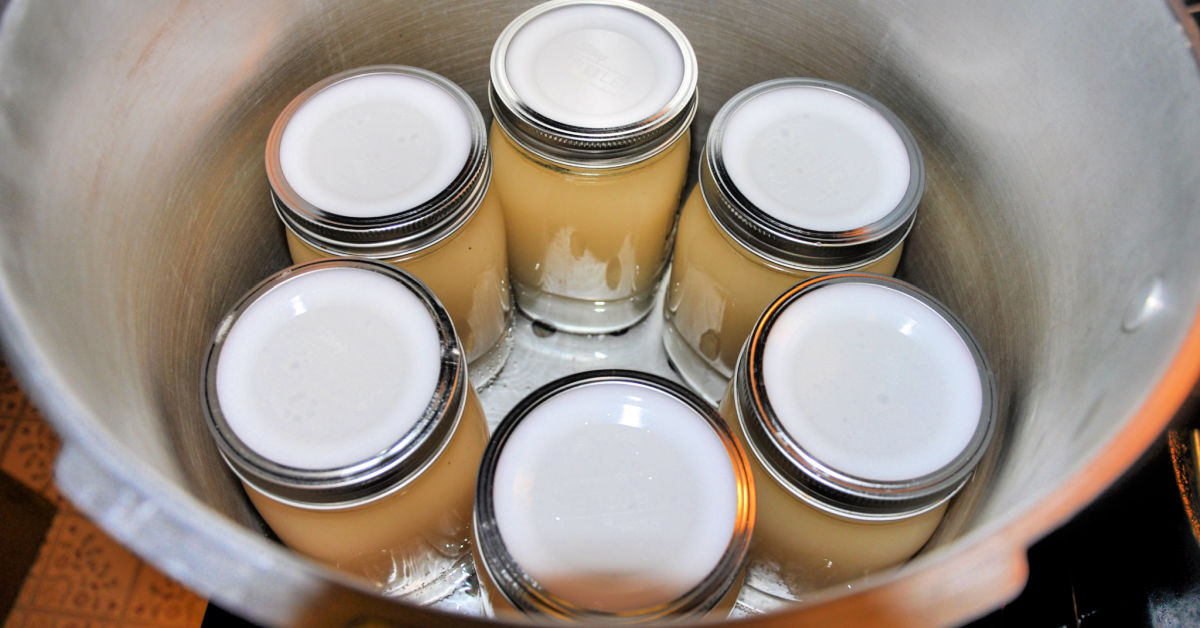
Step 9: Seal Jars, Place in Pressure Canner and Can
Repeat with each of your jars until you’re out of stock or your canner is full. Mine holds 7 quarts, but I only had 6 quarts of stock.
For precise cooking times and pressure levels, follow the directions that come with your pressure canner. Be sure to make sure to look at the directions for the sizes of jars you’re using and your altitude.
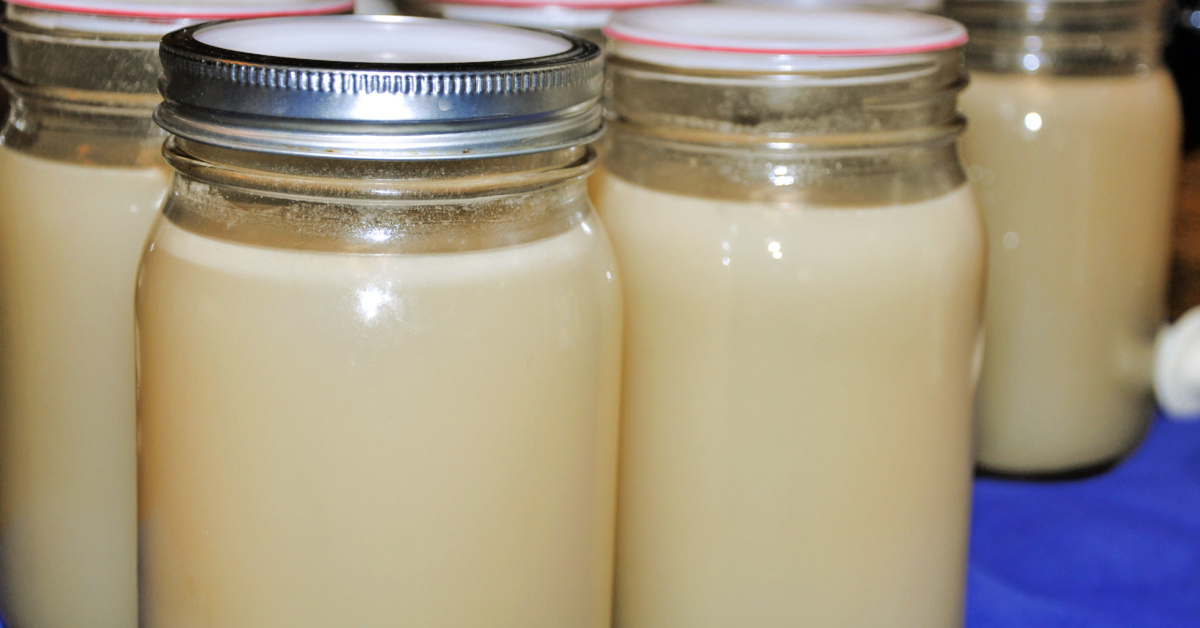
Step 10: Remove Sealed Jars From Pressure Canner
Once you’re ready to remove the jars from your canner, use the jar lifter to transfer the jars back to the towel (you don’t want to place them directly on your counter). After they are completely cooled (usually overnight), remove the bands, check the seals to be sure they took, label them and move them to your pantry or food storage.
Tips for Making Homemade Chicken Stock
Answers to all of your questions about making and canning chicken stock on the stove top, including tips, substitutions, variations and uses.
Chicken stock vs broth.
I’m often asked if chicken stock is the same as chicken broth. Chicken stock is usually made from bones, whereas chicken broth is made from meat.
Would you like to save this?
Thanks to gelatin from the leftover bones (especially when you use whole chicken carcasses), chicken stock is usually a bit thicker with a richer flavor than broth. It’s okay to substitute broth for stock and vice versa in most recipes.
I personally prefer making stock because it uses bones, which I’d discard otherwise. I do sometimes add leftover meat into the pot when I’m making bone broth. It’s a great way to reduce waste and it does add to the depth of flavor.
You can use these same methods for making chicken broth with meat instead of bones. The easiest and fastest way to make broth is to pick up a rotisserie chicken from the store and use that.
How long to simmer chicken stock?
How long you simmer your stock will affect the final product. The longer and slower you simmer it, the more gelatin it will contain. I’ve been known to gently simmer mine for 24 hours!
Other ways to make homemade stock
While making it on the stove top is the traditional way to make chicken stock, you can also try making stock in the Instant Pot if you’re after the easiest way to make quick chicken stock. However, it doesn’t produce the same amount of gelatin since it’s pressure cooked and not simmered.
If your goal is thick stock that you don’t have to stand over all day and not, then you’ll get amazing chicken stock using the slow cooker method. Yes, a crock pot takes longer, but it is worth it for how well it gels.
What’s the purpose of adding apple cider vinegar?
The vinegar helps pull the minerals from the bones into your stock. I find that I end up with a much richer, thicker, more flavorful stock when using ACV.
How to make chicken stock taste better?
Chicken stock can be bland if it’s not seasoned. I like to add salt, pepper and garlic at the end of cooking.
However, just like you save bones from roast chicken, you can also save veggie scraps in a freezer bag to toss in with your homemade broth. Some of the best things to save are carrot tops, celery ribs and tops, onion scraps, etc.
You can also add fresh chopped onion, carrot, celery, garlic, bay leaves and more into the pot with the bones if you don’t have any saved. I often can chicken stock with plain flavors that I can dress up when I make soup.
Why strain stock?
Straining stock is an important step. I use a fine-mesh strainer, once the fat has cooled and risen to the top, to be sure all bone fragments and excess fat are removed.
If you’re canning stock, never skip this step or the jars may not seal properly. It’s also best to make sure the excess fat is removed when freezing stock. If you’re making soup that day or plan to use the stock soon another way, it’s okay to leave the extra fat.
Regardless, this is the fine mesh strainer I use to strain stock in my kitchen. You want one that will easily rest in the top of your stock pot to make straining easier. It should be sturdy and not too large or too small for the opening of your pot.
Pressure canning vs water bath canning.
When canning chicken stock, it’s important to use the pressure canning method as water bath canning low acidity foods like stock is not safe. And no, you cannot safely use an Instant Pot for pressure canning.
If you have questions about any of the tools I use to pressure can chicken stock, be sure to read my post on canning supplies.
How long does chicken stock last in the fridge?
Chicken stock does go bad, so it’s important to use it within 2-3 days of making it. If you won’t use it right away, I recommend canning it or freezing it.
What to do with chicken stock?
Chicken stock has so many uses! Of course you can use it in traditional ways like in chicken noodle soup. But there are so many other things to do with chicken stock.
- Egg Drop Soup
- Gluten Free Chicken Pot Pie
- Instant Pot Chicken Fried Rice
- Gluten Free Gravy
- Chicken Enchiladas
Can you drink chicken stock?
Absolutely. I love drinking chicken stock in the winter months when it’s cold outside. Just heat a little bit up on the stove, pour it into a mug and enjoy.
Can you freeze chicken stock?
There are 2 ways I freeze chicken stock. The first is to freeze it in wide mouth pint jars, which hold around 2 cups. You need to make sure the mason jars you choose are freezer safe and be sure to leave some headspace for the stock to expand.
The second way is to freeze chicken stock cubes in ice trays. This method is great because it’s fast and easy to melt down cubes when you need them. Just transfer the frozen cubes to freezer bags or freezer safe containers for storage.
Freezing chicken stock is great if you have the extra freezer space because you don’t have to take the time to can it.
How to store chicken stock?
I use mason jars to store my chicken stock, no matter which method I use for making it. I keep my canned chicken stock in our pantry and a few jars frozen in the freezer. That way I can just grab a jar when I need it.
If you don’t have proper shelving for food storage, these really cool mason jar storage containers can be used to stack stock and other canned goods (like canned tomatoes). If your storage space is smaller, these storage trays are a great option too.
How do I make it into a concentrate?
To make a chicken stock concentrate, I recommend using the stove top method used in the chicken stock recipe above. Instead of adding more water as it simmers down, just let it keep cooking until it’s super concentrated.
After refrigeration, it should be the consistency of jello. You’ll save space and get a stronger flavor than using normal stock, but you’ll need to freeze concentrates for long term storage vs canning.
Can I make it into chicken stock powder?
You can make powdered chicken stock by dehydrating your homemade stock. Pour it into a baking dish and place in your oven at 170˚ F (or the lowest temperature setting for your oven). Cook for about 8 hours or until the stock becomes crispy, checking it regularly.
Let it cool, be sure it’s very dry then grind it down into a powder and store in an airtight jar. It can be used in place of chicken bouillon powder.
Can I make beef stock this way?
Beef stock is made the same way that chicken stock is. Choose bones with some marrow for when making beef stock if you want the best flavor.
I also use this same process for making stock with our Thanksgiving turkey. One turkey makes so much stock!
Homemade Chicken Stock Recipe
Ingredients
- Chicken bones - as many as you have
- 7 quarts filtered water - or enough to fill your pot
- 1 teaspoon apple cider vinegar
- 1 teaspoon sea salt
Equipment
- Stock Pot or Dutch Oven
- Fine mesh strainer
- Mason jars
- Pressure canner
- Jar lifter
- Headspace measurement tool
Instructions
- Put the chicken carcass and bones into a large stockpot or cast iron dutch oven, cover with water and add apple cider vinegar and sea salt.
- Bring it to a boil over high heat, then turn it down and allow it cook on a gentle simmer for 8-12 hours. Add more water as needed to keep the bones covered. I usually add water that has already been boiled.
- Strain the stock through a fine mesh strainer into a large bowl. You can use it right away or refrigerate overnight to skim more fat out.
- After pulling it out of the refrigerator, strain it once more through a fine-mesh strainer into a stock pot if you'll be canning it or into mason jars if you'll be using it soon or freezing it. Bring your chicken stock to a boil.
- While you’re waiting for your chicken stock to come to a boil, clean your jars and fill them with hot water. Set them out on a towel with your other canning tools. At the same time, put all of your lids into a small pan and boil them.You’ll also want to put your pressure canner on your stove and put 3 quarts of water and 1 tablespoon of vinegar in it. Be sure the rack is in the canner. I like to start getting it heated up now.Please note: You cannot can chicken stock in an Instant Pot. You need a pressure canner. See notes below recipe for more info.
- After your chicken stock comes to a boil, dump the water out of one jar and fill it with chicken stock. Use your headspace measurement tool to be sure you have 1-inch of headspace.
- Then use a damp towel to wipe the top of the jar. Carefully place the lid over the jar and screw the band on to fingertip tight. If you’re using the Tattler reusable lids as shown, be sure to follow their directions precisely. Regular canning lids work perfectly fine too. Using your jar lifter, move the jar to your pressure cooker.
- Repeat with each of your jars until you’re out of stock or your canner is full. Mine holds 7 quarts, but I only had 6 quarts of stock.For precise cooking times and pressure levels, follow the directions that come with your pressure canner. Be sure to make sure to look at the directions for the sizes of jars you're using and your altitude.
- Once you're ready to remove the jars from your canner, use the jar lifter to transfer the jars back to the towel (you don’t want to place them directly on your counter). After they are completely cooled (usually overnight), remove the bands, check the seals to be sure they took, label them and move them to your pantry or food storage.