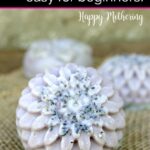
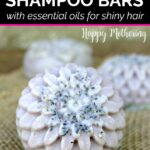
Shampoo Bar Recipe without Lye
Jump to Directions
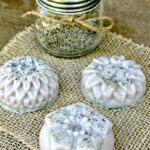
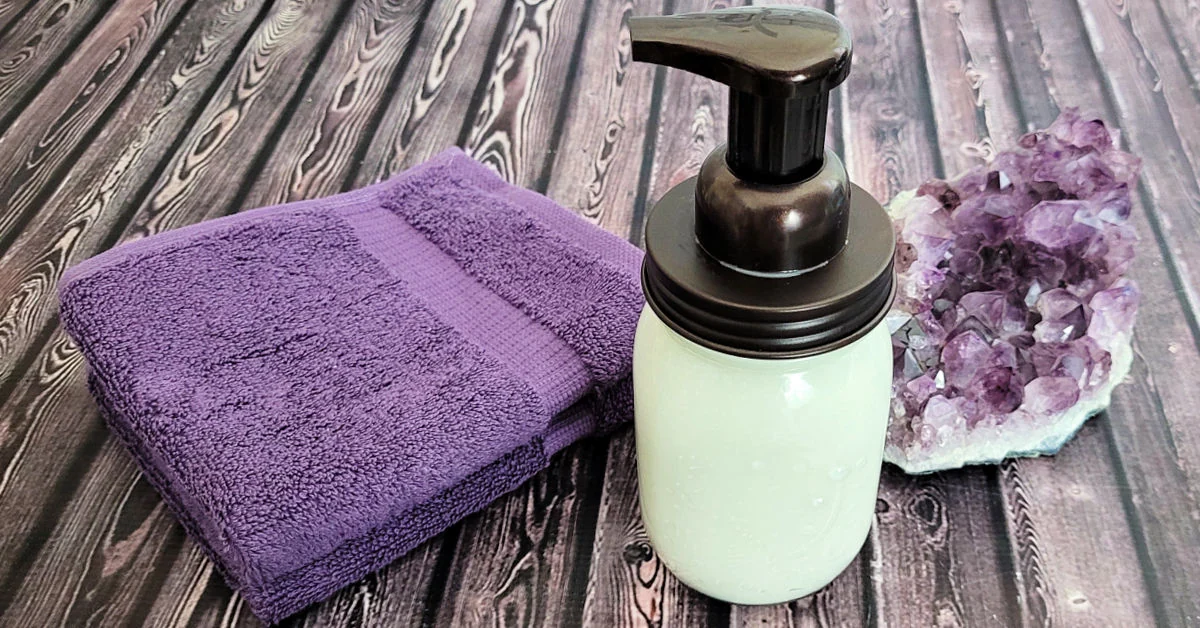
DIY shampoo bars are one of my favorite natural hair care products to make. They last a long time and work great for pretty much any hair type.

I know so many people who’ve tried (and failed) at the no poo method, especially people who have hard water like us. The simple combination of a baking soda wash with an acidic rinse just didn’t work for me. In fact, it made my hair straw like!
So that sent me on a quest to develop a homemade shampoo bar recipe that would work for my long hair. While many of the recipes you’ll find use cold process soap or hot process soap (both of which use a lye solution for the saponification process), you can also make them with a melt and pour soap base.
It’s not only simpler and safer, but it’s easy enough for a beginning soap maker to make their own shampoo bar recipe. All you need are some natural ingredients like a soap base, natural oils, cetyl alcohol and essential oils for clean, healthy hair.
Since they’re solid, they have a longer shelf life than liquid shampoos. And, making your own helps to eliminate plastic packaging so you can get one step closer to a zero-waste lifestyle.
If you’re looking for the best shampoo bar recipe to replace your regular shampoo, give my simple recipe a try.
Ingredients
- 3 teaspoons of cocoa butter
- 2 teaspoons of cetyl alcohol
- 1 tablespoon of coconut oil
- ½ pound of cubed goats milk melt and pour soap base
- 1 teaspoon of vitamin E oil
- 1 teaspoon of argan oil
- 1 teaspoon of apple cider vinegar
- 1 teaspoon of baking soda
- 1 teaspoon of sea salt
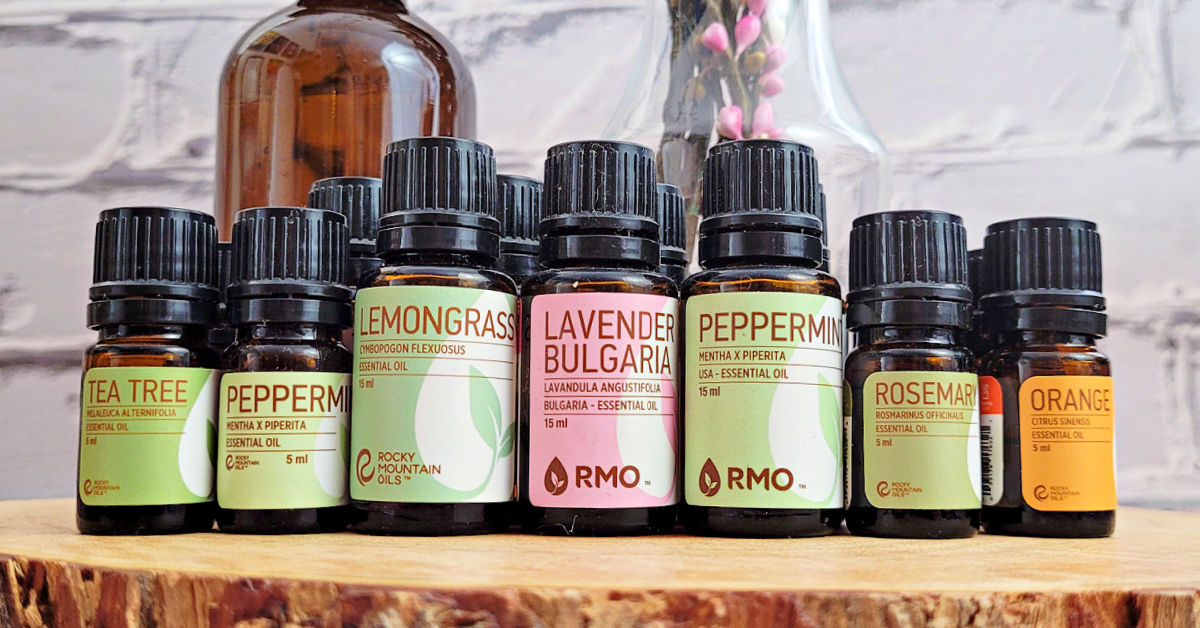
- 10 drops of lavender essential oil
- 10 drops of tea tree essential oil
- 10 drops of rosemary essential oil
- 10 drops of peppermint essential oil
- ¼ cup of crushed dried lavender
- Soap colorant
Tools
- Measuring cups and spoons
- Double Boiler
- Silicone molds
- Spray bottle of rubbing alcohol
- Mixing spoon
Step-by-Step: How to Make Shampoo Bars
Follow these simple steps to learn how to make DIY Shampoo Bars with natural ingredients for clean, beautiful hair.
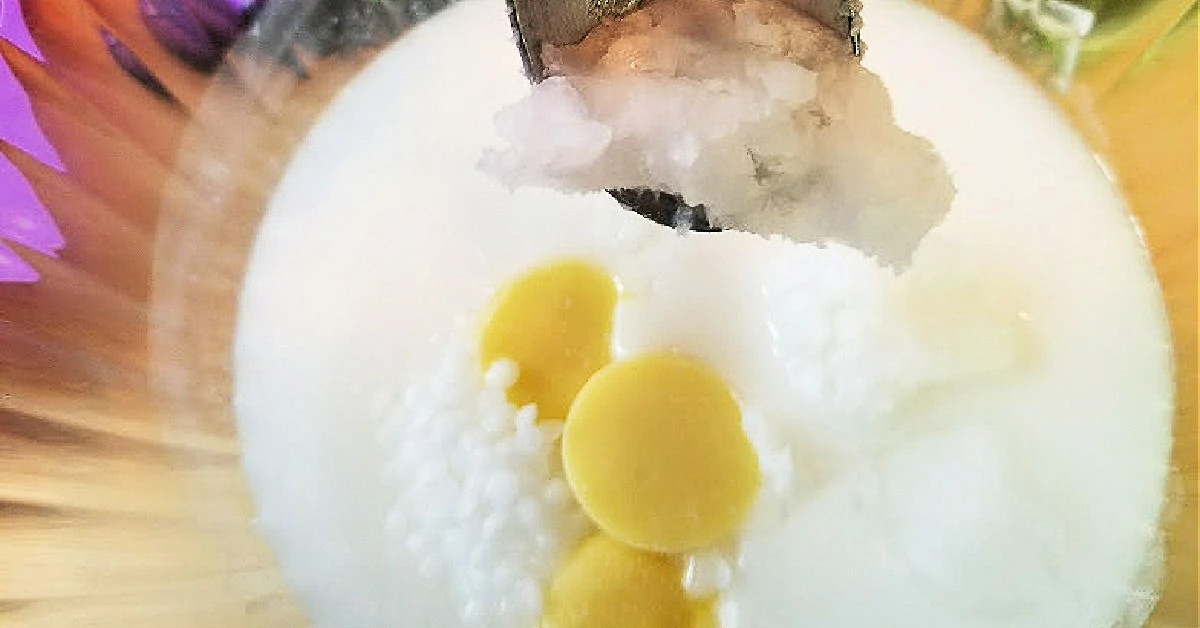
Step 1: Melt Cetyl Alcohol, Coconut Oil and Cocoa Butter
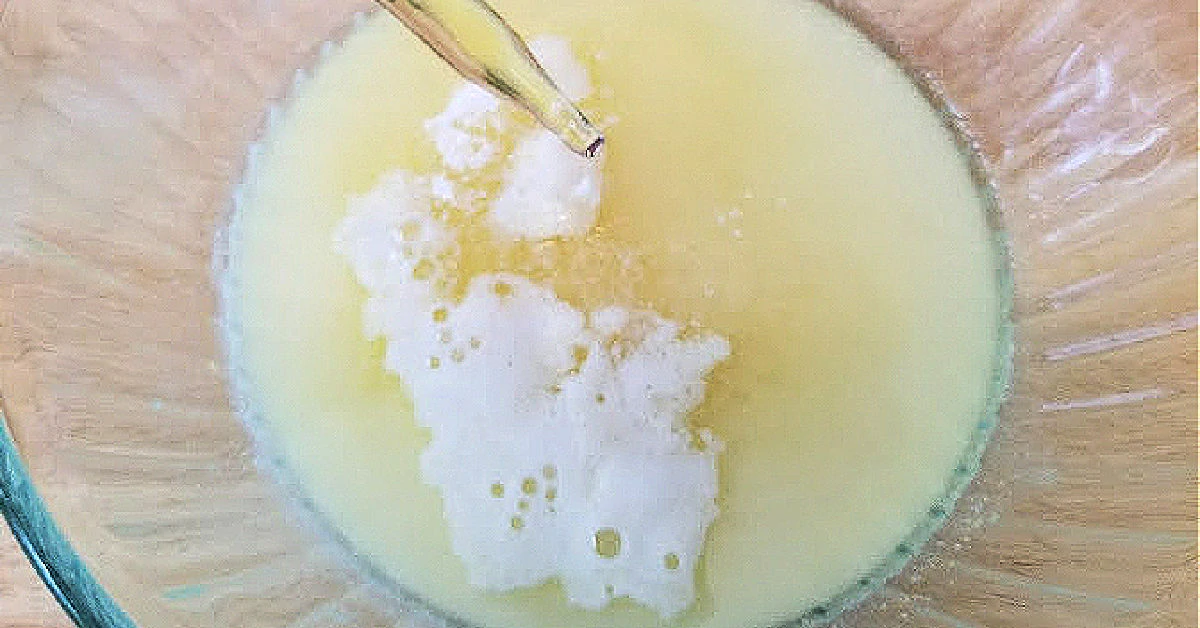
The first thing you want to do is add 2 teaspoons of cetyl alcohol, 1 tablespoon of coconut oil and 1 tablespoon of cocoa butter to a double boiler. Heat the ingredients over medium, stirring frequently, until everything is melted and clear.
Once melted, add ½ pound of melt and pour soap cubes and continue stirring frequently until the mixture is melted and smooth.
Step 2: Add ACV, Salt, Baking Soda, Vitamin E and Argan Oil
Stir 1 teaspoon each of the following ingredients into the mixture in the double boiler: apple cider vinegar, sea salt, baking soda, vitamin E oil and argan oil.
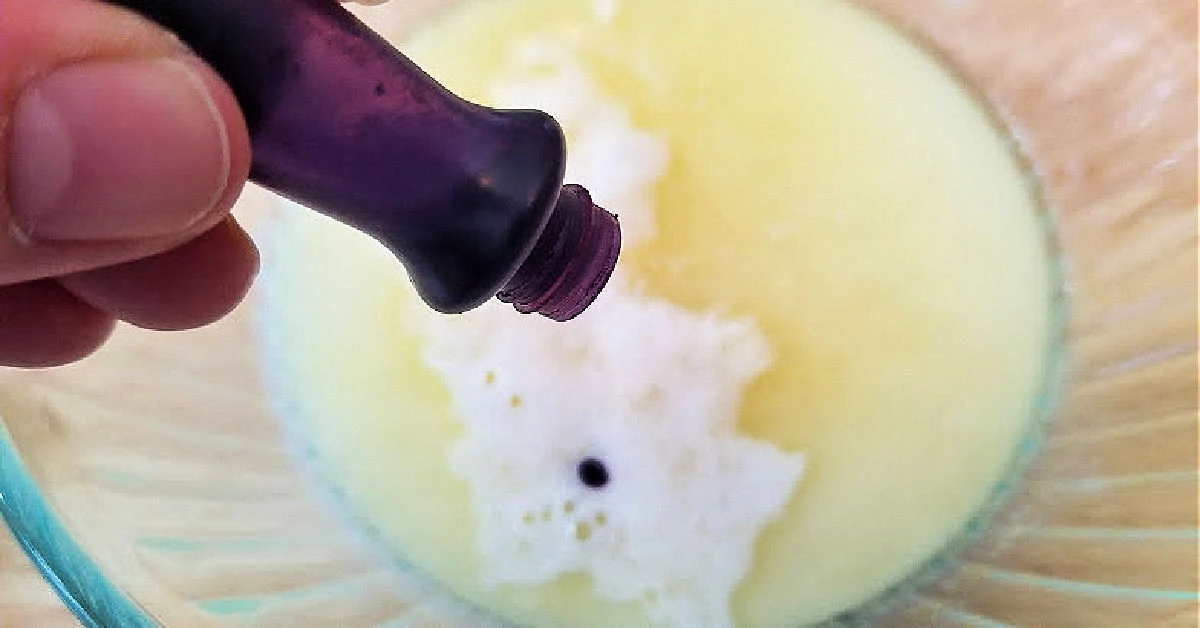
Step 3: Add Essential Oils and Soap Colorant
Add 10 drops each of the following essential oils to the pan: lavender, tea tree, rosemary and peppermint. Next, stir in enough soap colorant to reach your desired color. Then stir everything really well until it’s nice and combined.
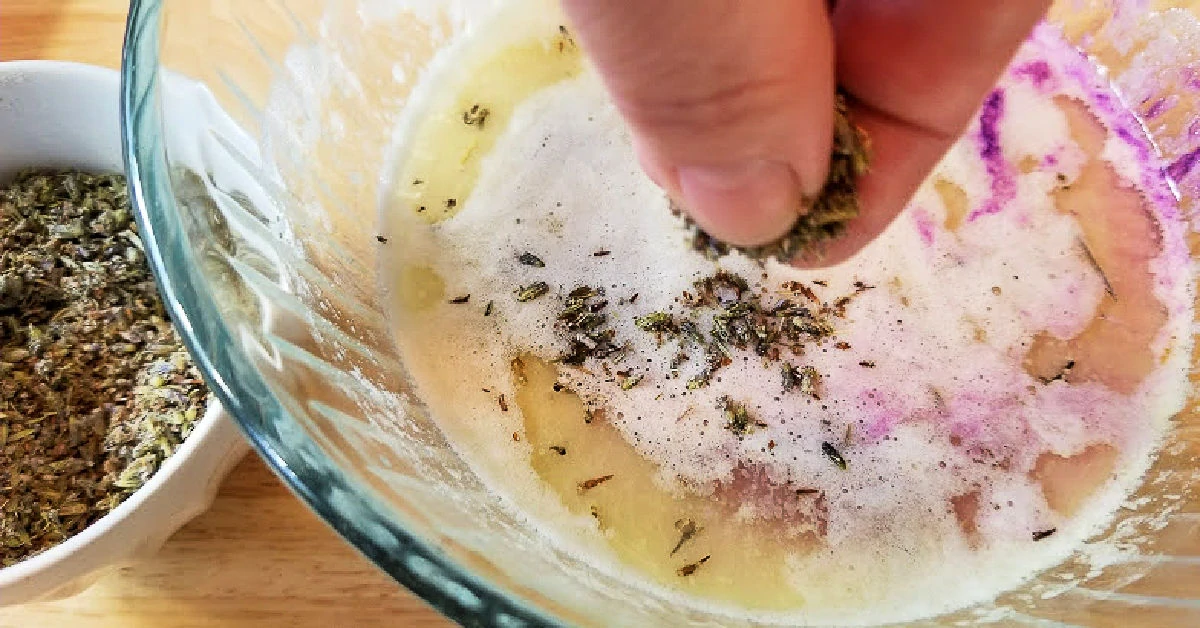
Step 4: Add Crushed Lavender
Turn off the heat and stir in 2 tablespoons of crushed lavender, saving the rest for the next step.
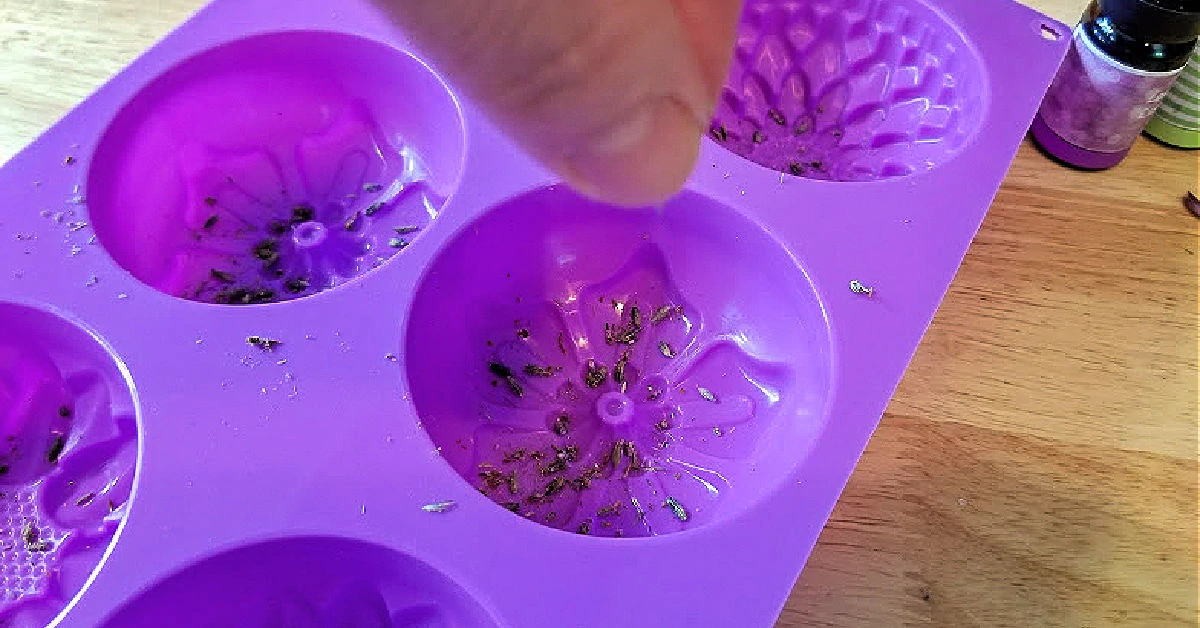
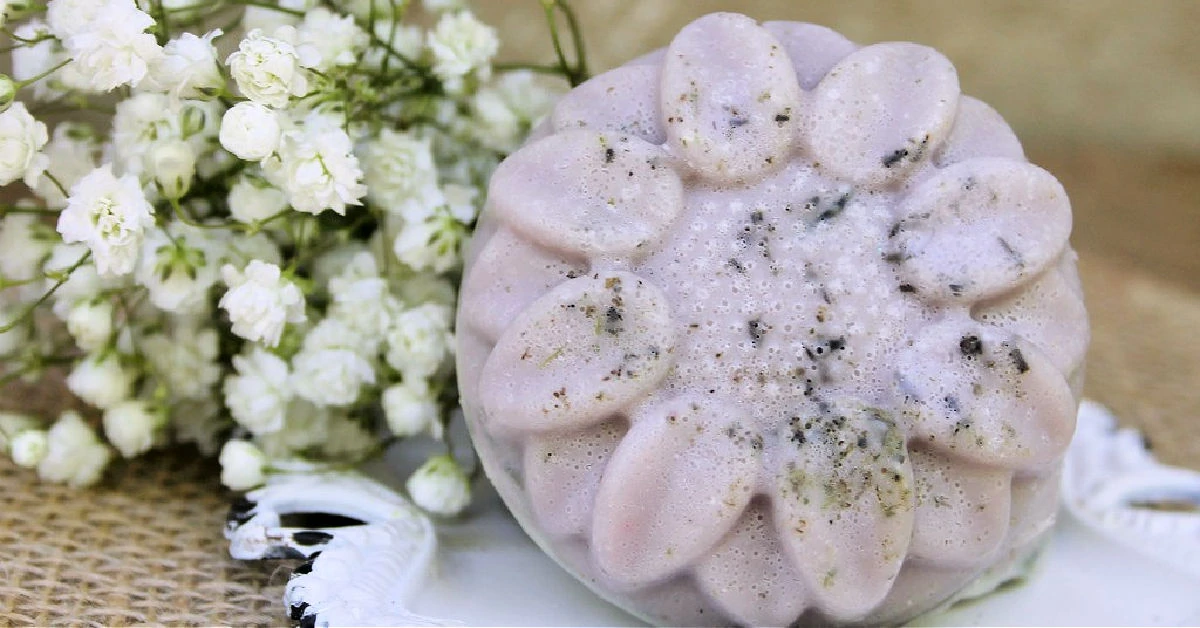
Step 5: Prepare Silicone Mold
Sprinkle about 2 tablespoons of crushed lavender into the cavities of your silicone soap mold. This will create the pretty look of lavender across the top of the bar.
Step 6: Pour Liquid Soap Into Mold
Next, carefully pour the liquid shampoo bars mixture into your silicone mold, making sure the cavities are each filled evenly so you have similar sized bars of soap. If it starts to harden while you’re pouring, just put the double boiler pan back over heat until it re-melts.

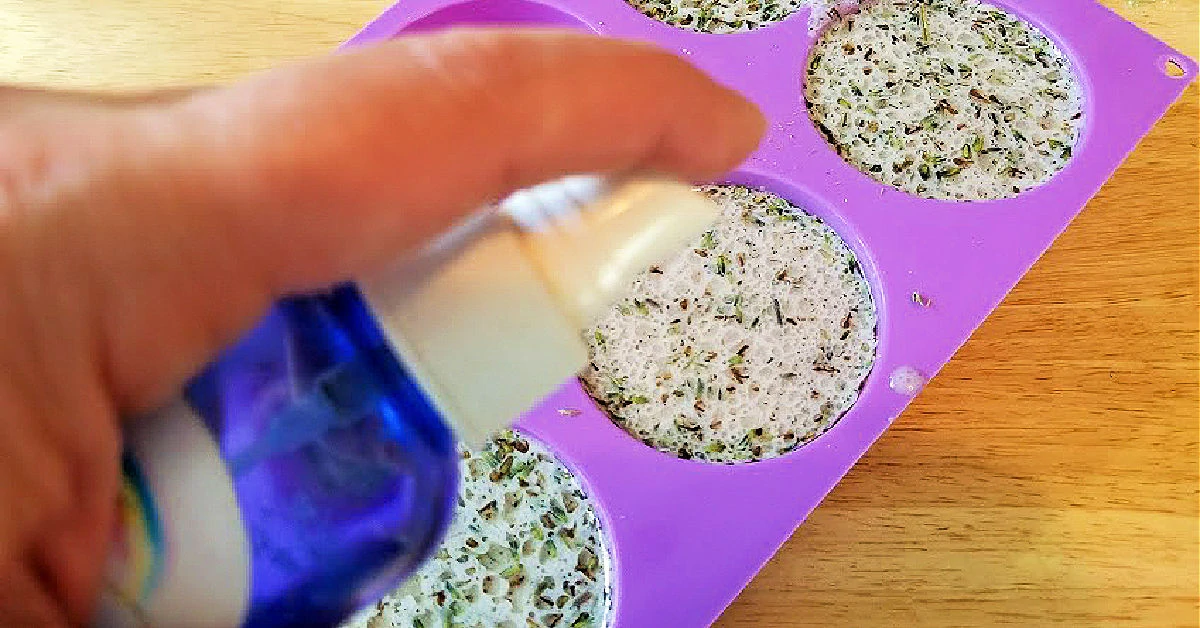
Step 7: Spray with Rubbing Alcohol
Once you’ve filled your silicone mold, spray the top of the soap with a spritz of rubbing alcohol. This will help to dissipate any bubbles that have formed inside the shampoo mixture.
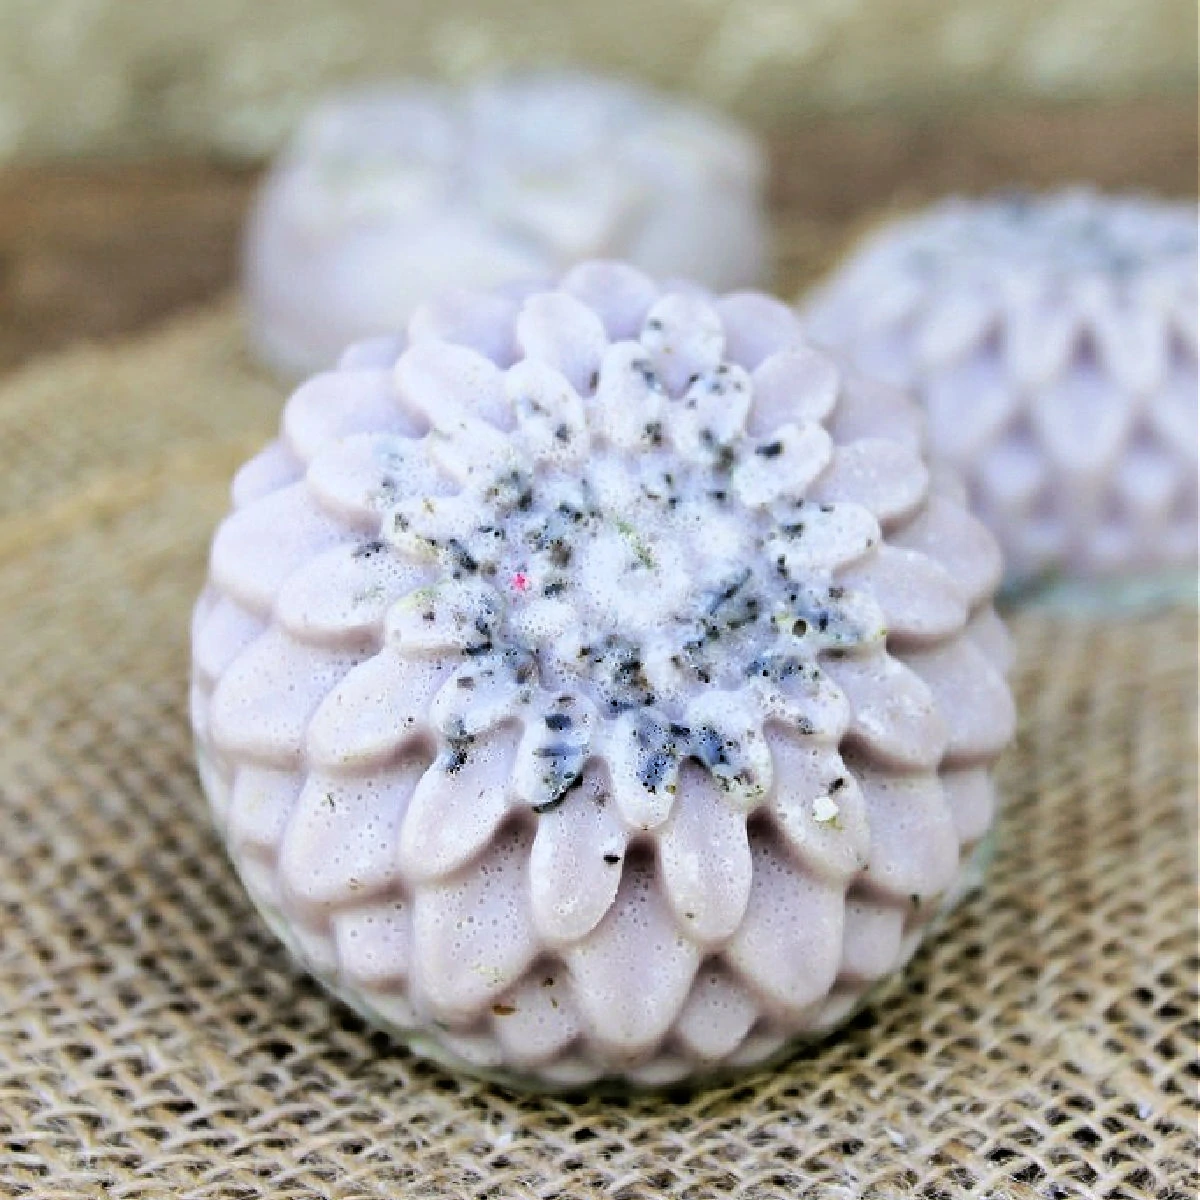
Step 8: Allow Bars to Harden
Allow your homemade shampoo bars to harden in a cool place (no warmer than room temperature) or in the refrigerator for at least two hours until completely cool. Then you’re ready to store or use them.
Would you like to save this?
Tips for Making and Using Shampoo Bars
Answers to all of your questions about making this DIY shampoo bar recipe without lye, including tips and substitution ideas.
Is cetyl alcohol necessary?
I’ve had several people ask if you need to include the cetyl alcohol. I understand it’s not a common DIY beauty ingredient, so you may not have it on hand. It is absolutely necessary to use it. It’s what binds everything together and makes it work. So don’t omit it!
Other essential oil ideas and tips
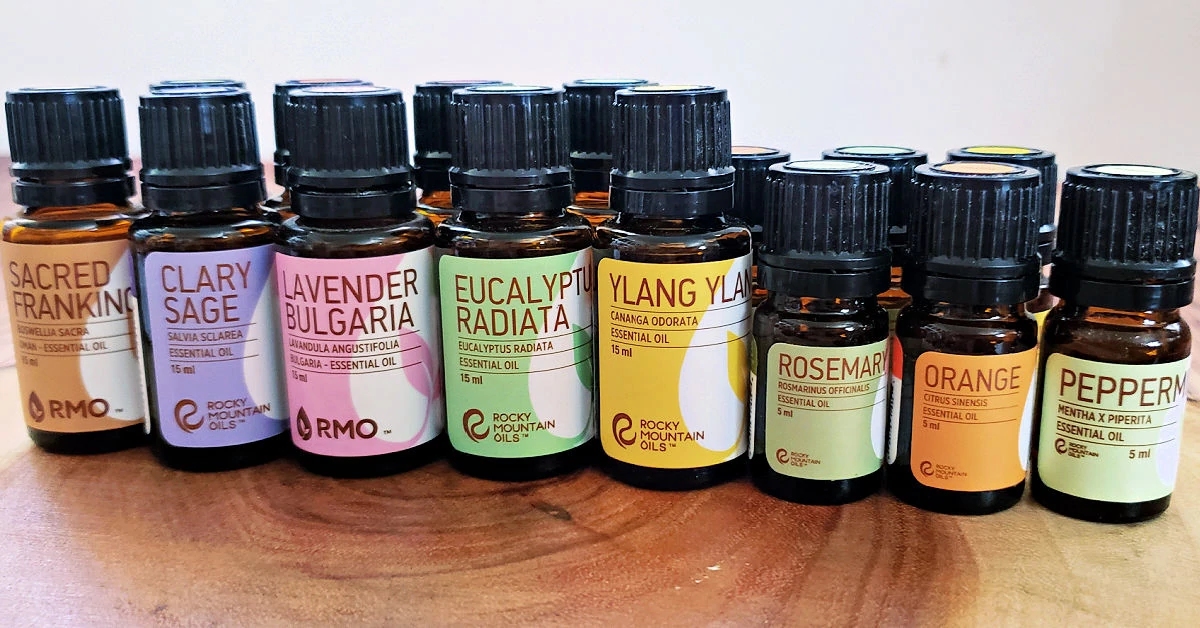
I have chosen to use a few essential oils that have great benefits for hair and most people have on hand. While I like the combination of lavender, tea tree, rosemary and peppermint essential oils, you can absolutely mix it up.
If you want to try different oils, check my coconut milk shampoo recipe where I shared a list of essential oil blends for hair for some more ideas on the hair benefits of each. You can also get my free guide to using essential oils in homemade beauty products by adding your first name and email address to this form.
Just use a total of 40 drops of any high quality essential oils of your choosing. I currently get all of my essential oils from Rocky Mountain Oils. I love the long-lasting strong scent they have and that RMO provides batch testing reports so you know they’re pure.
Alternatives to cocoa butter
You can use pretty much any standard butter in place of cocoa butter, including shea butter, mango butter, kokum butter and more, when making shampoo bars. They all have great qualities for shiny hair.
Best way to crush lavender
There are tons of ways to crush lavender, including using a spice grinder, coffee grinder or mortar and pestle. You can also put the pieces in whole without crushing, but they won’t be as fragrant.
If you don’t like having pieces of dried herbs in your shampoo bars, you can also add all of it to the soap mixture (instead of sprinkling half into the molds). Then use an immersion blender to combine it into the soap mixture so there aren’t so many pieces floating around in the soap.
Other carrier oil ideas
This recipe calls for a combination of coconut oil, argan oil and vitamin E oil. You can experiment with other carrier oils like olive oil, castor oil, jojoba oil, grapeseed oil, avocado oil, sweet almond oil or palm oil.
To learn more about the properties of each of these oils, read my Guide to Using Carrier Oils with Essential Oils.
I like to buy my carrier oils from Mountain Rose Herbs. They have pretty much anything you need for making homemade beauty products.
Alternative method to using double boiler
If you don’t have a double boiler, you can fit a glass bowl into a pan of water (it should not touch the bottom) and melt your ingredients in the bowl. I don’t recommend melting the ingredients in a saucepan as they can scorch easily.
If you plan to make DIY beauty products regularly, you’ll want to invest in a simple double boiler. You can get get an affordable double boiler insert at Mountain Rose Herbs if you’re on a budget, but want quality tools.
How to use shampoo bars
It’s really easy to use a shampoo bar to cleanse your hair in the shower.
- Get your hair thoroughly wet.
- Lather up the soap bar in your hands, then wash your wet hair as usual, making sure to get the roots and each hair follicle.
- If you have oily hair, you may want to wash twice just like with most store bought shampoos.
- Follow up with an all natural hair rinse for smooth, beautiful hair.
- If you need extra conditioning, follow with a good natural detangler before brushing.
Storage tips
Since these soap bars are made with a melt and pour base, they are more likely to sweat compared to a hot or cold process soap. This is true for all glycerin based melt and pour soaps (read more about glycerin sweating in my DIY Loofah Soap Bars tutorial).
To prevent this, make sure they are completely cooled before storing them. Once completely cool, wrap each bar of soap individually in plastic wrap. Then store the wrapped bars in an airtight container until you’re ready to use them.
The container should be kept in a cool, dry place out of direct sunlight. I find that sunlight shortens the life of most melt and pour soap products and it will fade any coloring you add.
More natural homemade hair care recipes
If you enjoy DIY beauty products for hair, try some of these other recipes:
DIY Shampoo Bars Recipe
Supplies
- 3 teaspoons cocoa butter
- 2 teaspoons cetyl alcohol
- 1 tablespoon coconut oil
- ½ pound goats milk melt and pour soap base - cut into cubes
- 1 teaspoon vitamin E oil
- 1 teaspoon argan oil
- 1 teaspoon apple cider vinegar
- 1 teaspoon baking soda
- 1 teaspoon sea salt
- 10 drops lavender essential oil
- 10 drops tea tree essential oil
- 10 drops rosemary essential oil
- 10 drops peppermint essential oil
- ¼ cup dried lavender - crushed
- Soap colorant - optional
Tools
- Measuring cups and spoons
- Double Boiler
- Silicone Molds
- Spray bottle of rubbing alcohol
- Mixing spoon
Instructions
- Add the cetyl alcohol, coconut oil and cocoa butter to a double boiler. Melt and combine ingredients over medium heat, stirring frequently. Once melted, add the melt and pour base and continue stirring until the soap mixture is melted and smooth.
- Stir the apple cider vinegar, sea salt, baking soda, Vitamin E and Argan oil into the mixture in the double boiler.
- Add the essential oils and soap colorant and stir until well combined.
- Stir in the crushed lavender, reserving about 2 tablespoons.
- Sprinkle a bit of crushed lavender into each cavity of the soap mold.
- Gently pour the natural shampoo bar mixture into your silicone mold.
- Spray the top of the mold with a spritz of rubbing alcohol to dissipate any bubbles.
- Allow your homemade shampoo bars to harden at room temperature or in the refrigerator for at least two hours, or until completely cool. Then you can store or use them.


This looks so good! What a great gift for a friend and to enjoy yourself!
Thanks Suzanne – enjoy!
Thanks for sharing! Do they keep long?
Unused and stored properly, they can last for about a year. Once used, they should be used within about 3 months.
Hi there, I normally use coconut milk by itself on my hair. Is there a way to make coconut milk shampoo bars without lye?
I’m not sure as that’s not something I’ve attempted before. If you aren’t using lye, then you’re pretty much left with using melt and pour soap and I’m not sure how well it would work to combine coconut milk with a melt and pour soap base.
Thank you very much for your response, jiji I think I will have to try it. Also thank you for your shampoo recipe. I definitely will be giving it a try.
You’re welcome! I hope it works well for you. 🙂
I made this but the oils ended up separating. Do you have any tricks to avoid this? Ty!
Did you include the cetyl alcohol?
I have a question if I may. Is it the cetyl alcohol that keeps the ingredients from separating while it cools?
Yes, cetyl alcohol is an emulsifier, so it keeps the ingredients from separating.
Hello. Does this recipe need a preservative?
Since it’s not a water-based recipe, it generally won’t need a preservative added. For more information, read my post on natural preservatives for homemade beauty products.
Question! I made these lastnight and they look and smell amazing! I haven’t use it on my hair yet my tested it on my hands to see how much lather I would get and I barely got any lather. Did I do something wrong in the process or do I have to let it cure? Thanks for your help!!
I did make this recipe 2 times since my first comment, and it turned out pretty good. I replaced the coconut oil with castor oil, which did not make a difference in the hardness of the bar. And I added 1 teaspoon of hemp seed oil to the whole recipe. I love it. Changed the essential oils, and I have great shampoo bars. Thank you.
Hi, I found your recipe this afternoon and want to try it, I’ve never made shampoo bars before. Do these give off a nice lather, either in your hands or in your hair?
Yes, the shampoo bars should lather up nicely, Cindy.
Your recipe is my “go-to” shampoo bar. I have tried others that didn’t lather well or didn’t clean well. I know, I know, I have posted here before. BUT, this is the best recipe I have found. Thank you.
I’m so glad to hear that Adrienne!